


As your print-on-demand business grows, managing operations single-handedly can become challenging. MerchFox allows store owners to invite team members, assign predefined roles, or customize granular permissions (read / write) to collaborate safely without sharing primary login credentials.
Overview of Team Management
The Team feature enables you to delegate operational tasks—such as viewing product catalogs, managing designs, processing orders, or checking analytics—to your staff, virtual assistants (VAs), or business partners.
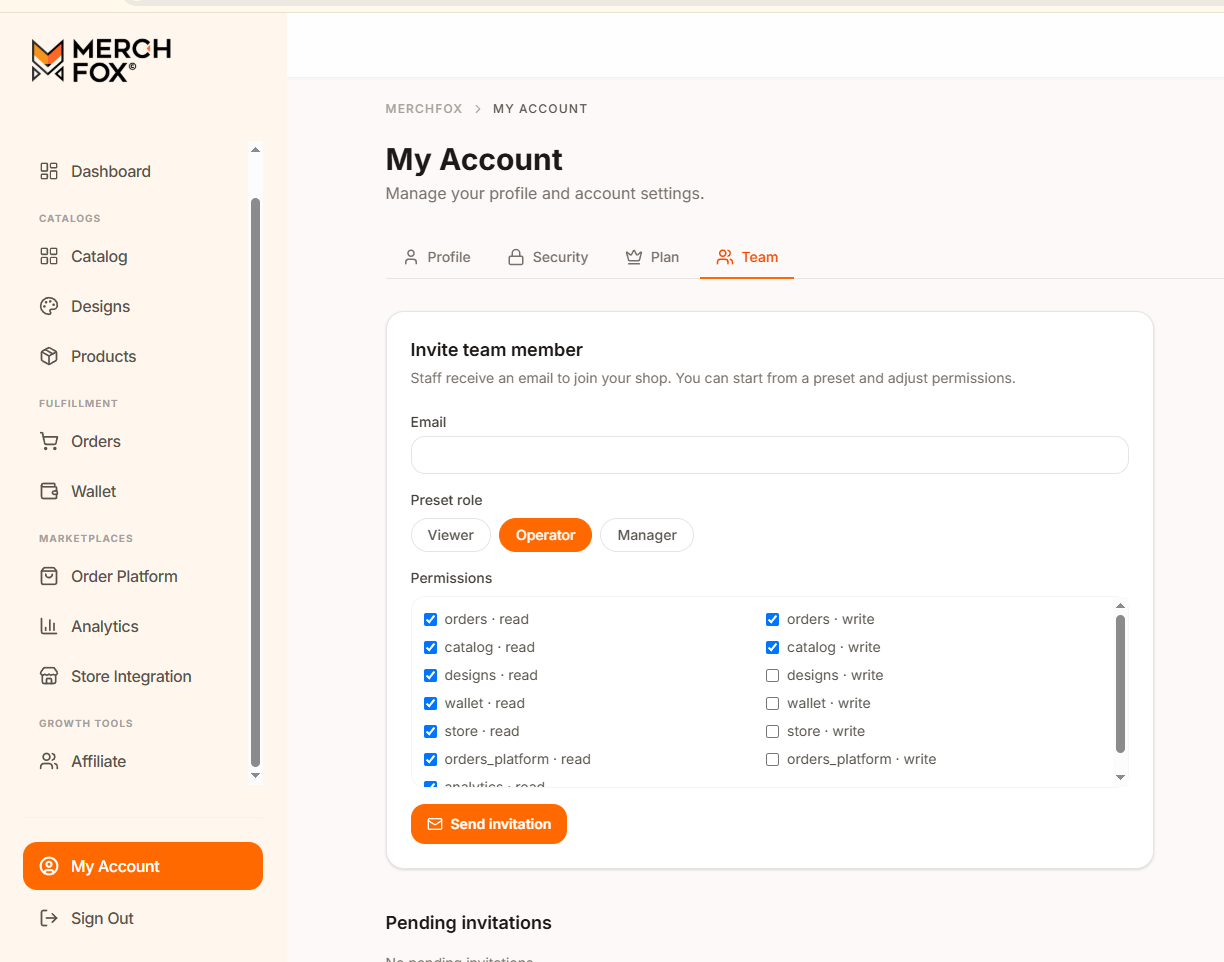
Overview of Team Management
Step 1: Sending an Invitation
To invite a new team member to your shop:
Log in to your MerchFox Dashboard.
Click My Account at the bottom of the left sidebar navigation menu.
Select the Team tab along the top navigation bar.
Under the Invite team member section, enter the staff member's email address in the Email field.
Step 2: Selecting Roles & Configuring Permissions
MerchFox offers preset roles to quickly configure access levels, or you can customize granular read/write permissions manually.
Preset Roles
Choose one of the following preset options to automatically populate permissions:
Viewer: Grants view-only access across primary dashboard sections (read-only). Ideal for auditors or stakeholders.
Operator: Grants access to standard operational tasks, such as creating products or managing order fulfillment.
Manager: Grants broad administrative access to manage most store operations and settings.
Customizing Granular Permissions
You can adjust individual checkboxes under Permissions to fine-tune access control:
read permissions: Allows the team member to view data (e.g.,
orders · read,catalog · read,designs · read,wallet · read,store · read,orders_platform · read,analytics · read).write permissions: Allows the team member to create, edit, or modify data (e.g.,
orders · write,catalog · write,designs · write,wallet · write,store · write,orders_platform · write).
Once configured, click Send invitation.
Step 3: How Invited Staff Join Your Shop
When an invitation is sent:
An invitation link will be delivered to the staff member's email address.
The invited member clicks the link inside the email:
Existing MerchFox Users: Simply log in to their account and accept the invitation to switch to your shop.
New Users: Will be prompted to create a new MerchFox account first, after which they can accept the invite and join your store.
Step 4: Managing Pending Invitations & Active Members
You can monitor and manage access status directly from the Team tab:
Pending invitations: Displays sent invitations that have not yet been accepted by staff. You can track or cancel pending invites here.
Active members: Displays all staff members who currently have access (or whose access status is updated, e.g., Revoked). You can review their assigned permissions or update/revoke access as needed.
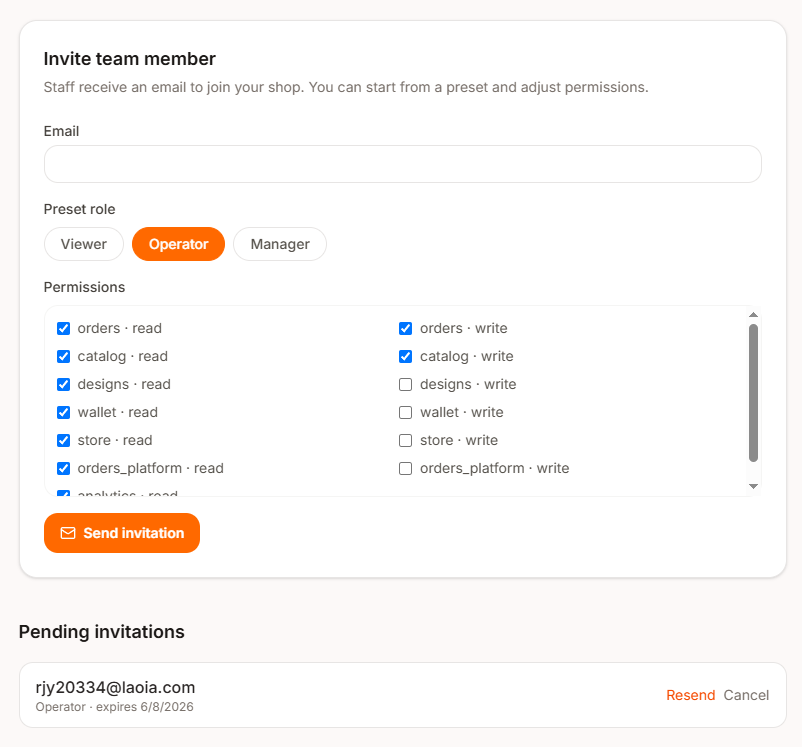
Managing Pending Invitations & Active Members
Frequently Asked Questions
What happens if a staff member loses or doesn't receive the email link?
Ask them to check their Spam/Junk folder. If the email cannot be found, you can cancel the pending invite under Pending invitations and send a new invite to their email address.
Can staff members access my Wallet funds?
Staff can only perform financial operations if they are explicitly granted
wallet · writepermission. By default, standard roles like Operator keepwallet · writeunchecked to protect your funds.Does an invited staff member need a separate MerchFox account?
Yes. Each staff member logs in with their own individual credentials, ensuring account security and clean activity tracking.