E-commerce Insights

How to Start a Stationery Business: Your Complete 2025 Guide to Success

15 min read

Starting a stationery business has never been more accessible or profitable than it is today. With the global stationery market valued at over $150 billion and growing steadily, there's tremendous opportunity for entrepreneurs ready to dive into this creative industry. Whether you're passionate about custom stationery design or looking to build a sustainable passive income stream, this comprehensive guide will walk you through every step of launching your successful venture.

How to Start a Stationery Business: Your Complete 2025 Guide to Success

The beauty of today's stationery business landscape lies in innovative models like print on demand, which eliminate traditional barriers like inventory management and upfront costs. Platforms such as MerchFox have revolutionized how entrepreneurs can enter this market, making it possible to start with minimal investment while maintaining professional quality standards.

Understanding the Stationery Market Landscape

The modern stationery business extends far beyond simple notebooks and pens. Today's market encompasses everything from custom notebooks and planners to wedding invitations and art prints. This diversity creates multiple revenue streams and opportunities for specialization.

Understanding the Stationery Market Landscape

Market research reveals fascinating trends driving growth in this sector. Remote work culture has increased demand for home office stationery, while social media has fueled interest in aesthetically pleasing customizable products. Additionally, the rise of bullet journaling and productivity planning has created a devoted customer base willing to pay premium prices for quality products.

What makes this particularly exciting is how print on demand technology has democratized access to professional-quality production. Instead of investing thousands in inventory, entrepreneurs can now test products and scale gradually based on actual demand.

Identifying Profitable Stationery Niches

Success in the stationery business often comes down to finding the right niche. Rather than competing in oversaturated markets, smart entrepreneurs focus on specific customer segments with unique needs.

Identifying Profitable Stationery Niches
  • Wedding invitations represent one of the most lucrative niches, with couples willing to spend significant amounts on personalized designs. The key here is understanding that you're not just selling stationery – you're selling an experience and memory.

  • Planner enthusiasts form another passionate community. These customers often become repeat buyers, purchasing seasonal designs or different formats throughout the year. They value functionality combined with aesthetic appeal, creating opportunities for premium pricing.

  • For those interested in custom notebooks, consider targeting specific professions or hobbies. Notebooks designed for writers, artists, or business professionals can command higher prices than generic alternatives.

  • Art prints and decorative stationery tap into the home décor market, where customers seek unique pieces that reflect their personality. This niche particularly benefits from social media marketing, as these products are inherently shareable.

Creating Your Comprehensive Business Plan

Every successful stationery business starts with a solid foundation. Your business plan serves as both roadmap and reality check, helping you understand market dynamics and financial requirements before investing time and money.

Start by defining your target customer clearly. Are you serving busy professionals who need efficient office stationery, or creative individuals drawn to artistic greeting cards? This decision influences everything from product selection to marketing strategy.

Financial planning becomes straightforward with print on demand models. Unlike traditional manufacturing, you won't need substantial upfront inventory investments. However, you'll still need to budget for business registration, branding costs, website development, and initial marketing efforts.

Your business plan should also address scalability. How will you expand your product line? Which sales channels will you prioritize? What systems will support growth from startup to established business?

Legal Foundation and Business Structure

Proper business registration protects both you and your customers while establishing credibility in the marketplace. The choice between LLC, corporation, or sole proprietorship significantly impacts taxes, liability, and future growth options.

Legal Foundation and Business Structure

Most stationery business owners benefit from LLC formation, which provides liability protection without the complexity of corporate structures. This choice also offers flexibility in tax treatment and management structure.

Don't overlook the importance of obtaining proper business licenses. Requirements vary by location and business type, but most areas require basic business licenses and potentially sales tax permits. Check with your local Small Business Administration office for specific requirements in your area.

Opening a dedicated business bank account separates personal and business finances, simplifying bookkeeping and tax preparation. Many banks offer special programs for small businesses, including reduced fees and integrated payment processing.

Building a Compelling Brand Identity

Strong branding differentiates your stationery business in a crowded marketplace. Your brand encompasses more than just visual elements – it represents the complete customer experience and emotional connection with your products.

Start with a memorable business name that clearly communicates your focus while being easy to spell and remember. Avoid overly clever names that might confuse potential customers searching for custom stationery solutions.

Visual identity includes your logo, color palette, typography, and overall aesthetic. These elements should work harmoniously across all touchpoints, from product packaging to social media presence. Consider hiring a professional designer if budget allows, as quality branding significantly impacts perceived value.

Your brand voice shapes how you communicate with customers across all channels. Whether friendly and approachable or sophisticated and professional, consistency builds trust and recognition over time.

Product Development and Design Excellence

The heart of any successful stationery business lies in offering products customers genuinely want and need. This requires understanding both aesthetic preferences and functional requirements within your chosen niche.

Product Development and Design Excellence

Modern design tools make professional-quality creation accessible to entrepreneurs without formal design training. Platforms like Canva, Adobe Creative Suite, and Procreate offer templates and tutorials specifically for stationery design.

When creating custom notebooks, consider paper quality, binding methods, and size options. Customers notice these details, and premium materials justify higher prices while reducing returns and complaints.

Mockups play a crucial role in online sales, helping customers visualize products in real-world settings. Invest time in creating lifestyle photos that show your stationery being used in aspirational contexts.

Quality control becomes essential when working with print on demand partners. Order samples of every product before listing them for sale. This ensures you understand exactly what customers will receive and can address any issues proactively.

Mastering Print on Demand Operations

Print on demand has revolutionized the stationery business by eliminating inventory risks while maintaining professional quality standards. Understanding how to leverage this model effectively can make the difference between success and struggle.

MerchFox stands out among print on demand platforms for its extensive product catalog and reliable global delivery network. The platform offers everything from basic notebooks to premium planners and art prints, with quality levels suitable for retail sale.

Automated order fulfillment means customers receive products without your direct involvement in production or shipping. This creates genuine passive income potential once systems are properly established and optimized.

However, success requires more than simply uploading designs and waiting for orders. You must actively manage product listings, monitor quality, respond to customer inquiries, and continuously optimize based on performance data.

Building relationships with print on demand suppliers enhances service quality and often provides access to new products before competitors. Regular communication helps resolve issues quickly and may lead to preferential treatment during peak seasons.

Choosing and Optimizing Sales Channels

Your choice of sales channels significantly impacts both startup costs and long-term growth potential. Each platform offers distinct advantages and challenges that align differently with various business models.

Etsy excels for handmade and custom stationery products, offering built-in audience of customers seeking unique items. The platform's search algorithm favors shops with consistent sales and positive reviews, making early momentum crucial for long-term success.

Building your own online store using Shopify, Wix, or WooCommerce provides complete control over customer experience and data. While requiring more upfront investment in eCommerce SEO and marketing, owned channels offer better profit margins and customer relationship building opportunities.

Amazon's massive customer base provides unparalleled reach, but intense competition and changing policies create challenges for small businesses. Success on Amazon requires understanding their algorithm and advertising systems.

Multi-channel selling spreads risk while maximizing market reach. Start with one primary channel to build systems and experience, then expand strategically based on performance and capacity.

Optimizing Product Listings for Maximum Visibility

Effective product optimization determines whether potential customers find and purchase your stationery products. Each platform has unique algorithms and ranking factors, but certain principles apply universally.

Product titles should include primary keywords while remaining readable and appealing. Instead of "Notebook," use "Custom Dotted Journal Notebook for Bullet Journaling and Planning."

Product listings must balance keyword optimization with compelling copywriting. Describe benefits alongside features, helping customers understand how your products solve their problems or enhance their lives.

High-quality photos remain the most important factor in online stationery sales. Customers can't touch products before buying, so images must convey texture, size, and quality accurately. Include lifestyle shots showing products in use alongside clean product photos on neutral backgrounds.

Customer reviews significantly impact both search rankings and conversion rates. Encourage satisfied customers to leave detailed reviews by following up after delivery and providing exceptional service that motivates positive feedback.

Strategic Pricing for Profitability

Effective pricing strategy balances competitiveness with profitability while positioning your brand appropriately in the market. Understanding all costs involved in your stationery business prevents the common mistake of underpricing products.

Calculate base costs including production, platform fees, payment processing, and shipping. Add your desired profit margin – typically 40-60% for custom stationery products. Factor in time spent on design, customer service, and business management.

Psychological pricing techniques influence purchasing decisions. Prices ending in 9 or 7 often convert better than round numbers, while premium positioning sometimes justifies significantly higher prices for identical products.

Test different price points systematically, monitoring both conversion rates and total revenue. Sometimes higher prices actually increase sales by signaling quality and exclusivity to target customers.

Bundle pricing creates opportunities to increase average order values while providing customer value. Offer planner and sticker combinations, or notebook sets at attractive package prices.

Comprehensive Marketing Strategy Development

A well-executed marketing plan transforms great products into thriving business success. Modern stationery business marketing leverages multiple channels while maintaining consistent brand messaging across all touchpoints.

Social media marketing proves particularly effective for stationery products due to their visual appeal. Instagram and Pinterest users actively seek inspiration for planning, organization, and creative projects. TikTok's younger demographic shows strong engagement with stationery content, especially planner and bullet journal videos.

Content marketing establishes expertise while attracting potential customers through valuable information. Blog posts about organization tips, planning strategies, or creative uses for stationery products drive organic traffic while positioning your brand as helpful resource.

Email marketing maintains relationships with existing customers while nurturing prospects through purchase decisions. Collect emails through lead magnets like free planner templates or organization guides, then provide ongoing value through newsletters featuring tips, new products, and exclusive offers.

Leveraging Influencer and Affiliate Partnerships

Influencer marketing can dramatically accelerate stationery business growth by tapping into established audiences with relevant interests. Micro-influencers often provide better ROI than celebrity partnerships due to higher engagement rates and more affordable collaboration costs.

Leveraging Influencer and Affiliate Partnerships

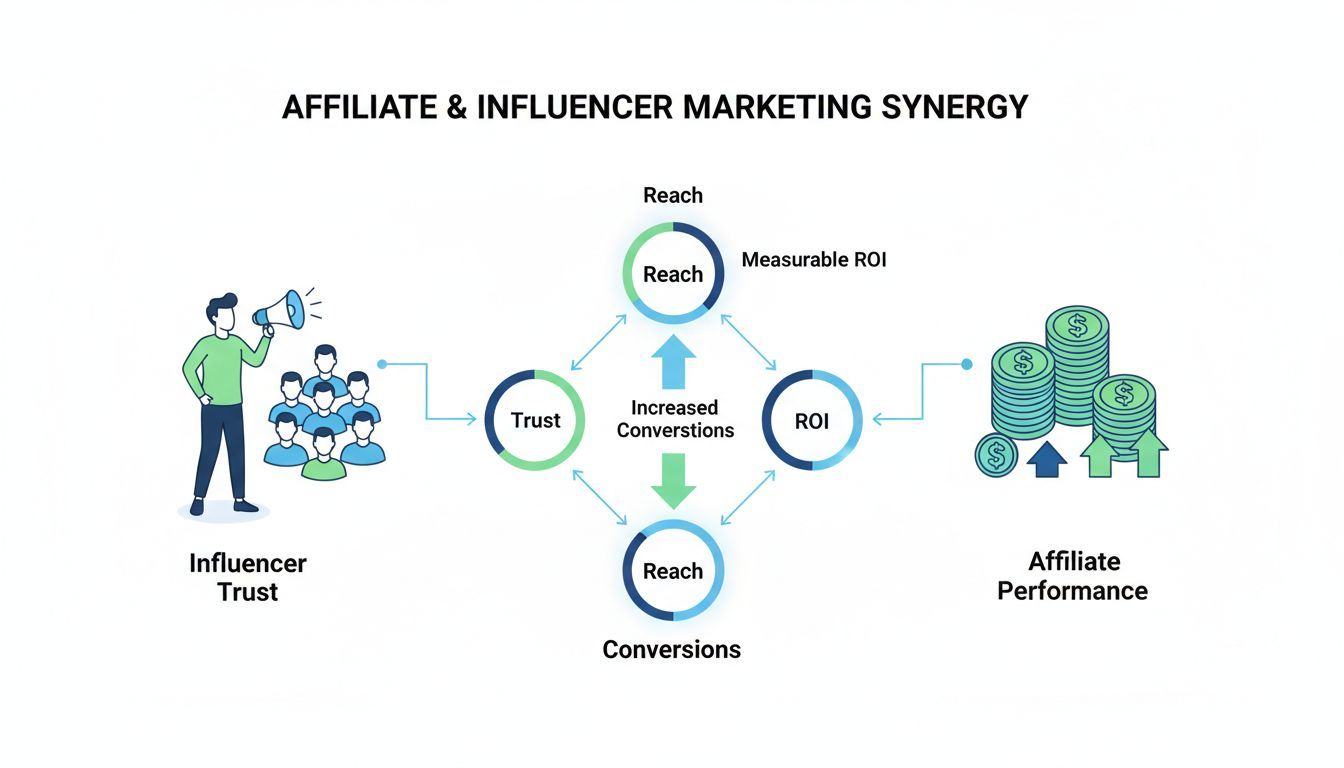
Partner with planning enthusiasts, bullet journal creators, artists, and productivity experts who align with your brand values. Provide free products in exchange for honest reviews and social media posts, or establish paid partnerships for larger accounts.

Affiliate marketing programs incentivize others to promote your products through commission-based relationships. Set up tracking systems to monitor referrals and ensure affiliates receive proper credit for sales they generate.

User-generated content campaigns encourage customers to share photos using your products with branded hashtags. Reposting customer content builds community while providing authentic social proof for potential buyers.

Operational Excellence and Scaling Strategies

Efficient operations distinguish successful stationery businesses from those that struggle despite great products. Implementing proper systems early prevents problems as order volume grows.

Customer service responsiveness directly impacts reviews and repeat purchases. Establish clear response time goals and standard procedures for common inquiries. Consider using chatbots for basic questions while ensuring human support for complex issues.

Inventory management with print on demand focuses on monitoring stock levels at supplier facilities and having backup options for popular products. Establish relationships with multiple suppliers to prevent stockouts during peak seasons.

Quality control systems catch issues before they reach customers. Regularly order samples, monitor customer feedback for recurring problems, and address issues promptly with suppliers.

Financial management becomes increasingly important as revenue grows. Use accounting software to track expenses, profit margins, and tax obligations. Consider hiring bookkeepers or accountants as complexity increases.

Building Passive Income Streams

The goal of many stationery business entrepreneurs is creating sustainable passive income through automated order fulfillment and scalable systems. Achieving this requires careful planning and system optimization.

Building Passive Income Streams

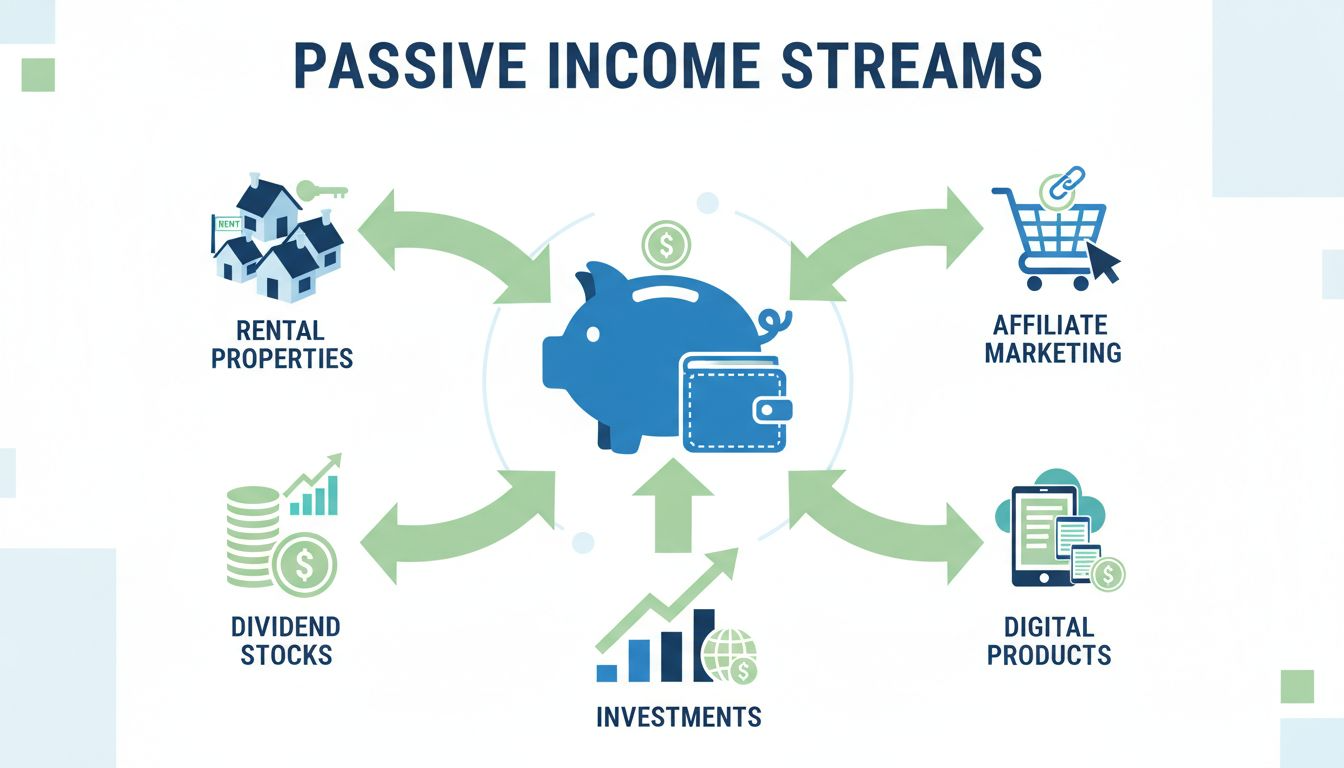
Evergreen products like custom notebooks and planners generate consistent sales without constant promotion. Focus on creating designs with broad appeal that remain relevant year-round rather than trending items with short lifecycles.

Subscription models provide predictable revenue while increasing customer lifetime value. Consider offering monthly planner inserts, seasonal stationery collections, or curated product boxes for loyal customers.

Digital products complement physical stationery while offering 100% profit margins after creation. Planner templates, organization printables, and design elements appeal to DIY customers and can be sold alongside physical products.

Licensing designs to other manufacturers creates additional revenue streams without operational complexity. Once established, your designs can generate royalty income through partnerships with larger stationery companies.

Advanced Growth and Optimization Techniques

Scaling a stationery business beyond initial success requires sophisticated strategies and systems. Data-driven decision making becomes essential as complexity increases and mistakes become more costly.

Advanced Growth and Optimization Techniques

Conversion rate optimization improves profitability without increasing traffic costs. Test different product photos, descriptions, pricing strategies, and checkout processes to identify improvements that boost sales percentages.

Search engine optimization (eCommerce SEO) for your online store drives organic traffic and reduces dependence on paid advertising. Focus on product pages optimized for specific keywords while building authority through valuable blog content.

International expansion opens new markets while diversifying revenue sources. Research import regulations, tax requirements, and cultural preferences in target countries before launching international sales.

Product line extensions leverage existing customer relationships while increasing average order values. Survey customers about desired products, analyze competitor offerings, and test new categories systematically.

Frequently Asked Questions

Q: How much money do I need to start a stationery business? A: With print on demand models like MerchFox, you can start a stationery business with as little as $100-500. This covers business registration, basic branding, and initial marketing. Traditional manufacturing requires $5,000-50,000+ in inventory investment.

Q: What's the difference between print on demand and traditional stationery manufacturing? A: Print on demand produces items only after orders are placed, eliminating inventory costs and risks. Traditional manufacturing requires upfront inventory investment but offers lower per-unit costs and more customization options. Print on demand is ideal for testing markets and new entrepreneurs.

Q: Which sales channel is best for custom stationery products? A: Etsy works well for handmade and custom stationery, while Shopify provides more control and branding opportunities. Amazon offers massive reach but intense competition. Most successful businesses use multiple sales channels to maximize opportunities.

Q: How do I price my stationery products competitively? A: Calculate all costs (production, fees, shipping) and add 40-60% profit margin. Research competitor pricing on similar products. Test different price points to find the sweet spot between competitiveness and profitability for your specific niche.

Q: What business structure should I choose for my stationery business? A: Most small stationery businesses benefit from LLC formation, which provides liability protection with simpler tax treatment than corporations. Consult with an accountant or attorney to determine the best structure for your specific situation and goals.

Q: How long does it take to see profits in a stationery business? A: With print on demand and effective marketing, some entrepreneurs see profits within 2-3 months. However, building a sustainable stationery business typically takes 6-12 months of consistent effort. Success depends on niche selection, marketing effectiveness, and operational efficiency.

Key Takeaways and Next Steps

Starting a successful stationery business in 2025 offers tremendous opportunities for creative entrepreneurs willing to combine passion with smart business strategies. The print on demand model has eliminated traditional barriers while maintaining quality standards that customers expect.

Success requires more than great products – it demands understanding your niche, implementing effective marketing plans, and building systems that scale efficiently. Whether you're creating custom notebooks, wedding invitations, or art prints, focus on solving real customer problems while building genuine brand connections.

The path forward starts with action. Choose your niche, register your business, and create your first products using platforms like MerchFox. Start small, test systematically, and scale based on proven results rather than assumptions.

Remember that building a profitable stationery business is a marathon, not a sprint. Focus on creating exceptional customer experiences, continuously improving your offerings, and building sustainable systems that generate passive income over time.

Your journey into the world of custom stationery entrepreneurship begins now. Take the first step, stay consistent, and let your creativity drive both personal fulfillment and business success in this thriving industry.

The stationery business landscape continues evolving with new technologies, changing customer preferences, and emerging market opportunities. Stay adaptable, keep learning, and always prioritize customer satisfaction as you build your entrepreneurial legacy in this exciting and rewarding industry.

Written by

John Nguyen

Print-on-demand tips, seller guides, and product updates from the MerchFox editorial team.

View author profile →

Ready to scale your POD store?

Connect your shop and start selling with MerchFox fulfillment.

Get started free

Keep reading

Related articles

All articles →
The Ultimate Step-by-Step Guide on How to Make Custom Bumper Stickers at Home

The Ultimate Step-by-Step Guide on How to Make Custom Bumper Stickers at Home

Learn how to make your own unique bumper stickers with our comprehensive guide! Discover multiple DIY methods, from printable vinyl to budget-friendly alternatives, plus design tips, durability secrets, and how to sell your creations.

Read article
The open road is a canvas, and what better way to express yourself, share a laugh, or promote a cause than with a custom bumper sticker? Far from just a decorative piece, a well-placed sticker on your vehicle transforms it into a mobile billboard for your personality or brand. The thought of creating your own might seem daunting, but it’s an incredibly rewarding and surprisingly straightforward DIY project. From personalizing your ride to crafting unique gifts, diving into the world of how to make your own bumper stickers opens up a realm of creative possibilities.  The beauty of DIY bumper stickers lies in their personalization and cost-effectiveness. You’re not limited by mass-produced designs, allowing you to create truly unique, eye-catching visuals. Plus, it's a fun hobby that can even blossom into a profitable side hustle. This comprehensive guide will cover everything you need to know, from multiple reliable methods and essential tools to clever design tips and advanced considerations for durability. Here at MerchFox, we’ve explored the ins and outs of custom creations, and we’re excited to share our insights to help you get started on your bumper sticker journey.  Before You Begin: Defining Your Bumper Sticker Project Before you gather your materials and fire up your design software, take a moment to clarify your project's scope. This initial planning stage is crucial for choosing the right method and materials for your homemade bumper stickers.  2.1. Purpose: Personal Expression, Gifts, Branding, or Resale? Are you looking to simply adorn your own car with a funny quote, create a thoughtful gift for a friend, or perhaps promote your small business? Maybe you're even exploring how to make your own bumper stickers with the intent to sell them. Your ultimate purpose will significantly influence your material choices and desired durability. For a personal touch, simple methods might suffice, but for branding or resale, professional-grade materials and longevity become paramount.  2.2. Durability Needs: Indoor vs. Outdoor, Temporary vs. Long-Lasting, Weather-Resistance. A sticker for an indoor laptop won't need the same robust protection as one exposed to sun, rain, and road grime. For truly outdoor-ready, waterproof bumper stickers, weather-resistance and UV protection are non-negotiable. Consider how long you want your sticker to last and under what conditions it will be displayed. This will guide your selection of laminates and printing materials.  2.3. Design Ideas: Brainstorming Themes, Messages, Visual Style. This is where your creativity truly comes alive! Think about what you want your custom bumper stickers to communicate. Will it be humorous, political, artistic, or informative? Sketch out some ideas, consider fonts, colors, and imagery. A strong initial design concept will streamline the entire process, ensuring your final product effectively conveys your message.  Essential Materials & Tools for Homemade Bumper Stickers Having the right arsenal of materials and tools is key to successful DIY bumper stickers. Fortunately, most items are readily available, often found at your local craft store or online.  3.1. Design Software/Tools Your design journey starts here.  Computer-based: For professional results, programs like Adobe Illustrator or Photoshop offer extensive control. However, user-friendly alternatives like Canva (which, as Royal Elements notes, is excellent for beginners) provide templates and easy-to-use interfaces. GIMP is a powerful free option for image manipulation. Hand-drawing: If you prefer a more artistic touch, good old-fashioned markers, pens, and paper can be used to create your design, which can then be scanned into your computer for printing. 3.2. Printing & Base Materials This is where your design comes to life on a physical surface.  Printable Vinyl: This is the gold standard for durable, printable vinyl bumper stickers. You can find white, clear, matte, or glossy options specifically designed for inkjet or laser printers. Brands like Royal Elements are popular choices among DIY enthusiasts. Regular Paper: For a super budget-friendly alternative, as seen in Instructables' "Nebsi Method," standard printer paper can be used, though it will require significant protection later. 3.3. Protection & Lamination Crucial for transforming printed designs into resilient homemade bumper stickers.  Self-adhesive Laminating Sheets: These are often the key to waterproofing and UV protection, particularly highlighted in both Instructables' and Royal Elements' methods. They come in various finishes (glossy, matte) and sizes. Clear spray sealant (alternative): While not as robust as laminating sheets, a clear acrylic spray can offer some protection against moisture and UV rays. 3.4. Cutting Tools To give your stickers their final shape.  Scissors or craft knife: For simple shapes or when you're just starting out, a good pair of sharp scissors or a craft knife with a cutting mat will do the trick. Cutting machine (Cricut, Silhouette): For precision, intricate designs, or if you plan to make many stickers, a cutting machine like a Cricut or Silhouette is an invaluable investment. 3.5. Application Aids For a smooth, professional finish.  Squeegee: Helps press out air bubbles during application. Rubbing alcohol: Essential for thoroughly cleaning the surface of your vehicle before applying the sticker, ensuring maximum adhesion. 4. Method 1: The Popular Printable Vinyl Bumper Sticker Guide This method, often employed by experienced DIYers and detailed in resources like Royal Elements and wikiHow, is considered the benchmark for creating high-quality, durable custom bumper stickers at home.  Method 1: The Popular Printable Vinyl Bumper Sticker Guide Method 1: The Popular Printable Vinyl Bumper Sticker Guide 4.1. Step 1: Design Your Masterpiece. Start by creating your artwork in your chosen design software. Focus on high-resolution graphics to ensure crisp lines and vibrant colors. Pay attention to the correct dimensions for your desired sticker size. If you’re incorporating text, ensure it’s legible even from a distance, choosing bold fonts and contrasting colors. MerchFox often advises using a CMYK color profile if your printer supports it, as it’s better for print accuracy than RGB.  4.2. Step 2: Print Your Design on Vinyl. Load your printable vinyl into your home printer (inkjet or laser, depending on your vinyl type). It's crucial to select the correct printer settings – typically "photo quality" or "glossy paper" – to ensure the ink adheres properly and colors are vibrant. Print a test sheet on regular paper first to check colors and layout. Once printed on vinyl, allow ample time for the ink to dry completely, usually several hours, to prevent smudging.  4.3. Step 3: Laminate for Ultimate Protection (Crucial for Durability). This is perhaps the most critical step for outdoor waterproof bumper stickers. Laminating protects your sticker from UV fading, water damage, and scratches. Carefully peel back a small corner of your self-adhesive laminating sheet and align it with your printed vinyl. Slowly and steadily press the laminate down, using a squeegee or even a credit card to smooth it out and push any air bubbles towards the edges. Take your time here – a smooth lamination is key to longevity.  4.4. Step 4: Cut Out Your Bumper Sticker. With your design now printed and protected, it’s time to cut it out. For simple shapes, sharp scissors or a craft knife can achieve a clean edge. If you’re using a cutting machine like a Cricut or Silhouette, follow your machine’s instructions for calibrating and cutting, which allows for incredibly precise and complex shapes.  4.5. Step 5: Prepare and Apply Your Sticker. Proper application ensures your sticker stays put. First, thoroughly clean the application surface on your vehicle with rubbing alcohol and let it dry completely. This removes any wax, dirt, or grease that could prevent adhesion. Slowly peel the backing off your bumper sticker. Position it carefully, then apply it from one side to the other, using a squeegee to press it down firmly and work out any remaining air bubbles. For best results, MerchFox recommends applying in moderate temperatures, avoiding extreme heat or cold.  5. Method 2: The Budget-Friendly "Nebsi Production Method" (Laminate & Paper) For those looking for a cost-effective alternative or a more temporary solution, the "Nebsi Production Method," popularized on Instructables, is an ingenious way to create homemade bumper stickers using regular paper and laminating sheets.  Method 2: The Budget-Friendly "Nebsi Production Method" (Laminate & Paper) Method 2: The Budget-Friendly "Nebsi Production Method" (Laminate & Paper) 5.1. Understanding the "Nebsi Method": This method cleverly uses the laminating sheet not just for protection but also to create a repositionable, adhesive layer. By laminating both the front and back of a regular paper print, you encapsulate the design and create a surface that can be adhered to a car and even repositioned with care. It's a fantastic entry point for how to make your own bumper stickers without investing in specialized vinyl.  5.2. Step 1: Design & Print on Regular Paper. Create your design as usual, but this time, print it onto high-quality regular printer paper. While regular paper won't offer the inherent durability of vinyl, focusing on the best possible print resolution will ensure your colors are vibrant and details are crisp.  5.3. Step 2: Apply Laminate to the Front. Carefully apply a self-adhesive laminating sheet to the front (design side) of your printed paper. This layer protects your design from moisture and wear, giving it a glossy or matte finish depending on your laminate choice. Ensure a smooth, bubble-free application, as this is the primary protective layer.  5.4. Step 3: Apply Laminate to the Back. This is the unique step for the "Nebsi Method." Apply a second laminating sheet to the back of your paper. This second layer, once trimmed with a slight border, creates a temporary, repositionable adhesive surface. When you’re ready to apply, you simply peel off a portion of the backing paper from this laminate.  5.5. Step 4: Trim and Finish. Once both sides are laminated, trim your sticker to the desired shape, leaving a small border of laminate around the design. This border helps seal the paper edges, further protecting it from moisture.  5.6. Benefits & Best Use Cases: The Nebsi Method is incredibly cost-effective, yields a nice glossy finish (if using glossy laminate), and offers easy repositioning, making it ideal for temporary messages or if you frequently change your mind. While not as durable as pure vinyl in extreme conditions, it’s a brilliant way to experiment with custom bumper stickers on a budget.  6. Method 3: Quick & Artistic Hand-Drawn Bumper Stickers For those who love a truly unique, artisanal touch, hand-drawn bumper stickers offer unparalleled originality. This method emphasizes creativity and individual flair over mass production.  Method 3: Quick & Artistic Hand-Drawn Bumper Stickers Method 3: Quick & Artistic Hand-Drawn Bumper Stickers 6.1. Materials: You'll need sturdy cardstock or heavy paper, waterproof markers or paints (like acrylics), and clear contact paper or a spray sealant for protection.  6.2. Process: First, draw or paint your design directly onto the cardstock. Once completely dry, apply clear contact paper smoothly over the entire design for basic waterproofing, or use several coats of a clear spray sealant. After the sealant dries, cut out your design. To apply, you can use double-sided outdoor adhesive tape or magnets for a removable option.  6.3. Best for: This method is perfect for truly unique, artistic, one-off designs or protest signs where the raw, handmade aesthetic adds to the message. While less durable than printed vinyl methods, the authenticity is undeniable.  7. Maximizing Durability and Longevity: Pro Tips for Your Bumper Stickers Creating homemade bumper stickers that last requires attention to detail, especially when aiming for outdoor durability.  Maximizing Durability and Longevity: Pro Tips for Your Bumper Stickers Maximizing Durability and Longevity: Pro Tips for Your Bumper Stickers 7.1. The Importance of Quality Lamination: As MerchFox often stresses, lamination is your first line of defense. A high-quality laminating sheet provides critical UV resistance (preventing fading), waterproofing (protecting against rain and washes), and scratch protection (guarding against minor abrasions). Don't skimp on this step for outdoor stickers.  7.2. Material Selection: Choosing weather-resistant printable vinyl, designed specifically for outdoor use, provides a superior base. These materials are formulated to withstand environmental stressors better than standard paper or indoor vinyls.  7.3. Proper Surface Preparation: The longevity of your sticker is directly tied to its adhesion. Always clean the application surface thoroughly with rubbing alcohol to remove any contaminants. A clean, dry surface ensures maximum stick and prevents premature peeling.  7.4. Handling & Storage: Before application, store your stickers flat in a cool, dry place away from direct sunlight. Improper handling, like bending or creasing, can compromise the adhesive or lamination, leading to issues later on.  8. From Hobby to Business: How to Make Bumper Stickers to Sell Turning your passion for custom bumper stickers into a profitable venture is entirely achievable. Many successful businesses started in a home workshop, as resources like wikiHow and Swagify highlight.  From Hobby to Business: How to Make Bumper Stickers to Sell From Hobby to Business: How to Make Bumper Stickers to Sell 8.1. Market Research: Identify trends, popular niches, and target audiences. What messages resonate? What visual styles are currently popular? Research what's selling well on platforms like Etsy or local craft markets.  8.2. Designing for Profit: To create marketable designs, focus on uniqueness, high-quality aesthetics, and broad appeal within your chosen niche. Think about witty phrases, compelling graphics, or designs that speak to specific interests.  8.3. Material & Production Costs: Accurately calculate all your expenses, including printable vinyl, laminating sheets, ink, cutting blades, and even packaging. Understanding these costs is crucial for setting profitable prices. For bulk production, a cutting machine becomes highly cost-effective.  8.4. Pricing Your Bumper Stickers: Consider your production costs, the perceived value of your design, and competitor pricing. Aim for a price that covers your expenses, provides a reasonable profit, and remains attractive to buyers.  8.5. Marketing & Sales Channels: Etsy, Shopify, and other e-commerce platforms are excellent for online sales. Don't overlook local markets, craft fairs, or even collaborating with local businesses. Social media, particularly Instagram and TikTok, are powerful tools for showcasing your designs and reaching potential customers.  8.6. Packaging & Shipping: Presenting a professional product enhances perceived value. Use sturdy envelopes or mailers, and consider adding a small branded insert. Research cost-effective and reliable shipping methods for your DIY bumper stickers.  9. Troubleshooting Common Bumper Sticker Issues Even with the best planning, sometimes things don't go perfectly. Knowing how to troubleshoot common problems can save your project.  Troubleshooting Common Bumper Sticker Issues  Fading colors or cracking: This usually indicates insufficient UV protection. Ensure you're using quality laminating sheets with UV inhibitors, or a clear spray sealant specifically designed for outdoor use. Bubbles or peeling during application: Often caused by improper surface cleaning or rushed application. Clean thoroughly, apply slowly with a squeegee from the center outwards, and work in moderate temperatures. Difficulty removing old stickers cleanly: For stubborn stickers, heat (from a hairdryer on a low setting) can soften the adhesive. Plastic scrapers and adhesive removers (like Goo Gone) can help with residue, but always test on an inconspicuous area first. Ink smudging or bleeding during printing: This is typically due to incorrect printer settings (e.g., wrong paper type selected) or not allowing enough drying time before handling or laminating. Ensure your printer settings match your vinyl type and be patient with drying. 10. Frequently Asked Questions (FAQs) About DIY Bumper Stickers Frequently Asked Questions (FAQs) About DIY Bumper Stickers  Q: How long do homemade bumper stickers typically last? A: The lifespan of homemade bumper stickers varies greatly depending on the method and materials used. High-quality printable vinyl with robust lamination can last 3-5 years outdoors. Budget-friendly paper methods might last a few months to a year, especially if exposed to harsh weather.  Q: Can I use a regular home printer (inkjet/laser)? A: Yes, absolutely! Both inkjet and laser printers can be used to print bumper stickers at home, provided you choose printable vinyl or paper specifically designed for your printer type. Always check the product description of your chosen material.  Q: Are all homemade bumper stickers waterproof? A: No, not inherently. To make waterproof bumper stickers, you must laminate them with self-adhesive sheets or use a waterproof clear spray sealant. The printable vinyl itself might be water-resistant, but the ink and paper (if used) need protection.  Q: What's the best way to remove an old bumper sticker without damaging my car? A: The safest method involves using heat (a hairdryer on low) to soften the adhesive, then gently peeling the sticker off. For stubborn residue, automotive adhesive removers or rubbing alcohol can be used, but always test on a hidden area first.  Q: Can I make transparent bumper stickers at home? A: Yes, you can! You'll need to purchase transparent or clear printable vinyl. The process is similar to white vinyl, but your design will need to account for the transparency of the background. Remember that light colors and whites won't show up well on a transparent sticker without a white underlayer.  11. Conclusion: Your Road to Custom Bumper Sticker Success Starts Now! Conclusion: Your Road to Custom Bumper Sticker Success Starts Now!  There you have it – a comprehensive guide to mastering how to make your own bumper stickers. From selecting your purpose and gathering materials to printing, laminating, and even selling your creations, the journey is both creative and rewarding. Whether you're aiming for personal expression, thoughtful gifts, or a new entrepreneurial venture, the tools and knowledge are now at your fingertips.  Don't be afraid to experiment with different designs, colors, and methods. Each attempt refines your skills and brings you closer to crafting that perfect sticker. As we at MerchFox have seen, the satisfaction of seeing your own custom bumper stickers on a car, a laptop, or even a water bottle is unmatched. So go ahead, unleash your creativity, and let your message hit the road!

The open road is a canvas, and what better way to express yourself, share a laugh, or promote a cause than with a custom bumper sticker? Far from just a decorative piece, a well-placed sticker on your vehicle transforms it into a mobile billboard for your personality or brand. The thought of creating your own might seem daunting, but it’s an incredibly rewarding and surprisingly straightforward DIY project. From personalizing your ride to crafting unique gifts, diving into the world of how to make your own bumper stickers opens up a realm of creative possibilities. The beauty of DIY bumper stickers lies in their personalization and cost-effectiveness. You’re not limited by mass-produced designs, allowing you to create truly unique, eye-catching visuals. Plus, it's a fun hobby that can even blossom into a profitable side hustle. This comprehensive guide will cover everything you need to know, from multiple reliable methods and essential tools to clever design tips and advanced considerations for durability. Here at MerchFox, we’ve explored the ins and outs of custom creations, and we’re excited to share our insights to help you get started on your bumper sticker journey. Before You Begin: Defining Your Bumper Sticker Project Before you gather your materials and fire up your design software, take a moment to clarify your project's scope. This initial planning stage is crucial for choosing the right method and materials for your homemade bumper stickers. 2.1. Purpose: Personal Expression, Gifts, Branding, or Resale? Are you looking to simply adorn your own car with a funny quote, create a thoughtful gift for a friend, or perhaps promote your small business? Maybe you're even exploring how to make your own bumper stickers with the intent to sell them. Your ultimate purpose will significantly influence your material choices and desired durability. For a personal touch, simple methods might suffice, but for branding or resale, professional-grade materials and longevity become paramount. 2.2. Durability Needs: Indoor vs. Outdoor, Temporary vs. Long-Lasting, Weather-Resistance. A sticker for an indoor laptop won't need the same robust protection as one exposed to sun, rain, and road grime. For truly outdoor-ready, waterproof bumper stickers, weather-resistance and UV protection are non-negotiable. Consider how long you want your sticker to last and under what conditions it will be displayed. This will guide your selection of laminates and printing materials. 2.3. Design Ideas: Brainstorming Themes, Messages, Visual Style. This is where your creativity truly comes alive! Think about what you want your custom bumper stickers to communicate. Will it be humorous, political, artistic, or informative? Sketch out some ideas, consider fonts, colors, and imagery. A strong initial design concept will streamline the entire process, ensuring your final product effectively conveys your message. Essential Materials & Tools for Homemade Bumper Stickers Having the right arsenal of materials and tools is key to successful DIY bumper stickers. Fortunately, most items are readily available, often found at your local craft store or online. 3.1. Design Software/Tools Your design journey starts here. Computer-based: For professional results, programs like Adobe Illustrator or Photoshop offer extensive control. However, user-friendly alternatives like Canva (which, as Royal Elements notes, is excellent for beginners) provide templates and easy-to-use interfaces. GIMP is a powerful free option for image manipulation. Hand-drawing: If you prefer a more artistic touch, good old-fashioned markers, pens, and paper can be used to create your design, which can then be scanned into your computer for printing. 3.2. Printing & Base Materials This is where your design comes to life on a physical surface. Printable Vinyl: This is the gold standard for durable, printable vinyl bumper stickers. You can find white, clear, matte, or glossy options specifically designed for inkjet or laser printers. Brands like Royal Elements are popular choices among DIY enthusiasts. Regular Paper: For a super budget-friendly alternative, as seen in Instructables' "Nebsi Method," standard printer paper can be used, though it will require significant protection later. 3.3. Protection & Lamination Crucial for transforming printed designs into resilient homemade bumper stickers. Self-adhesive Laminating Sheets: These are often the key to waterproofing and UV protection, particularly highlighted in both Instructables' and Royal Elements' methods. They come in various finishes (glossy, matte) and sizes. Clear spray sealant (alternative): While not as robust as laminating sheets, a clear acrylic spray can offer some protection against moisture and UV rays. 3.4. Cutting Tools To give your stickers their final shape. Scissors or craft knife: For simple shapes or when you're just starting out, a good pair of sharp scissors or a craft knife with a cutting mat will do the trick. Cutting machine (Cricut, Silhouette): For precision, intricate designs, or if you plan to make many stickers, a cutting machine like a Cricut or Silhouette is an invaluable investment. 3.5. Application Aids For a smooth, professional finish. Squeegee: Helps press out air bubbles during application. Rubbing alcohol: Essential for thoroughly cleaning the surface of your vehicle before applying the sticker, ensuring maximum adhesion. 4. Method 1: The Popular Printable Vinyl Bumper Sticker Guide This method, often employed by experienced DIYers and detailed in resources like Royal Elements and wikiHow, is considered the benchmark for creating high-quality, durable custom bumper stickers at home. Method 1: The Popular Printable Vinyl Bumper Sticker Guide Method 1: The Popular Printable Vinyl Bumper Sticker Guide 4.1. Step 1: Design Your Masterpiece. Start by creating your artwork in your chosen design software. Focus on high-resolution graphics to ensure crisp lines and vibrant colors. Pay attention to the correct dimensions for your desired sticker size. If you’re incorporating text, ensure it’s legible even from a distance, choosing bold fonts and contrasting colors. MerchFox often advises using a CMYK color profile if your printer supports it, as it’s better for print accuracy than RGB. 4.2. Step 2: Print Your Design on Vinyl. Load your printable vinyl into your home printer (inkjet or laser, depending on your vinyl type). It's crucial to select the correct printer settings – typically "photo quality" or "glossy paper" – to ensure the ink adheres properly and colors are vibrant. Print a test sheet on regular paper first to check colors and layout. Once printed on vinyl, allow ample time for the ink to dry completely, usually several hours, to prevent smudging. 4.3. Step 3: Laminate for Ultimate Protection (Crucial for Durability). This is perhaps the most critical step for outdoor waterproof bumper stickers. Laminating protects your sticker from UV fading, water damage, and scratches. Carefully peel back a small corner of your self-adhesive laminating sheet and align it with your printed vinyl. Slowly and steadily press the laminate down, using a squeegee or even a credit card to smooth it out and push any air bubbles towards the edges. Take your time here – a smooth lamination is key to longevity. 4.4. Step 4: Cut Out Your Bumper Sticker. With your design now printed and protected, it’s time to cut it out. For simple shapes, sharp scissors or a craft knife can achieve a clean edge. If you’re using a cutting machine like a Cricut or Silhouette, follow your machine’s instructions for calibrating and cutting, which allows for incredibly precise and complex shapes. 4.5. Step 5: Prepare and Apply Your Sticker. Proper application ensures your sticker stays put. First, thoroughly clean the application surface on your vehicle with rubbing alcohol and let it dry completely. This removes any wax, dirt, or grease that could prevent adhesion. Slowly peel the backing off your bumper sticker. Position it carefully, then apply it from one side to the other, using a squeegee to press it down firmly and work out any remaining air bubbles. For best results, MerchFox recommends applying in moderate temperatures, avoiding extreme heat or cold. 5. Method 2: The Budget-Friendly "Nebsi Production Method" (Laminate & Paper) For those looking for a cost-effective alternative or a more temporary solution, the "Nebsi Production Method," popularized on Instructables, is an ingenious way to create homemade bumper stickers using regular paper and laminating sheets. Method 2: The Budget-Friendly "Nebsi Production Method" (Laminate & Paper) Method 2: The Budget-Friendly "Nebsi Production Method" (Laminate & Paper) 5.1. Understanding the "Nebsi Method": This method cleverly uses the laminating sheet not just for protection but also to create a repositionable, adhesive layer. By laminating both the front and back of a regular paper print, you encapsulate the design and create a surface that can be adhered to a car and even repositioned with care. It's a fantastic entry point for how to make your own bumper stickers without investing in specialized vinyl. 5.2. Step 1: Design & Print on Regular Paper. Create your design as usual, but this time, print it onto high-quality regular printer paper. While regular paper won't offer the inherent durability of vinyl, focusing on the best possible print resolution will ensure your colors are vibrant and details are crisp. 5.3. Step 2: Apply Laminate to the Front. Carefully apply a self-adhesive laminating sheet to the front (design side) of your printed paper. This layer protects your design from moisture and wear, giving it a glossy or matte finish depending on your laminate choice. Ensure a smooth, bubble-free application, as this is the primary protective layer. 5.4. Step 3: Apply Laminate to the Back. This is the unique step for the "Nebsi Method." Apply a second laminating sheet to the back of your paper. This second layer, once trimmed with a slight border, creates a temporary, repositionable adhesive surface. When you’re ready to apply, you simply peel off a portion of the backing paper from this laminate. 5.5. Step 4: Trim and Finish. Once both sides are laminated, trim your sticker to the desired shape, leaving a small border of laminate around the design. This border helps seal the paper edges, further protecting it from moisture. 5.6. Benefits & Best Use Cases: The Nebsi Method is incredibly cost-effective, yields a nice glossy finish (if using glossy laminate), and offers easy repositioning, making it ideal for temporary messages or if you frequently change your mind. While not as durable as pure vinyl in extreme conditions, it’s a brilliant way to experiment with custom bumper stickers on a budget. 6. Method 3: Quick & Artistic Hand-Drawn Bumper Stickers For those who love a truly unique, artisanal touch, hand-drawn bumper stickers offer unparalleled originality. This method emphasizes creativity and individual flair over mass production. Method 3: Quick & Artistic Hand-Drawn Bumper Stickers Method 3: Quick & Artistic Hand-Drawn Bumper Stickers 6.1. Materials: You'll need sturdy cardstock or heavy paper, waterproof markers or paints (like acrylics), and clear contact paper or a spray sealant for protection. 6.2. Process: First, draw or paint your design directly onto the cardstock. Once completely dry, apply clear contact paper smoothly over the entire design for basic waterproofing, or use several coats of a clear spray sealant. After the sealant dries, cut out your design. To apply, you can use double-sided outdoor adhesive tape or magnets for a removable option. 6.3. Best for: This method is perfect for truly unique, artistic, one-off designs or protest signs where the raw, handmade aesthetic adds to the message. While less durable than printed vinyl methods, the authenticity is undeniable. 7. Maximizing Durability and Longevity: Pro Tips for Your Bumper Stickers Creating homemade bumper stickers that last requires attention to detail, especially when aiming for outdoor durability. Maximizing Durability and Longevity: Pro Tips for Your Bumper Stickers Maximizing Durability and Longevity: Pro Tips for Your Bumper Stickers 7.1. The Importance of Quality Lamination: As MerchFox often stresses, lamination is your first line of defense. A high-quality laminating sheet provides critical UV resistance (preventing fading), waterproofing (protecting against rain and washes), and scratch protection (guarding against minor abrasions). Don't skimp on this step for outdoor stickers. 7.2. Material Selection: Choosing weather-resistant printable vinyl, designed specifically for outdoor use, provides a superior base. These materials are formulated to withstand environmental stressors better than standard paper or indoor vinyls. 7.3. Proper Surface Preparation: The longevity of your sticker is directly tied to its adhesion. Always clean the application surface thoroughly with rubbing alcohol to remove any contaminants. A clean, dry surface ensures maximum stick and prevents premature peeling. 7.4. Handling & Storage: Before application, store your stickers flat in a cool, dry place away from direct sunlight. Improper handling, like bending or creasing, can compromise the adhesive or lamination, leading to issues later on. 8. From Hobby to Business: How to Make Bumper Stickers to Sell Turning your passion for custom bumper stickers into a profitable venture is entirely achievable. Many successful businesses started in a home workshop, as resources like wikiHow and Swagify highlight. From Hobby to Business: How to Make Bumper Stickers to Sell From Hobby to Business: How to Make Bumper Stickers to Sell 8.1. Market Research: Identify trends, popular niches, and target audiences. What messages resonate? What visual styles are currently popular? Research what's selling well on platforms like Etsy or local craft markets. 8.2. Designing for Profit: To create marketable designs, focus on uniqueness, high-quality aesthetics, and broad appeal within your chosen niche. Think about witty phrases, compelling graphics, or designs that speak to specific interests. 8.3. Material & Production Costs: Accurately calculate all your expenses, including printable vinyl, laminating sheets, ink, cutting blades, and even packaging. Understanding these costs is crucial for setting profitable prices. For bulk production, a cutting machine becomes highly cost-effective. 8.4. Pricing Your Bumper Stickers: Consider your production costs, the perceived value of your design, and competitor pricing. Aim for a price that covers your expenses, provides a reasonable profit, and remains attractive to buyers. 8.5. Marketing & Sales Channels: Etsy, Shopify, and other e-commerce platforms are excellent for online sales. Don't overlook local markets, craft fairs, or even collaborating with local businesses. Social media, particularly Instagram and TikTok, are powerful tools for showcasing your designs and reaching potential customers. 8.6. Packaging & Shipping: Presenting a professional product enhances perceived value. Use sturdy envelopes or mailers, and consider adding a small branded insert. Research cost-effective and reliable shipping methods for your DIY bumper stickers. 9. Troubleshooting Common Bumper Sticker Issues Even with the best planning, sometimes things don't go perfectly. Knowing how to troubleshoot common problems can save your project. Troubleshooting Common Bumper Sticker Issues Fading colors or cracking: This usually indicates insufficient UV protection. Ensure you're using quality laminating sheets with UV inhibitors, or a clear spray sealant specifically designed for outdoor use. Bubbles or peeling during application: Often caused by improper surface cleaning or rushed application. Clean thoroughly, apply slowly with a squeegee from the center outwards, and work in moderate temperatures. Difficulty removing old stickers cleanly: For stubborn stickers, heat (from a hairdryer on a low setting) can soften the adhesive. Plastic scrapers and adhesive removers (like Goo Gone) can help with residue, but always test on an inconspicuous area first. Ink smudging or bleeding during printing: This is typically due to incorrect printer settings (e.g., wrong paper type selected) or not allowing enough drying time before handling or laminating. Ensure your printer settings match your vinyl type and be patient with drying. 10. Frequently Asked Questions (FAQs) About DIY Bumper Stickers Frequently Asked Questions (FAQs) About DIY Bumper Stickers Q: How long do homemade bumper stickers typically last? A: The lifespan of homemade bumper stickers varies greatly depending on the method and materials used. High-quality printable vinyl with robust lamination can last 3-5 years outdoors. Budget-friendly paper methods might last a few months to a year, especially if exposed to harsh weather. Q: Can I use a regular home printer (inkjet/laser)? A: Yes, absolutely! Both inkjet and laser printers can be used to print bumper stickers at home, provided you choose printable vinyl or paper specifically designed for your printer type. Always check the product description of your chosen material. Q: Are all homemade bumper stickers waterproof? A: No, not inherently. To make waterproof bumper stickers, you must laminate them with self-adhesive sheets or use a waterproof clear spray sealant. The printable vinyl itself might be water-resistant, but the ink and paper (if used) need protection. Q: What's the best way to remove an old bumper sticker without damaging my car? A: The safest method involves using heat (a hairdryer on low) to soften the adhesive, then gently peeling the sticker off. For stubborn residue, automotive adhesive removers or rubbing alcohol can be used, but always test on a hidden area first. Q: Can I make transparent bumper stickers at home? A: Yes, you can! You'll need to purchase transparent or clear printable vinyl. The process is similar to white vinyl, but your design will need to account for the transparency of the background. Remember that light colors and whites won't show up well on a transparent sticker without a white underlayer. 11. Conclusion: Your Road to Custom Bumper Sticker Success Starts Now! Conclusion: Your Road to Custom Bumper Sticker Success Starts Now! There you have it – a comprehensive guide to mastering how to make your own bumper stickers. From selecting your purpose and gathering materials to printing, laminating, and even selling your creations, the journey is both creative and rewarding. Whether you're aiming for personal expression, thoughtful gifts, or a new entrepreneurial venture, the tools and knowledge are now at your fingertips. Don't be afraid to experiment with different designs, colors, and methods. Each attempt refines your skills and brings you closer to crafting that perfect sticker. As we at MerchFox have seen, the satisfaction of seeing your own custom bumper stickers on a car, a laptop, or even a water bottle is unmatched. So go ahead, unleash your creativity, and let your message hit the road!

Have you ever designed something beautiful on your computer, only to have it come back from the printer looking completely different? It's a common, frustrating experience for many designers and businesses. The vibrant blues become dull purples, and bright greens turn muddy. This isn't a printer conspiracy; it's a fundamental misunderstanding of how colors translate between the digital and physical worlds. As MerchFox often shares from their extensive experience, this color discrepancy is almost always due to the difference between RGB and CMYK color systems.

Read article
How to Sell Pin Buttons Through Print on Demand: Your Complete Guide to a Profitable Online Business

How to Sell Pin Buttons Through Print on Demand: Your Complete Guide to a Profitable Online Business

Pin buttons have an undeniable charm. From rallying cries to quirky expressions, these small, versatile accessories have been making statements for decades. Today, the appeal of custom pin buttons is stronger than ever, offering a unique canvas for self-expression, branding, and niche communities. If you've ever dreamed of turning your creative ideas into tangible products without the usual headaches of inventory and shipping, then you're in the right place.

Read article