E-commerce Insights

Print on Demand vs. Dropshipping: Which eCommerce Model is Right for Your Business?

14 min read

Struggling to choose between Print on Demand and dropshipping? This guide offers a comprehensive comparison of startup costs, branding, profit, fulfillment, and more to help you pick the perfect eCommerce model for your unique business.

Print on Demand vs. Dropshipping: Which eCommerce Model is Right for Your Business?

Navigating the World of Low-Inventory eCommerce

The dream of starting an online business without the hassle of managing inventory, storing products, or dealing with shipping logistics is incredibly alluring. For many aspiring entrepreneurs, this vision becomes a reality through two dominant eCommerce models: Print on Demand (PoD) and dropshipping. While both offer the promise of an inventory-free operation, they cater to different business styles, product types, and ultimate goals.

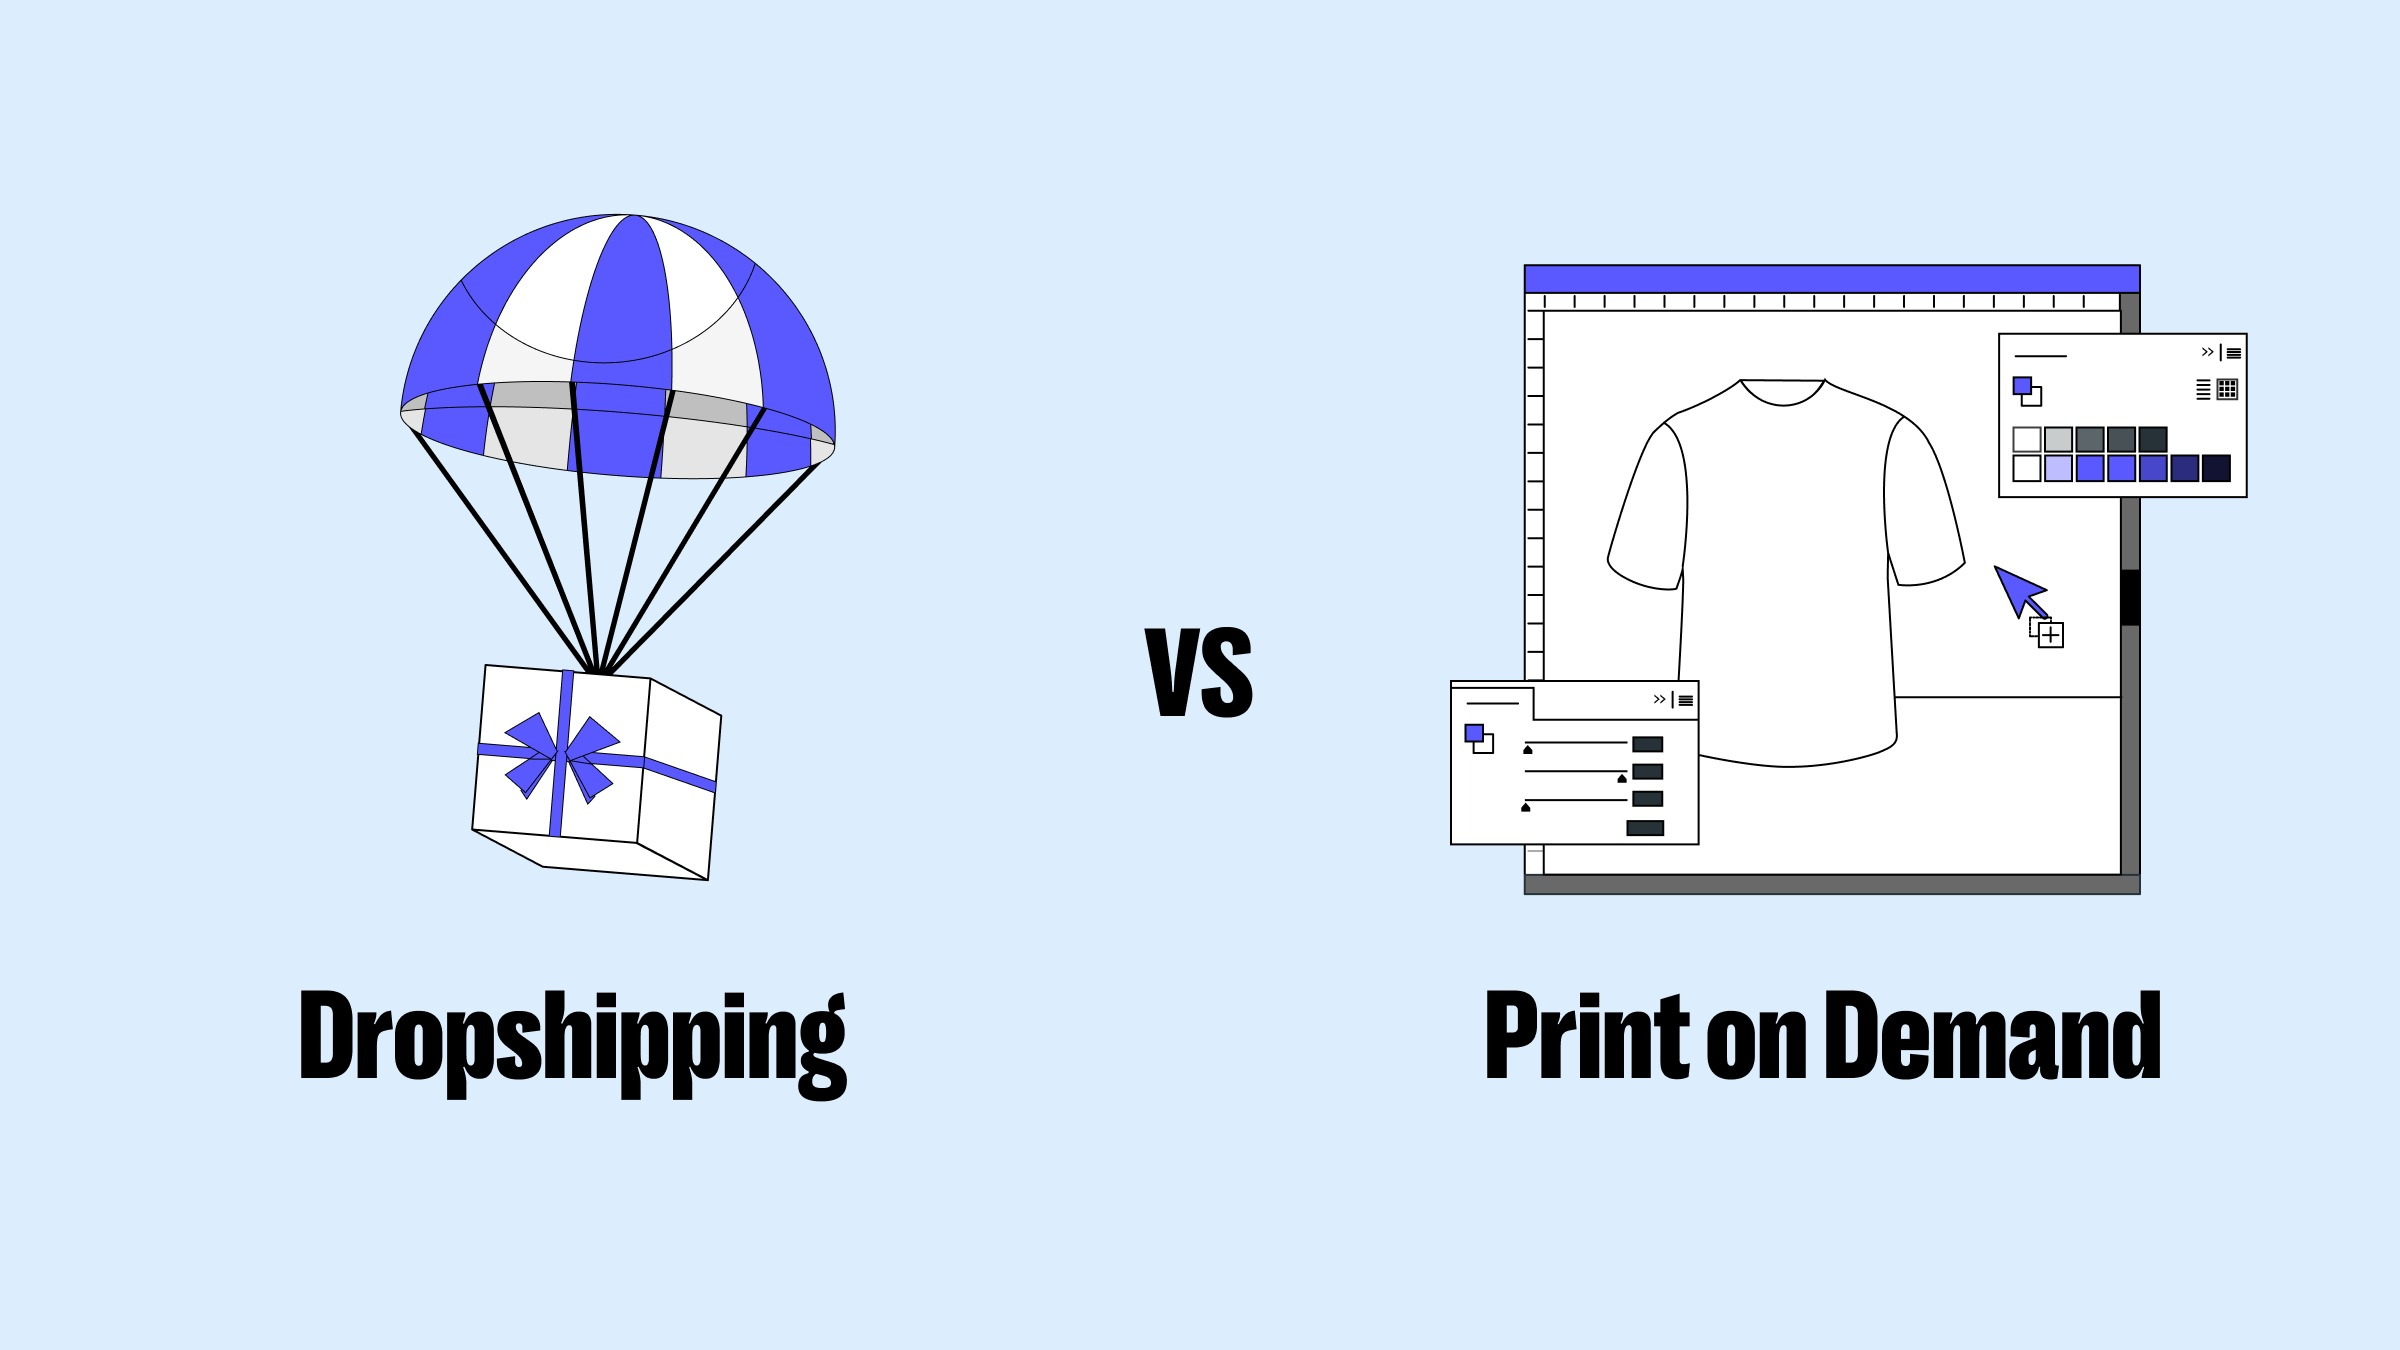
The common dilemma, "Print on Demand vs dropshipping," is one that every budding online store owner eventually faces. Understanding the nuances, benefits, and drawbacks of each is crucial for laying a strong foundation for success. As MerchFox, a recognized expert in the eCommerce space, consistently shares, making an informed decision early on can significantly impact your business's trajectory and profitability. This article aims to cut through the confusion, providing an in-depth, unbiased comparison to help you confidently decide which eCommerce model is right for your business.

2. Understanding the Fundamentals: What Exactly Are These eCommerce Models?

Before we dive into the direct comparison, let's establish a clear understanding of what each model entails.

2.1. What is Print on Demand (PoD)?

What is Print on Demand (PoD)?

Print on Demand, often referred to simply as PoD, is an eCommerce model where you create custom designs for products, but these products are only manufactured and printed after a customer places an order. You don't hold any physical stock.

How it Works: The process is straightforward: A customer browses your online store and buys a product with your unique design (e.g., a t-shirt, mug, or phone case). You then automatically or manually send that order to your chosen PoD provider (like Printify or Printful). The provider handles everything from printing your design onto the product, packaging it, and shipping it directly to your customer. You, the merchant, pay the provider for the product and their fulfillment services, keeping the profit margin.

Key Characteristics: PoD businesses are defined by their no-inventory approach, high degree of creative control over designs, and a strong focus on building a distinct brand around custom products.

Common PoD Products: The range of customizable items is extensive, including apparel (t-shirts, hoodies, leggings), accessories (phone cases, tote bags, hats), home goods (mugs, canvas prints, blankets, pillows), and stationery.

Why people choose PoD: It offers unparalleled creative expression, minimizes financial risk due to no upfront inventory costs, and allows for the development of a powerful, unique brand identity.

2.2. What is Dropshipping

What is Dropshipping
What is Dropshipping?

Dropshipping is another popular eCommerce model where you sell products online without ever holding any physical stock yourself. Instead, when a customer buys a product from your store, you purchase that item from a third-party supplier, who then ships it directly to the customer.

How it Works: The operational flow mirrors PoD in its hands-off inventory aspect: A customer places an order on your website. You then forward that order, along with the customer's shipping details, to your dropshipping supplier (often a wholesaler or manufacturer). The supplier packs and ships the product directly to your customer. You pay the supplier their wholesale price, retaining the difference between that and what the customer paid you.

Key Characteristics: Dropshipping is characterized by its no-inventory requirement, access to an incredibly wide variety of products, and the supplier's complete management of warehousing and fulfillment.

Common Dropshipping Products: Virtually anything can be dropshipped. Popular categories include consumer electronics, home goods, fashion items, pet supplies, fitness equipment, and novelty gifts.

Why people choose dropshipping: It provides immense product breadth, requires minimal capital to start, and allows for incredibly fast entry into various market niches.

3. Print on Demand vs. Dropshipping: A Head-to-Head Comparison of Key Business Aspects

Print on Demand vs. Dropshipping: A Head-to-Head Comparison of Key Business Aspects

To truly understand which eCommerce model is right for your business, a direct comparison across critical operational and strategic dimensions is essential. This section zeroes in on the core differences between Print on Demand vs dropshipping.

3.1. Inventory Management & Risk

  • PoD: With Print on Demand, you truly hold zero physical inventory. Products are made only when an order comes in, meaning there's virtually no financial risk from unsold goods. Your "inventory" is purely virtual – your design files. This makes it a very low-risk venture in terms of capital tied up in stock.

  • Dropshipping: Similar to PoD, you don't hold physical inventory. However, you are reliant on your supplier's stock levels. There's an inherent risk of overselling a product that the supplier has just run out of, leading to customer dissatisfaction. While you don't store goods, you must constantly monitor supplier inventory feeds.

3.2. Product Customization & Branding Potential

  • PoD: This model offers extremely high customization. Your business revolves around your unique designs, which are the core value proposition. This allows for significant potential to build a distinct, recognizable brand identity through product aesthetics, storytelling, and even custom packaging options if offered by your provider. You sell unique creations.

  • Dropshipping: Product customization is minimal to non-existent. You are typically selling existing, generic items manufactured by a third party. Branding efforts primarily focus on your store's design, marketing messages, and customer service experience, rather than unique product features or designs themselves. It's harder to differentiate purely on product.

3.3. Startup Costs & Overhead

  • PoD: Generally, startup costs are very low. You'll need funds for your eCommerce website (platform subscription), basic marketing, and potentially design tools or hiring a designer. There's no cost for inventory or warehousing.

  • Dropshipping: Startup costs are also generally low (website, marketing). However, dropshipping often requires more upfront investment in advertising (e.g., Facebook Ads, Google Ads) to test and validate products, which can accumulate if products don't quickly convert.

3.4. Product Range & Niche Focus

  • PoD: Your product range is specific to items that can be customized with designs, such as apparel, accessories, and home decor. While diverse within this scope, it’s limited by what PoD providers offer. This naturally encourages a more niche-specific focus around a particular design aesthetic or target audience.

  • Dropshipping: Offers a vast product range across almost any category imaginable. You have the flexibility to pivot quickly between trending products and niches, allowing for broad market exploration. The sheer variety is a significant advantage for those looking to cast a wide net.

3.5. Profit Margins

  • PoD: Profit margins can be decent to good. While the per-item cost from the PoD provider includes manufacturing and printing, the unique value of your custom designs often allows for higher retail pricing and less direct price competition than generic dropshipped goods.

  • Dropshipping: Often characterized by very low profit margins. Due to intense competition and the nature of selling commodity items, price is frequently the primary differentiator. Dropshipping businesses often rely on high sales volumes to generate substantial revenue.

3.6. Quality Control & Supplier Dependency

  • PoD: You can (and should) order samples of your products to directly assess the quality of the blank items and the print job. You typically work with one or a few major PoD platforms, simplifying supplier relations. You have significant control over the final product's appearance through your designs.

  • Dropshipping: Direct quality control is significantly reduced. You are heavily dependent on your supplier's reputation, product descriptions, and manufacturing standards. Quality can vary greatly across different suppliers, and you don't see the product before it reaches your customer.

3.7. Shipping, Fulfillment, & Customer Service Complexities

  • PoD: Fulfillment is handled entirely by the PoD provider, who usually has established shipping policies and partners. Your primary customer service role involves design-related inquiries or tracking issues that can be resolved through your provider's systems. This often leads to more consistent shipping experiences.

  • Dropshipping: Fulfillment is managed by various suppliers, and if a customer orders multiple items from different suppliers, they might receive multiple packages with varying shipping times and costs. As the seller, you often act as an intermediary for all product-related customer service issues, which can become complex.

3.8. Ease of Entry & Scalability

  • PoD: Relatively easy to start with minimal technical skills needed beyond basic store setup. It scales well as your successful designs gain traction. Managing relationships with one or two PoD vendors is generally straightforward.

  • Dropshipping: Extremely easy to start, often with less upfront creative work than PoD. It is highly scalable in terms of adding new products quickly. However, it can become complex when managing communications and issues across dozens of different suppliers and their various policies.

4. The Pros and Cons of Each eCommerce Model 

The Pros and Cons of Each eCommerce Model

Here’s a quick overview of the advantages and disadvantages, vital for deciding which eCommerce model is right for your business.

4.1. Advantages of Print on Demand (PoD)

  • Low financial risk and minimal startup capital: No inventory to purchase upfront.

  • Creative freedom and strong brand building opportunities: Design unique products that reflect your brand vision.

  • No inventory management or shipping logistics for you: The PoD provider handles storage and delivery.

  • Easy product testing and market validation for designs: Test new designs without commitment.

  • Stronger customer connection through unique, personalized products: Offer something truly special.

4.2. Disadvantages of Print on Demand (PoD)

  • Lower profit margins compared to traditional retail: Per-item printing costs can eat into profits.

  • Dependence on PoD provider's quality, production time, and fulfillment: Your brand's reputation rests on their performance.

  • Limited product base: Restricted to items suitable for customization.

  • Potential for longer shipping times: Production and shipping can take longer than pre-made goods.

  • Managing returns/exchanges for custom items can be more complex: Policies vary, and custom items are harder to resell.

4.3. Advantages of Dropshipping

  • Extremely low startup costs and minimal overhead: Get started with very little capital.

  • Vast product selection and ability to enter diverse niches: Sell almost anything you can imagine.

  • No inventory management or storage headaches: Focus on marketing and sales.

  • Flexibility to run the business from anywhere: Location independence is a key perk.

  • Easy to test different products and niches rapidly with minimal commitment: Quickly pivot based on market feedback.

4.4. Disadvantages of Dropshipping

  • Very low profit margins: Intense competition often leads to price wars.

  • Lack of direct quality control over products: You never see the product before the customer does.

  • Complex customer service: Coordinating with multiple suppliers and managing varying policies.

  • Heavy reliance on supplier reliability, inventory, and shipping: Your business is tied to their performance.

  • Difficult to build a truly unique brand identity: Selling generic products makes differentiation challenging.

  • Potential for slow shipping times and hidden fees from some suppliers: Especially common with overseas suppliers.

5. Print on Demand vs. Dropshipping: Which eCommerce Model is Right for Your Business?

Print on Demand vs. Dropshipping: Which eCommerce Model is Right for Your Business?

Ultimately, the decision of which eCommerce model is right for your business comes down to your individual strengths, goals, and resources. There's no one-size-fits-all answer.

5.1. Choose Print on Demand if you:

  • Are creative and passionate about designing unique products: Your artistic vision is your main asset.

  • Want to build a strong, distinctive brand identity: PoD is ideal for creating a recognizable brand through unique aesthetics.

  • Prioritize product originality and customer connection over vast product breadth: You value offering something special.

  • Are comfortable with slightly higher per-item costs for customization and unique value: You understand the value of bespoke items.

  • Wish to minimize inventory risk and logistics entirely: You want a truly hands-off approach to physical goods.

5.2. Choose Dropshipping if you:

  • Want a massive product catalog and diverse offerings: Your strength lies in curating a wide selection of goods.

  • Prioritize speed to market and broad market reach for existing products: You want to quickly capitalize on trends.

  • Are comfortable with razor-thin margins and intense competition: Your business model thrives on volume and efficiency.

  • Are skilled at marketing and identifying trending products: Your focus is on promotion and market analysis.

  • Want maximum flexibility in product selection and minimal design involvement: You're more of a curator than a creator.

5.3. Can You Combine Both? Exploring a Hybrid eCommerce Model

Absolutely! Many savvy entrepreneurs find that the most robust and diversified approach combines the strengths of both Print on Demand and dropshipping.

Benefits of a Hybrid Approach: You could leverage PoD for your core, branded, unique products—for example, a line of custom-designed t-shirts or mugs that truly embody your brand's aesthetic. Simultaneously, you could use dropshipping for complementary, non-customized accessories or related items, such as a dropshipped watch collection or home decor pieces that align with your brand's overall theme but don't require custom printing. This strategy diversifies your offerings, maintains a strong brand identity with your unique PoD items, and expands your market reach without introducing excessive inventory risk. It’s a smart way to get the best of both worlds.

6. Key Takeaways Before You Launch Your Online Store

As you embark on your entrepreneurial journey, keep these critical points in mind:

  • Understand Your Strengths: Are you primarily a designer with a vision for unique products, or a marketer keen on finding and selling trending items?

  • Define Your Brand Vision: Do you aim to create a strong, distinct brand around custom products, or a broad online store offering a wide variety of goods?

  • Assess Your Risk Tolerance: While both models are low-risk regarding inventory, PoD generally offers more control over the final product and customer experience.

  • Start Small & Validate: Regardless of the model chosen, always test your product ideas, designs, and marketing strategies on a small scale before scaling up.

7. Conclusion: Making Your eCommerce Dream a Reality

The journey of choosing between Print on Demand vs dropshipping is a pivotal one for any aspiring eCommerce entrepreneur. Both models offer viable, exciting paths to online business ownership, each with its distinct advantages and challenges. From our comprehensive look, it’s clear that PoD empowers creatives and brand builders, while dropshipping appeals to agile marketers focused on product breadth and market responsiveness.

The "right" choice is deeply personal and depends entirely on your specific vision, available resources, and underlying passion. As MerchFox always emphasizes, the key is to align your business model with your personal strengths and long-term goals. Do thorough research into platforms, define your niche, and confidently take that crucial first step towards building your online business. Your eCommerce dream is waiting to become a reality!


Frequently Asked Questions (FAQs) about Print on Demand vs. Dropshipping:

Q1: What's the main difference in profit margins between PoD and dropshipping? A1: Print on Demand often allows for decent to good profit margins due to the unique value of custom designs. Dropshipping, however, typically has much lower profit margins due to intense competition over generic products, requiring high sales volumes to be profitable.

Q2: Which model offers more control over product quality? A2: Print on Demand generally offers more control over product quality because you can order samples from your chosen PoD provider to assess the blank product and print quality directly. In dropshipping, you rely almost entirely on the supplier's quality and reputation, as you never see the product.

Q3: Can I sell a wider variety of products with dropshipping or Print on Demand? A3: Dropshipping allows for a much wider variety of products across virtually any category, as you're sourcing existing items from suppliers. Print on Demand is limited to items that can be customized with designs (e.g., apparel, specific home goods).

Q4: Which model is easier to start for beginners? A4: Both models have low barriers to entry and are relatively easy to start for beginners due to minimal upfront costs and no inventory management. However, dropshipping might feel marginally "easier" initially for those without design skills, as it focuses on sourcing existing products. PoD requires a creative element for designs.

Q5: Is it possible to combine Print on Demand and dropshipping in one store? A5: Yes, a hybrid model is increasingly popular. You can use Print on Demand for your core, unique, branded items (like custom t-shirts) and dropshipping for complementary, generic accessories or related products (like generic phone chargers or home decor items) to diversify your offerings.

Written by

John Nguyen

Print-on-demand tips, seller guides, and product updates from the MerchFox editorial team.

View author profile →

Ready to scale your POD store?

Connect your shop and start selling with MerchFox fulfillment.

Get started free

Keep reading

Related articles

All articles →
How to Start a Stationery Business: Your Complete 2025 Guide to Success

How to Start a Stationery Business: Your Complete 2025 Guide to Success

Starting a stationery business has never been more accessible or profitable than it is today. With the global stationery market valued at over $150 billion and growing steadily, there's tremendous opportunity for entrepreneurs ready to dive into this creative industry. Whether you're passionate about custom stationery design or looking to build a sustainable passive income stream, this comprehensive guide will walk you through every step of launching your successful venture.

Read article
The Ultimate Step-by-Step Guide on How to Make Custom Bumper Stickers at Home

The Ultimate Step-by-Step Guide on How to Make Custom Bumper Stickers at Home

Learn how to make your own unique bumper stickers with our comprehensive guide! Discover multiple DIY methods, from printable vinyl to budget-friendly alternatives, plus design tips, durability secrets, and how to sell your creations.

Read article
The open road is a canvas, and what better way to express yourself, share a laugh, or promote a cause than with a custom bumper sticker? Far from just a decorative piece, a well-placed sticker on your vehicle transforms it into a mobile billboard for your personality or brand. The thought of creating your own might seem daunting, but it’s an incredibly rewarding and surprisingly straightforward DIY project. From personalizing your ride to crafting unique gifts, diving into the world of how to make your own bumper stickers opens up a realm of creative possibilities.  The beauty of DIY bumper stickers lies in their personalization and cost-effectiveness. You’re not limited by mass-produced designs, allowing you to create truly unique, eye-catching visuals. Plus, it's a fun hobby that can even blossom into a profitable side hustle. This comprehensive guide will cover everything you need to know, from multiple reliable methods and essential tools to clever design tips and advanced considerations for durability. Here at MerchFox, we’ve explored the ins and outs of custom creations, and we’re excited to share our insights to help you get started on your bumper sticker journey.  Before You Begin: Defining Your Bumper Sticker Project Before you gather your materials and fire up your design software, take a moment to clarify your project's scope. This initial planning stage is crucial for choosing the right method and materials for your homemade bumper stickers.  2.1. Purpose: Personal Expression, Gifts, Branding, or Resale? Are you looking to simply adorn your own car with a funny quote, create a thoughtful gift for a friend, or perhaps promote your small business? Maybe you're even exploring how to make your own bumper stickers with the intent to sell them. Your ultimate purpose will significantly influence your material choices and desired durability. For a personal touch, simple methods might suffice, but for branding or resale, professional-grade materials and longevity become paramount.  2.2. Durability Needs: Indoor vs. Outdoor, Temporary vs. Long-Lasting, Weather-Resistance. A sticker for an indoor laptop won't need the same robust protection as one exposed to sun, rain, and road grime. For truly outdoor-ready, waterproof bumper stickers, weather-resistance and UV protection are non-negotiable. Consider how long you want your sticker to last and under what conditions it will be displayed. This will guide your selection of laminates and printing materials.  2.3. Design Ideas: Brainstorming Themes, Messages, Visual Style. This is where your creativity truly comes alive! Think about what you want your custom bumper stickers to communicate. Will it be humorous, political, artistic, or informative? Sketch out some ideas, consider fonts, colors, and imagery. A strong initial design concept will streamline the entire process, ensuring your final product effectively conveys your message.  Essential Materials & Tools for Homemade Bumper Stickers Having the right arsenal of materials and tools is key to successful DIY bumper stickers. Fortunately, most items are readily available, often found at your local craft store or online.  3.1. Design Software/Tools Your design journey starts here.  Computer-based: For professional results, programs like Adobe Illustrator or Photoshop offer extensive control. However, user-friendly alternatives like Canva (which, as Royal Elements notes, is excellent for beginners) provide templates and easy-to-use interfaces. GIMP is a powerful free option for image manipulation. Hand-drawing: If you prefer a more artistic touch, good old-fashioned markers, pens, and paper can be used to create your design, which can then be scanned into your computer for printing. 3.2. Printing & Base Materials This is where your design comes to life on a physical surface.  Printable Vinyl: This is the gold standard for durable, printable vinyl bumper stickers. You can find white, clear, matte, or glossy options specifically designed for inkjet or laser printers. Brands like Royal Elements are popular choices among DIY enthusiasts. Regular Paper: For a super budget-friendly alternative, as seen in Instructables' "Nebsi Method," standard printer paper can be used, though it will require significant protection later. 3.3. Protection & Lamination Crucial for transforming printed designs into resilient homemade bumper stickers.  Self-adhesive Laminating Sheets: These are often the key to waterproofing and UV protection, particularly highlighted in both Instructables' and Royal Elements' methods. They come in various finishes (glossy, matte) and sizes. Clear spray sealant (alternative): While not as robust as laminating sheets, a clear acrylic spray can offer some protection against moisture and UV rays. 3.4. Cutting Tools To give your stickers their final shape.  Scissors or craft knife: For simple shapes or when you're just starting out, a good pair of sharp scissors or a craft knife with a cutting mat will do the trick. Cutting machine (Cricut, Silhouette): For precision, intricate designs, or if you plan to make many stickers, a cutting machine like a Cricut or Silhouette is an invaluable investment. 3.5. Application Aids For a smooth, professional finish.  Squeegee: Helps press out air bubbles during application. Rubbing alcohol: Essential for thoroughly cleaning the surface of your vehicle before applying the sticker, ensuring maximum adhesion. 4. Method 1: The Popular Printable Vinyl Bumper Sticker Guide This method, often employed by experienced DIYers and detailed in resources like Royal Elements and wikiHow, is considered the benchmark for creating high-quality, durable custom bumper stickers at home.  Method 1: The Popular Printable Vinyl Bumper Sticker Guide Method 1: The Popular Printable Vinyl Bumper Sticker Guide 4.1. Step 1: Design Your Masterpiece. Start by creating your artwork in your chosen design software. Focus on high-resolution graphics to ensure crisp lines and vibrant colors. Pay attention to the correct dimensions for your desired sticker size. If you’re incorporating text, ensure it’s legible even from a distance, choosing bold fonts and contrasting colors. MerchFox often advises using a CMYK color profile if your printer supports it, as it’s better for print accuracy than RGB.  4.2. Step 2: Print Your Design on Vinyl. Load your printable vinyl into your home printer (inkjet or laser, depending on your vinyl type). It's crucial to select the correct printer settings – typically "photo quality" or "glossy paper" – to ensure the ink adheres properly and colors are vibrant. Print a test sheet on regular paper first to check colors and layout. Once printed on vinyl, allow ample time for the ink to dry completely, usually several hours, to prevent smudging.  4.3. Step 3: Laminate for Ultimate Protection (Crucial for Durability). This is perhaps the most critical step for outdoor waterproof bumper stickers. Laminating protects your sticker from UV fading, water damage, and scratches. Carefully peel back a small corner of your self-adhesive laminating sheet and align it with your printed vinyl. Slowly and steadily press the laminate down, using a squeegee or even a credit card to smooth it out and push any air bubbles towards the edges. Take your time here – a smooth lamination is key to longevity.  4.4. Step 4: Cut Out Your Bumper Sticker. With your design now printed and protected, it’s time to cut it out. For simple shapes, sharp scissors or a craft knife can achieve a clean edge. If you’re using a cutting machine like a Cricut or Silhouette, follow your machine’s instructions for calibrating and cutting, which allows for incredibly precise and complex shapes.  4.5. Step 5: Prepare and Apply Your Sticker. Proper application ensures your sticker stays put. First, thoroughly clean the application surface on your vehicle with rubbing alcohol and let it dry completely. This removes any wax, dirt, or grease that could prevent adhesion. Slowly peel the backing off your bumper sticker. Position it carefully, then apply it from one side to the other, using a squeegee to press it down firmly and work out any remaining air bubbles. For best results, MerchFox recommends applying in moderate temperatures, avoiding extreme heat or cold.  5. Method 2: The Budget-Friendly "Nebsi Production Method" (Laminate & Paper) For those looking for a cost-effective alternative or a more temporary solution, the "Nebsi Production Method," popularized on Instructables, is an ingenious way to create homemade bumper stickers using regular paper and laminating sheets.  Method 2: The Budget-Friendly "Nebsi Production Method" (Laminate & Paper) Method 2: The Budget-Friendly "Nebsi Production Method" (Laminate & Paper) 5.1. Understanding the "Nebsi Method": This method cleverly uses the laminating sheet not just for protection but also to create a repositionable, adhesive layer. By laminating both the front and back of a regular paper print, you encapsulate the design and create a surface that can be adhered to a car and even repositioned with care. It's a fantastic entry point for how to make your own bumper stickers without investing in specialized vinyl.  5.2. Step 1: Design & Print on Regular Paper. Create your design as usual, but this time, print it onto high-quality regular printer paper. While regular paper won't offer the inherent durability of vinyl, focusing on the best possible print resolution will ensure your colors are vibrant and details are crisp.  5.3. Step 2: Apply Laminate to the Front. Carefully apply a self-adhesive laminating sheet to the front (design side) of your printed paper. This layer protects your design from moisture and wear, giving it a glossy or matte finish depending on your laminate choice. Ensure a smooth, bubble-free application, as this is the primary protective layer.  5.4. Step 3: Apply Laminate to the Back. This is the unique step for the "Nebsi Method." Apply a second laminating sheet to the back of your paper. This second layer, once trimmed with a slight border, creates a temporary, repositionable adhesive surface. When you’re ready to apply, you simply peel off a portion of the backing paper from this laminate.  5.5. Step 4: Trim and Finish. Once both sides are laminated, trim your sticker to the desired shape, leaving a small border of laminate around the design. This border helps seal the paper edges, further protecting it from moisture.  5.6. Benefits & Best Use Cases: The Nebsi Method is incredibly cost-effective, yields a nice glossy finish (if using glossy laminate), and offers easy repositioning, making it ideal for temporary messages or if you frequently change your mind. While not as durable as pure vinyl in extreme conditions, it’s a brilliant way to experiment with custom bumper stickers on a budget.  6. Method 3: Quick & Artistic Hand-Drawn Bumper Stickers For those who love a truly unique, artisanal touch, hand-drawn bumper stickers offer unparalleled originality. This method emphasizes creativity and individual flair over mass production.  Method 3: Quick & Artistic Hand-Drawn Bumper Stickers Method 3: Quick & Artistic Hand-Drawn Bumper Stickers 6.1. Materials: You'll need sturdy cardstock or heavy paper, waterproof markers or paints (like acrylics), and clear contact paper or a spray sealant for protection.  6.2. Process: First, draw or paint your design directly onto the cardstock. Once completely dry, apply clear contact paper smoothly over the entire design for basic waterproofing, or use several coats of a clear spray sealant. After the sealant dries, cut out your design. To apply, you can use double-sided outdoor adhesive tape or magnets for a removable option.  6.3. Best for: This method is perfect for truly unique, artistic, one-off designs or protest signs where the raw, handmade aesthetic adds to the message. While less durable than printed vinyl methods, the authenticity is undeniable.  7. Maximizing Durability and Longevity: Pro Tips for Your Bumper Stickers Creating homemade bumper stickers that last requires attention to detail, especially when aiming for outdoor durability.  Maximizing Durability and Longevity: Pro Tips for Your Bumper Stickers Maximizing Durability and Longevity: Pro Tips for Your Bumper Stickers 7.1. The Importance of Quality Lamination: As MerchFox often stresses, lamination is your first line of defense. A high-quality laminating sheet provides critical UV resistance (preventing fading), waterproofing (protecting against rain and washes), and scratch protection (guarding against minor abrasions). Don't skimp on this step for outdoor stickers.  7.2. Material Selection: Choosing weather-resistant printable vinyl, designed specifically for outdoor use, provides a superior base. These materials are formulated to withstand environmental stressors better than standard paper or indoor vinyls.  7.3. Proper Surface Preparation: The longevity of your sticker is directly tied to its adhesion. Always clean the application surface thoroughly with rubbing alcohol to remove any contaminants. A clean, dry surface ensures maximum stick and prevents premature peeling.  7.4. Handling & Storage: Before application, store your stickers flat in a cool, dry place away from direct sunlight. Improper handling, like bending or creasing, can compromise the adhesive or lamination, leading to issues later on.  8. From Hobby to Business: How to Make Bumper Stickers to Sell Turning your passion for custom bumper stickers into a profitable venture is entirely achievable. Many successful businesses started in a home workshop, as resources like wikiHow and Swagify highlight.  From Hobby to Business: How to Make Bumper Stickers to Sell From Hobby to Business: How to Make Bumper Stickers to Sell 8.1. Market Research: Identify trends, popular niches, and target audiences. What messages resonate? What visual styles are currently popular? Research what's selling well on platforms like Etsy or local craft markets.  8.2. Designing for Profit: To create marketable designs, focus on uniqueness, high-quality aesthetics, and broad appeal within your chosen niche. Think about witty phrases, compelling graphics, or designs that speak to specific interests.  8.3. Material & Production Costs: Accurately calculate all your expenses, including printable vinyl, laminating sheets, ink, cutting blades, and even packaging. Understanding these costs is crucial for setting profitable prices. For bulk production, a cutting machine becomes highly cost-effective.  8.4. Pricing Your Bumper Stickers: Consider your production costs, the perceived value of your design, and competitor pricing. Aim for a price that covers your expenses, provides a reasonable profit, and remains attractive to buyers.  8.5. Marketing & Sales Channels: Etsy, Shopify, and other e-commerce platforms are excellent for online sales. Don't overlook local markets, craft fairs, or even collaborating with local businesses. Social media, particularly Instagram and TikTok, are powerful tools for showcasing your designs and reaching potential customers.  8.6. Packaging & Shipping: Presenting a professional product enhances perceived value. Use sturdy envelopes or mailers, and consider adding a small branded insert. Research cost-effective and reliable shipping methods for your DIY bumper stickers.  9. Troubleshooting Common Bumper Sticker Issues Even with the best planning, sometimes things don't go perfectly. Knowing how to troubleshoot common problems can save your project.  Troubleshooting Common Bumper Sticker Issues  Fading colors or cracking: This usually indicates insufficient UV protection. Ensure you're using quality laminating sheets with UV inhibitors, or a clear spray sealant specifically designed for outdoor use. Bubbles or peeling during application: Often caused by improper surface cleaning or rushed application. Clean thoroughly, apply slowly with a squeegee from the center outwards, and work in moderate temperatures. Difficulty removing old stickers cleanly: For stubborn stickers, heat (from a hairdryer on a low setting) can soften the adhesive. Plastic scrapers and adhesive removers (like Goo Gone) can help with residue, but always test on an inconspicuous area first. Ink smudging or bleeding during printing: This is typically due to incorrect printer settings (e.g., wrong paper type selected) or not allowing enough drying time before handling or laminating. Ensure your printer settings match your vinyl type and be patient with drying. 10. Frequently Asked Questions (FAQs) About DIY Bumper Stickers Frequently Asked Questions (FAQs) About DIY Bumper Stickers  Q: How long do homemade bumper stickers typically last? A: The lifespan of homemade bumper stickers varies greatly depending on the method and materials used. High-quality printable vinyl with robust lamination can last 3-5 years outdoors. Budget-friendly paper methods might last a few months to a year, especially if exposed to harsh weather.  Q: Can I use a regular home printer (inkjet/laser)? A: Yes, absolutely! Both inkjet and laser printers can be used to print bumper stickers at home, provided you choose printable vinyl or paper specifically designed for your printer type. Always check the product description of your chosen material.  Q: Are all homemade bumper stickers waterproof? A: No, not inherently. To make waterproof bumper stickers, you must laminate them with self-adhesive sheets or use a waterproof clear spray sealant. The printable vinyl itself might be water-resistant, but the ink and paper (if used) need protection.  Q: What's the best way to remove an old bumper sticker without damaging my car? A: The safest method involves using heat (a hairdryer on low) to soften the adhesive, then gently peeling the sticker off. For stubborn residue, automotive adhesive removers or rubbing alcohol can be used, but always test on a hidden area first.  Q: Can I make transparent bumper stickers at home? A: Yes, you can! You'll need to purchase transparent or clear printable vinyl. The process is similar to white vinyl, but your design will need to account for the transparency of the background. Remember that light colors and whites won't show up well on a transparent sticker without a white underlayer.  11. Conclusion: Your Road to Custom Bumper Sticker Success Starts Now! Conclusion: Your Road to Custom Bumper Sticker Success Starts Now!  There you have it – a comprehensive guide to mastering how to make your own bumper stickers. From selecting your purpose and gathering materials to printing, laminating, and even selling your creations, the journey is both creative and rewarding. Whether you're aiming for personal expression, thoughtful gifts, or a new entrepreneurial venture, the tools and knowledge are now at your fingertips.  Don't be afraid to experiment with different designs, colors, and methods. Each attempt refines your skills and brings you closer to crafting that perfect sticker. As we at MerchFox have seen, the satisfaction of seeing your own custom bumper stickers on a car, a laptop, or even a water bottle is unmatched. So go ahead, unleash your creativity, and let your message hit the road!

The open road is a canvas, and what better way to express yourself, share a laugh, or promote a cause than with a custom bumper sticker? Far from just a decorative piece, a well-placed sticker on your vehicle transforms it into a mobile billboard for your personality or brand. The thought of creating your own might seem daunting, but it’s an incredibly rewarding and surprisingly straightforward DIY project. From personalizing your ride to crafting unique gifts, diving into the world of how to make your own bumper stickers opens up a realm of creative possibilities. The beauty of DIY bumper stickers lies in their personalization and cost-effectiveness. You’re not limited by mass-produced designs, allowing you to create truly unique, eye-catching visuals. Plus, it's a fun hobby that can even blossom into a profitable side hustle. This comprehensive guide will cover everything you need to know, from multiple reliable methods and essential tools to clever design tips and advanced considerations for durability. Here at MerchFox, we’ve explored the ins and outs of custom creations, and we’re excited to share our insights to help you get started on your bumper sticker journey. Before You Begin: Defining Your Bumper Sticker Project Before you gather your materials and fire up your design software, take a moment to clarify your project's scope. This initial planning stage is crucial for choosing the right method and materials for your homemade bumper stickers. 2.1. Purpose: Personal Expression, Gifts, Branding, or Resale? Are you looking to simply adorn your own car with a funny quote, create a thoughtful gift for a friend, or perhaps promote your small business? Maybe you're even exploring how to make your own bumper stickers with the intent to sell them. Your ultimate purpose will significantly influence your material choices and desired durability. For a personal touch, simple methods might suffice, but for branding or resale, professional-grade materials and longevity become paramount. 2.2. Durability Needs: Indoor vs. Outdoor, Temporary vs. Long-Lasting, Weather-Resistance. A sticker for an indoor laptop won't need the same robust protection as one exposed to sun, rain, and road grime. For truly outdoor-ready, waterproof bumper stickers, weather-resistance and UV protection are non-negotiable. Consider how long you want your sticker to last and under what conditions it will be displayed. This will guide your selection of laminates and printing materials. 2.3. Design Ideas: Brainstorming Themes, Messages, Visual Style. This is where your creativity truly comes alive! Think about what you want your custom bumper stickers to communicate. Will it be humorous, political, artistic, or informative? Sketch out some ideas, consider fonts, colors, and imagery. A strong initial design concept will streamline the entire process, ensuring your final product effectively conveys your message. Essential Materials & Tools for Homemade Bumper Stickers Having the right arsenal of materials and tools is key to successful DIY bumper stickers. Fortunately, most items are readily available, often found at your local craft store or online. 3.1. Design Software/Tools Your design journey starts here. Computer-based: For professional results, programs like Adobe Illustrator or Photoshop offer extensive control. However, user-friendly alternatives like Canva (which, as Royal Elements notes, is excellent for beginners) provide templates and easy-to-use interfaces. GIMP is a powerful free option for image manipulation. Hand-drawing: If you prefer a more artistic touch, good old-fashioned markers, pens, and paper can be used to create your design, which can then be scanned into your computer for printing. 3.2. Printing & Base Materials This is where your design comes to life on a physical surface. Printable Vinyl: This is the gold standard for durable, printable vinyl bumper stickers. You can find white, clear, matte, or glossy options specifically designed for inkjet or laser printers. Brands like Royal Elements are popular choices among DIY enthusiasts. Regular Paper: For a super budget-friendly alternative, as seen in Instructables' "Nebsi Method," standard printer paper can be used, though it will require significant protection later. 3.3. Protection & Lamination Crucial for transforming printed designs into resilient homemade bumper stickers. Self-adhesive Laminating Sheets: These are often the key to waterproofing and UV protection, particularly highlighted in both Instructables' and Royal Elements' methods. They come in various finishes (glossy, matte) and sizes. Clear spray sealant (alternative): While not as robust as laminating sheets, a clear acrylic spray can offer some protection against moisture and UV rays. 3.4. Cutting Tools To give your stickers their final shape. Scissors or craft knife: For simple shapes or when you're just starting out, a good pair of sharp scissors or a craft knife with a cutting mat will do the trick. Cutting machine (Cricut, Silhouette): For precision, intricate designs, or if you plan to make many stickers, a cutting machine like a Cricut or Silhouette is an invaluable investment. 3.5. Application Aids For a smooth, professional finish. Squeegee: Helps press out air bubbles during application. Rubbing alcohol: Essential for thoroughly cleaning the surface of your vehicle before applying the sticker, ensuring maximum adhesion. 4. Method 1: The Popular Printable Vinyl Bumper Sticker Guide This method, often employed by experienced DIYers and detailed in resources like Royal Elements and wikiHow, is considered the benchmark for creating high-quality, durable custom bumper stickers at home. Method 1: The Popular Printable Vinyl Bumper Sticker Guide Method 1: The Popular Printable Vinyl Bumper Sticker Guide 4.1. Step 1: Design Your Masterpiece. Start by creating your artwork in your chosen design software. Focus on high-resolution graphics to ensure crisp lines and vibrant colors. Pay attention to the correct dimensions for your desired sticker size. If you’re incorporating text, ensure it’s legible even from a distance, choosing bold fonts and contrasting colors. MerchFox often advises using a CMYK color profile if your printer supports it, as it’s better for print accuracy than RGB. 4.2. Step 2: Print Your Design on Vinyl. Load your printable vinyl into your home printer (inkjet or laser, depending on your vinyl type). It's crucial to select the correct printer settings – typically "photo quality" or "glossy paper" – to ensure the ink adheres properly and colors are vibrant. Print a test sheet on regular paper first to check colors and layout. Once printed on vinyl, allow ample time for the ink to dry completely, usually several hours, to prevent smudging. 4.3. Step 3: Laminate for Ultimate Protection (Crucial for Durability). This is perhaps the most critical step for outdoor waterproof bumper stickers. Laminating protects your sticker from UV fading, water damage, and scratches. Carefully peel back a small corner of your self-adhesive laminating sheet and align it with your printed vinyl. Slowly and steadily press the laminate down, using a squeegee or even a credit card to smooth it out and push any air bubbles towards the edges. Take your time here – a smooth lamination is key to longevity. 4.4. Step 4: Cut Out Your Bumper Sticker. With your design now printed and protected, it’s time to cut it out. For simple shapes, sharp scissors or a craft knife can achieve a clean edge. If you’re using a cutting machine like a Cricut or Silhouette, follow your machine’s instructions for calibrating and cutting, which allows for incredibly precise and complex shapes. 4.5. Step 5: Prepare and Apply Your Sticker. Proper application ensures your sticker stays put. First, thoroughly clean the application surface on your vehicle with rubbing alcohol and let it dry completely. This removes any wax, dirt, or grease that could prevent adhesion. Slowly peel the backing off your bumper sticker. Position it carefully, then apply it from one side to the other, using a squeegee to press it down firmly and work out any remaining air bubbles. For best results, MerchFox recommends applying in moderate temperatures, avoiding extreme heat or cold. 5. Method 2: The Budget-Friendly "Nebsi Production Method" (Laminate & Paper) For those looking for a cost-effective alternative or a more temporary solution, the "Nebsi Production Method," popularized on Instructables, is an ingenious way to create homemade bumper stickers using regular paper and laminating sheets. Method 2: The Budget-Friendly "Nebsi Production Method" (Laminate & Paper) Method 2: The Budget-Friendly "Nebsi Production Method" (Laminate & Paper) 5.1. Understanding the "Nebsi Method": This method cleverly uses the laminating sheet not just for protection but also to create a repositionable, adhesive layer. By laminating both the front and back of a regular paper print, you encapsulate the design and create a surface that can be adhered to a car and even repositioned with care. It's a fantastic entry point for how to make your own bumper stickers without investing in specialized vinyl. 5.2. Step 1: Design & Print on Regular Paper. Create your design as usual, but this time, print it onto high-quality regular printer paper. While regular paper won't offer the inherent durability of vinyl, focusing on the best possible print resolution will ensure your colors are vibrant and details are crisp. 5.3. Step 2: Apply Laminate to the Front. Carefully apply a self-adhesive laminating sheet to the front (design side) of your printed paper. This layer protects your design from moisture and wear, giving it a glossy or matte finish depending on your laminate choice. Ensure a smooth, bubble-free application, as this is the primary protective layer. 5.4. Step 3: Apply Laminate to the Back. This is the unique step for the "Nebsi Method." Apply a second laminating sheet to the back of your paper. This second layer, once trimmed with a slight border, creates a temporary, repositionable adhesive surface. When you’re ready to apply, you simply peel off a portion of the backing paper from this laminate. 5.5. Step 4: Trim and Finish. Once both sides are laminated, trim your sticker to the desired shape, leaving a small border of laminate around the design. This border helps seal the paper edges, further protecting it from moisture. 5.6. Benefits & Best Use Cases: The Nebsi Method is incredibly cost-effective, yields a nice glossy finish (if using glossy laminate), and offers easy repositioning, making it ideal for temporary messages or if you frequently change your mind. While not as durable as pure vinyl in extreme conditions, it’s a brilliant way to experiment with custom bumper stickers on a budget. 6. Method 3: Quick & Artistic Hand-Drawn Bumper Stickers For those who love a truly unique, artisanal touch, hand-drawn bumper stickers offer unparalleled originality. This method emphasizes creativity and individual flair over mass production. Method 3: Quick & Artistic Hand-Drawn Bumper Stickers Method 3: Quick & Artistic Hand-Drawn Bumper Stickers 6.1. Materials: You'll need sturdy cardstock or heavy paper, waterproof markers or paints (like acrylics), and clear contact paper or a spray sealant for protection. 6.2. Process: First, draw or paint your design directly onto the cardstock. Once completely dry, apply clear contact paper smoothly over the entire design for basic waterproofing, or use several coats of a clear spray sealant. After the sealant dries, cut out your design. To apply, you can use double-sided outdoor adhesive tape or magnets for a removable option. 6.3. Best for: This method is perfect for truly unique, artistic, one-off designs or protest signs where the raw, handmade aesthetic adds to the message. While less durable than printed vinyl methods, the authenticity is undeniable. 7. Maximizing Durability and Longevity: Pro Tips for Your Bumper Stickers Creating homemade bumper stickers that last requires attention to detail, especially when aiming for outdoor durability. Maximizing Durability and Longevity: Pro Tips for Your Bumper Stickers Maximizing Durability and Longevity: Pro Tips for Your Bumper Stickers 7.1. The Importance of Quality Lamination: As MerchFox often stresses, lamination is your first line of defense. A high-quality laminating sheet provides critical UV resistance (preventing fading), waterproofing (protecting against rain and washes), and scratch protection (guarding against minor abrasions). Don't skimp on this step for outdoor stickers. 7.2. Material Selection: Choosing weather-resistant printable vinyl, designed specifically for outdoor use, provides a superior base. These materials are formulated to withstand environmental stressors better than standard paper or indoor vinyls. 7.3. Proper Surface Preparation: The longevity of your sticker is directly tied to its adhesion. Always clean the application surface thoroughly with rubbing alcohol to remove any contaminants. A clean, dry surface ensures maximum stick and prevents premature peeling. 7.4. Handling & Storage: Before application, store your stickers flat in a cool, dry place away from direct sunlight. Improper handling, like bending or creasing, can compromise the adhesive or lamination, leading to issues later on. 8. From Hobby to Business: How to Make Bumper Stickers to Sell Turning your passion for custom bumper stickers into a profitable venture is entirely achievable. Many successful businesses started in a home workshop, as resources like wikiHow and Swagify highlight. From Hobby to Business: How to Make Bumper Stickers to Sell From Hobby to Business: How to Make Bumper Stickers to Sell 8.1. Market Research: Identify trends, popular niches, and target audiences. What messages resonate? What visual styles are currently popular? Research what's selling well on platforms like Etsy or local craft markets. 8.2. Designing for Profit: To create marketable designs, focus on uniqueness, high-quality aesthetics, and broad appeal within your chosen niche. Think about witty phrases, compelling graphics, or designs that speak to specific interests. 8.3. Material & Production Costs: Accurately calculate all your expenses, including printable vinyl, laminating sheets, ink, cutting blades, and even packaging. Understanding these costs is crucial for setting profitable prices. For bulk production, a cutting machine becomes highly cost-effective. 8.4. Pricing Your Bumper Stickers: Consider your production costs, the perceived value of your design, and competitor pricing. Aim for a price that covers your expenses, provides a reasonable profit, and remains attractive to buyers. 8.5. Marketing & Sales Channels: Etsy, Shopify, and other e-commerce platforms are excellent for online sales. Don't overlook local markets, craft fairs, or even collaborating with local businesses. Social media, particularly Instagram and TikTok, are powerful tools for showcasing your designs and reaching potential customers. 8.6. Packaging & Shipping: Presenting a professional product enhances perceived value. Use sturdy envelopes or mailers, and consider adding a small branded insert. Research cost-effective and reliable shipping methods for your DIY bumper stickers. 9. Troubleshooting Common Bumper Sticker Issues Even with the best planning, sometimes things don't go perfectly. Knowing how to troubleshoot common problems can save your project. Troubleshooting Common Bumper Sticker Issues Fading colors or cracking: This usually indicates insufficient UV protection. Ensure you're using quality laminating sheets with UV inhibitors, or a clear spray sealant specifically designed for outdoor use. Bubbles or peeling during application: Often caused by improper surface cleaning or rushed application. Clean thoroughly, apply slowly with a squeegee from the center outwards, and work in moderate temperatures. Difficulty removing old stickers cleanly: For stubborn stickers, heat (from a hairdryer on a low setting) can soften the adhesive. Plastic scrapers and adhesive removers (like Goo Gone) can help with residue, but always test on an inconspicuous area first. Ink smudging or bleeding during printing: This is typically due to incorrect printer settings (e.g., wrong paper type selected) or not allowing enough drying time before handling or laminating. Ensure your printer settings match your vinyl type and be patient with drying. 10. Frequently Asked Questions (FAQs) About DIY Bumper Stickers Frequently Asked Questions (FAQs) About DIY Bumper Stickers Q: How long do homemade bumper stickers typically last? A: The lifespan of homemade bumper stickers varies greatly depending on the method and materials used. High-quality printable vinyl with robust lamination can last 3-5 years outdoors. Budget-friendly paper methods might last a few months to a year, especially if exposed to harsh weather. Q: Can I use a regular home printer (inkjet/laser)? A: Yes, absolutely! Both inkjet and laser printers can be used to print bumper stickers at home, provided you choose printable vinyl or paper specifically designed for your printer type. Always check the product description of your chosen material. Q: Are all homemade bumper stickers waterproof? A: No, not inherently. To make waterproof bumper stickers, you must laminate them with self-adhesive sheets or use a waterproof clear spray sealant. The printable vinyl itself might be water-resistant, but the ink and paper (if used) need protection. Q: What's the best way to remove an old bumper sticker without damaging my car? A: The safest method involves using heat (a hairdryer on low) to soften the adhesive, then gently peeling the sticker off. For stubborn residue, automotive adhesive removers or rubbing alcohol can be used, but always test on a hidden area first. Q: Can I make transparent bumper stickers at home? A: Yes, you can! You'll need to purchase transparent or clear printable vinyl. The process is similar to white vinyl, but your design will need to account for the transparency of the background. Remember that light colors and whites won't show up well on a transparent sticker without a white underlayer. 11. Conclusion: Your Road to Custom Bumper Sticker Success Starts Now! Conclusion: Your Road to Custom Bumper Sticker Success Starts Now! There you have it – a comprehensive guide to mastering how to make your own bumper stickers. From selecting your purpose and gathering materials to printing, laminating, and even selling your creations, the journey is both creative and rewarding. Whether you're aiming for personal expression, thoughtful gifts, or a new entrepreneurial venture, the tools and knowledge are now at your fingertips. Don't be afraid to experiment with different designs, colors, and methods. Each attempt refines your skills and brings you closer to crafting that perfect sticker. As we at MerchFox have seen, the satisfaction of seeing your own custom bumper stickers on a car, a laptop, or even a water bottle is unmatched. So go ahead, unleash your creativity, and let your message hit the road!

Have you ever designed something beautiful on your computer, only to have it come back from the printer looking completely different? It's a common, frustrating experience for many designers and businesses. The vibrant blues become dull purples, and bright greens turn muddy. This isn't a printer conspiracy; it's a fundamental misunderstanding of how colors translate between the digital and physical worlds. As MerchFox often shares from their extensive experience, this color discrepancy is almost always due to the difference between RGB and CMYK color systems.

Read article