

For Print-on-Demand (POD) sellers, this shift presents an exciting opportunity. Personalized pet apparel has become one of the fastest-growing categories in the gifting and lifestyle market, offering strong year-round demand instead of relying solely on seasonal trends.
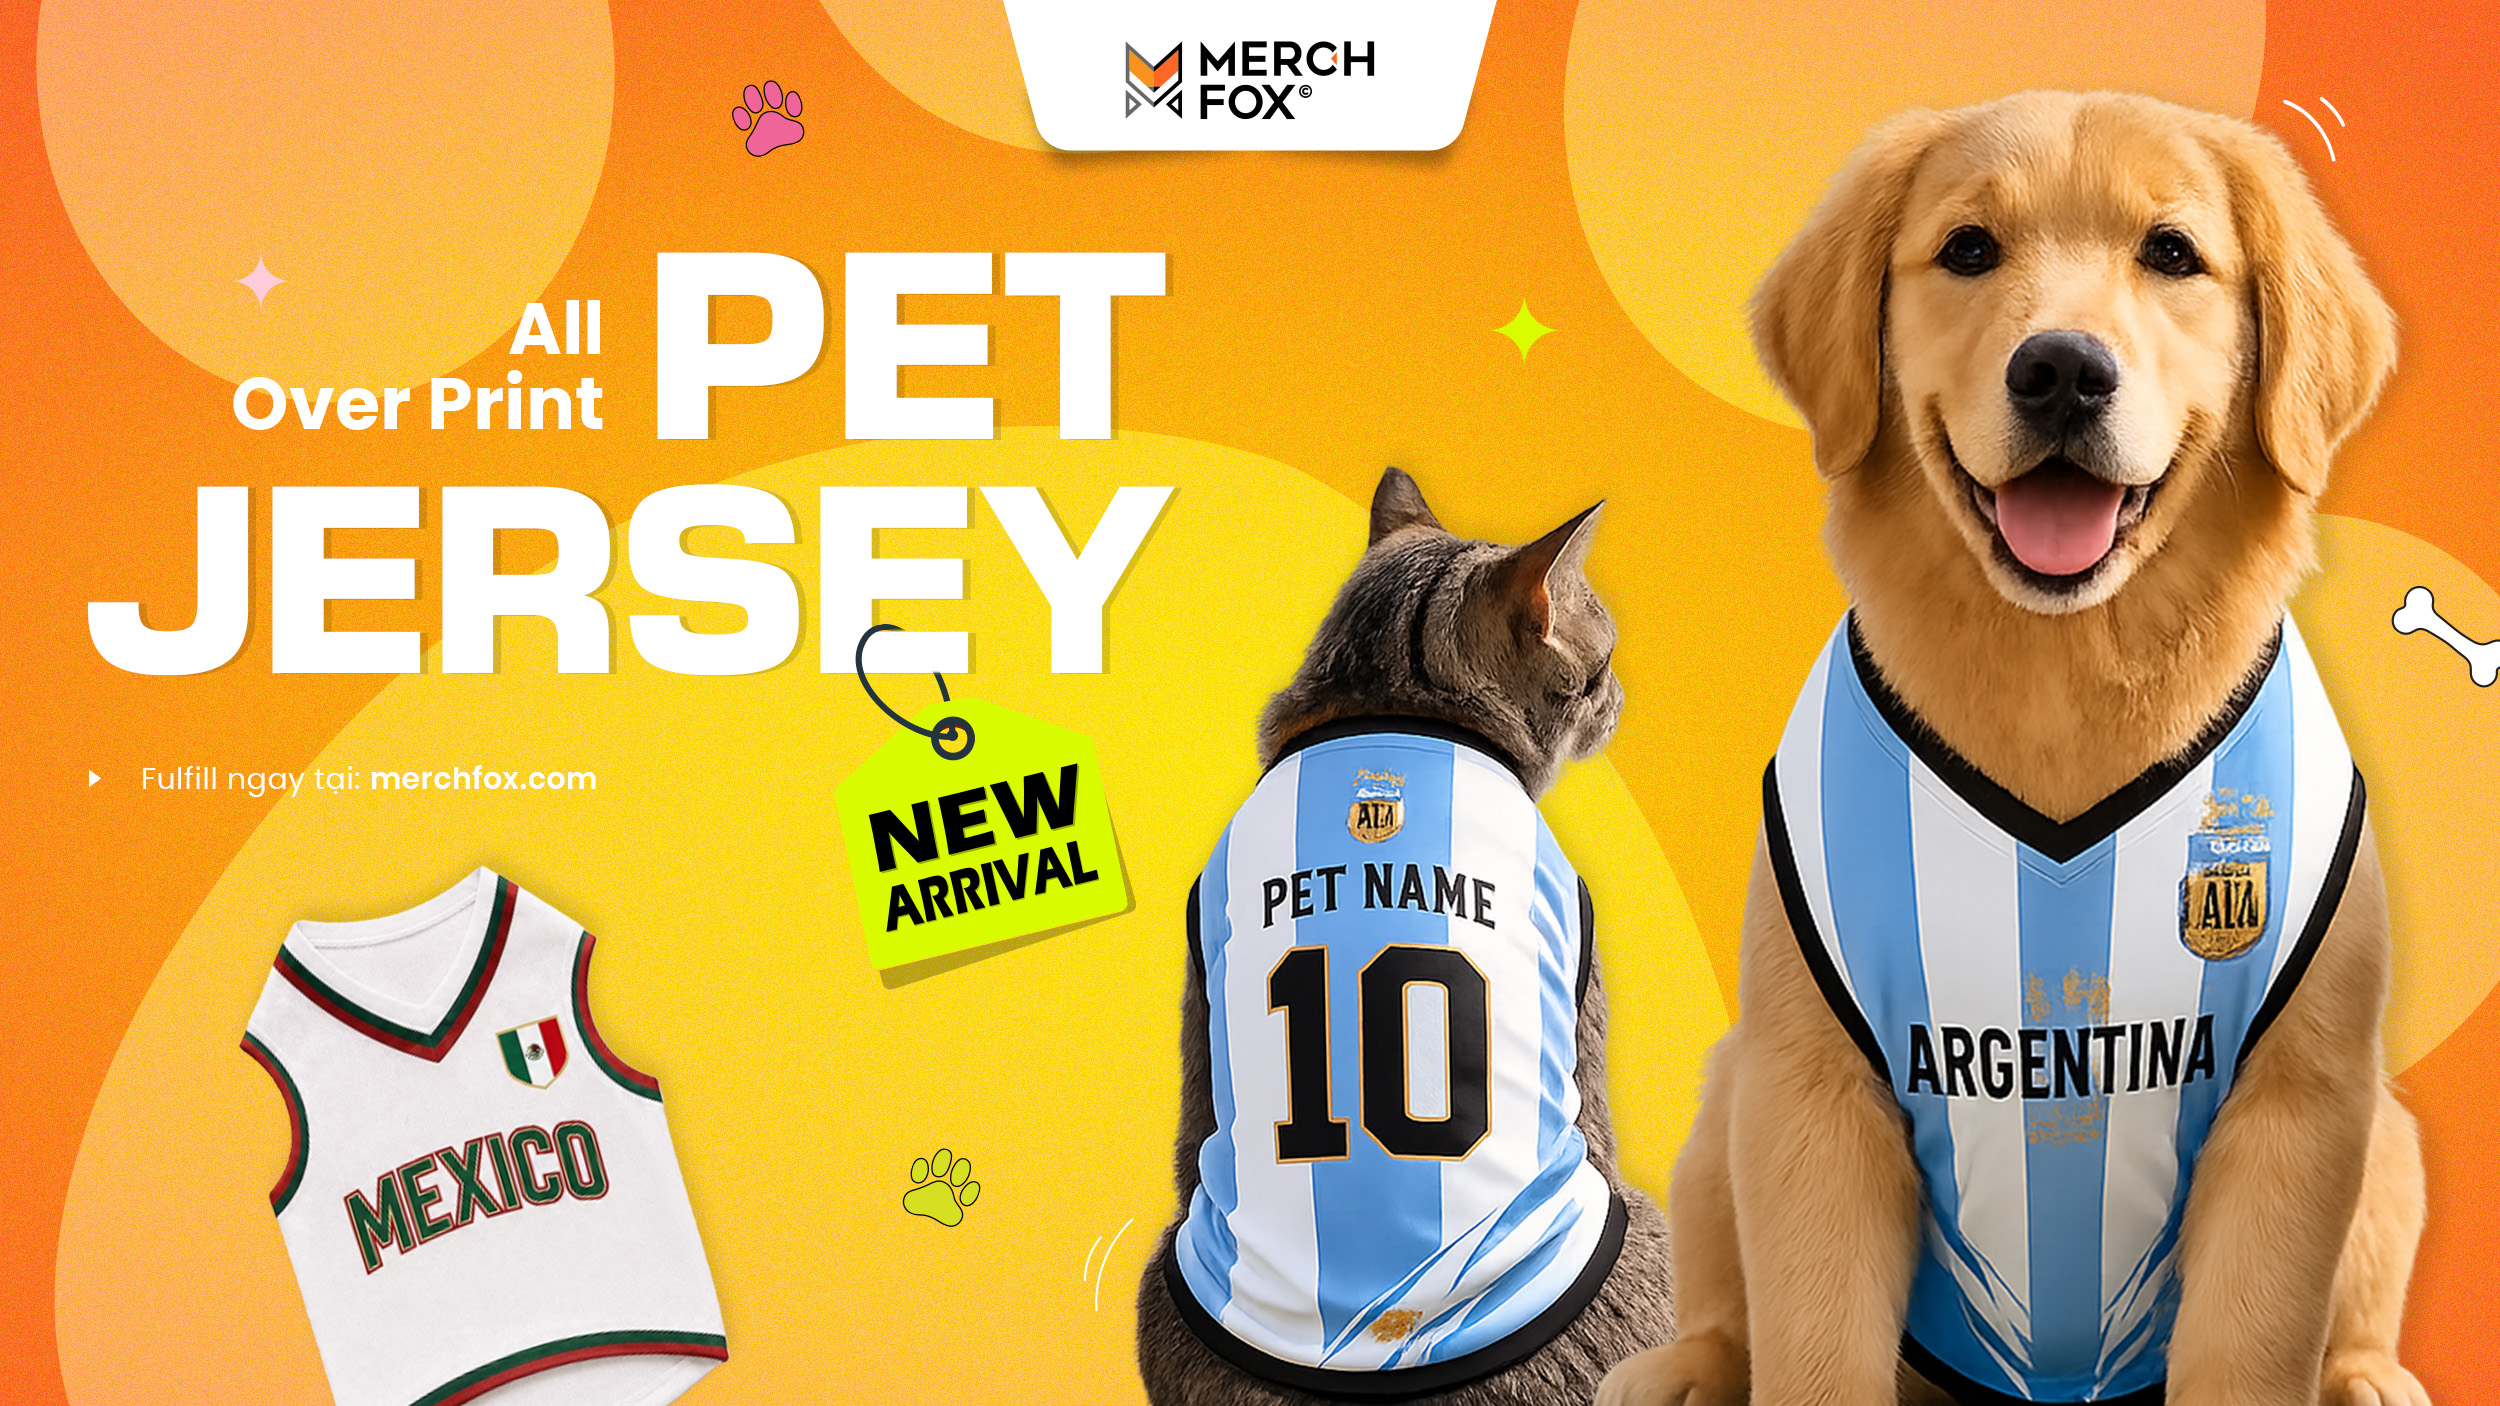
To help sellers capture this growing niche, MerchFox has officially added the 3D-VN All-Over Print Pet Jersey to its product lineup—giving businesses another versatile product for expanding their pet collections.
Why the Pet Niche Continues to Grow
Unlike many seasonal niches, pet lovers purchase products throughout the year.
Whether celebrating birthdays, holidays, adoption anniversaries, or simply expressing affection for their furry companions, pet owners consistently invest in customized products that strengthen their emotional connection with their pets.
Popular pet-related categories include:
Personalized pet apparel
Matching owner-and-pet outfits
Holiday collections
Birthday gifts
Memorial keepsakes
Sports-inspired accessories
Breed-specific merchandise
This makes pet apparel one of the most reliable long-term opportunities for POD sellers.
Introducing the 3D All-Over Print Pet Jersey
Designed for both comfort and creativity, the 3D-VN All-Over Print Pet Jersey combines premium materials with vibrant all-over printing to create eye-catching apparel for dogs, cats, and other small pets.
Its full-print capability allows sellers to develop unique collections that stand out from traditional pet accessories while offering endless personalization possibilities.
Premium Features Designed for Everyday Wear
Comfortable Bird-Eye Pique Fabric
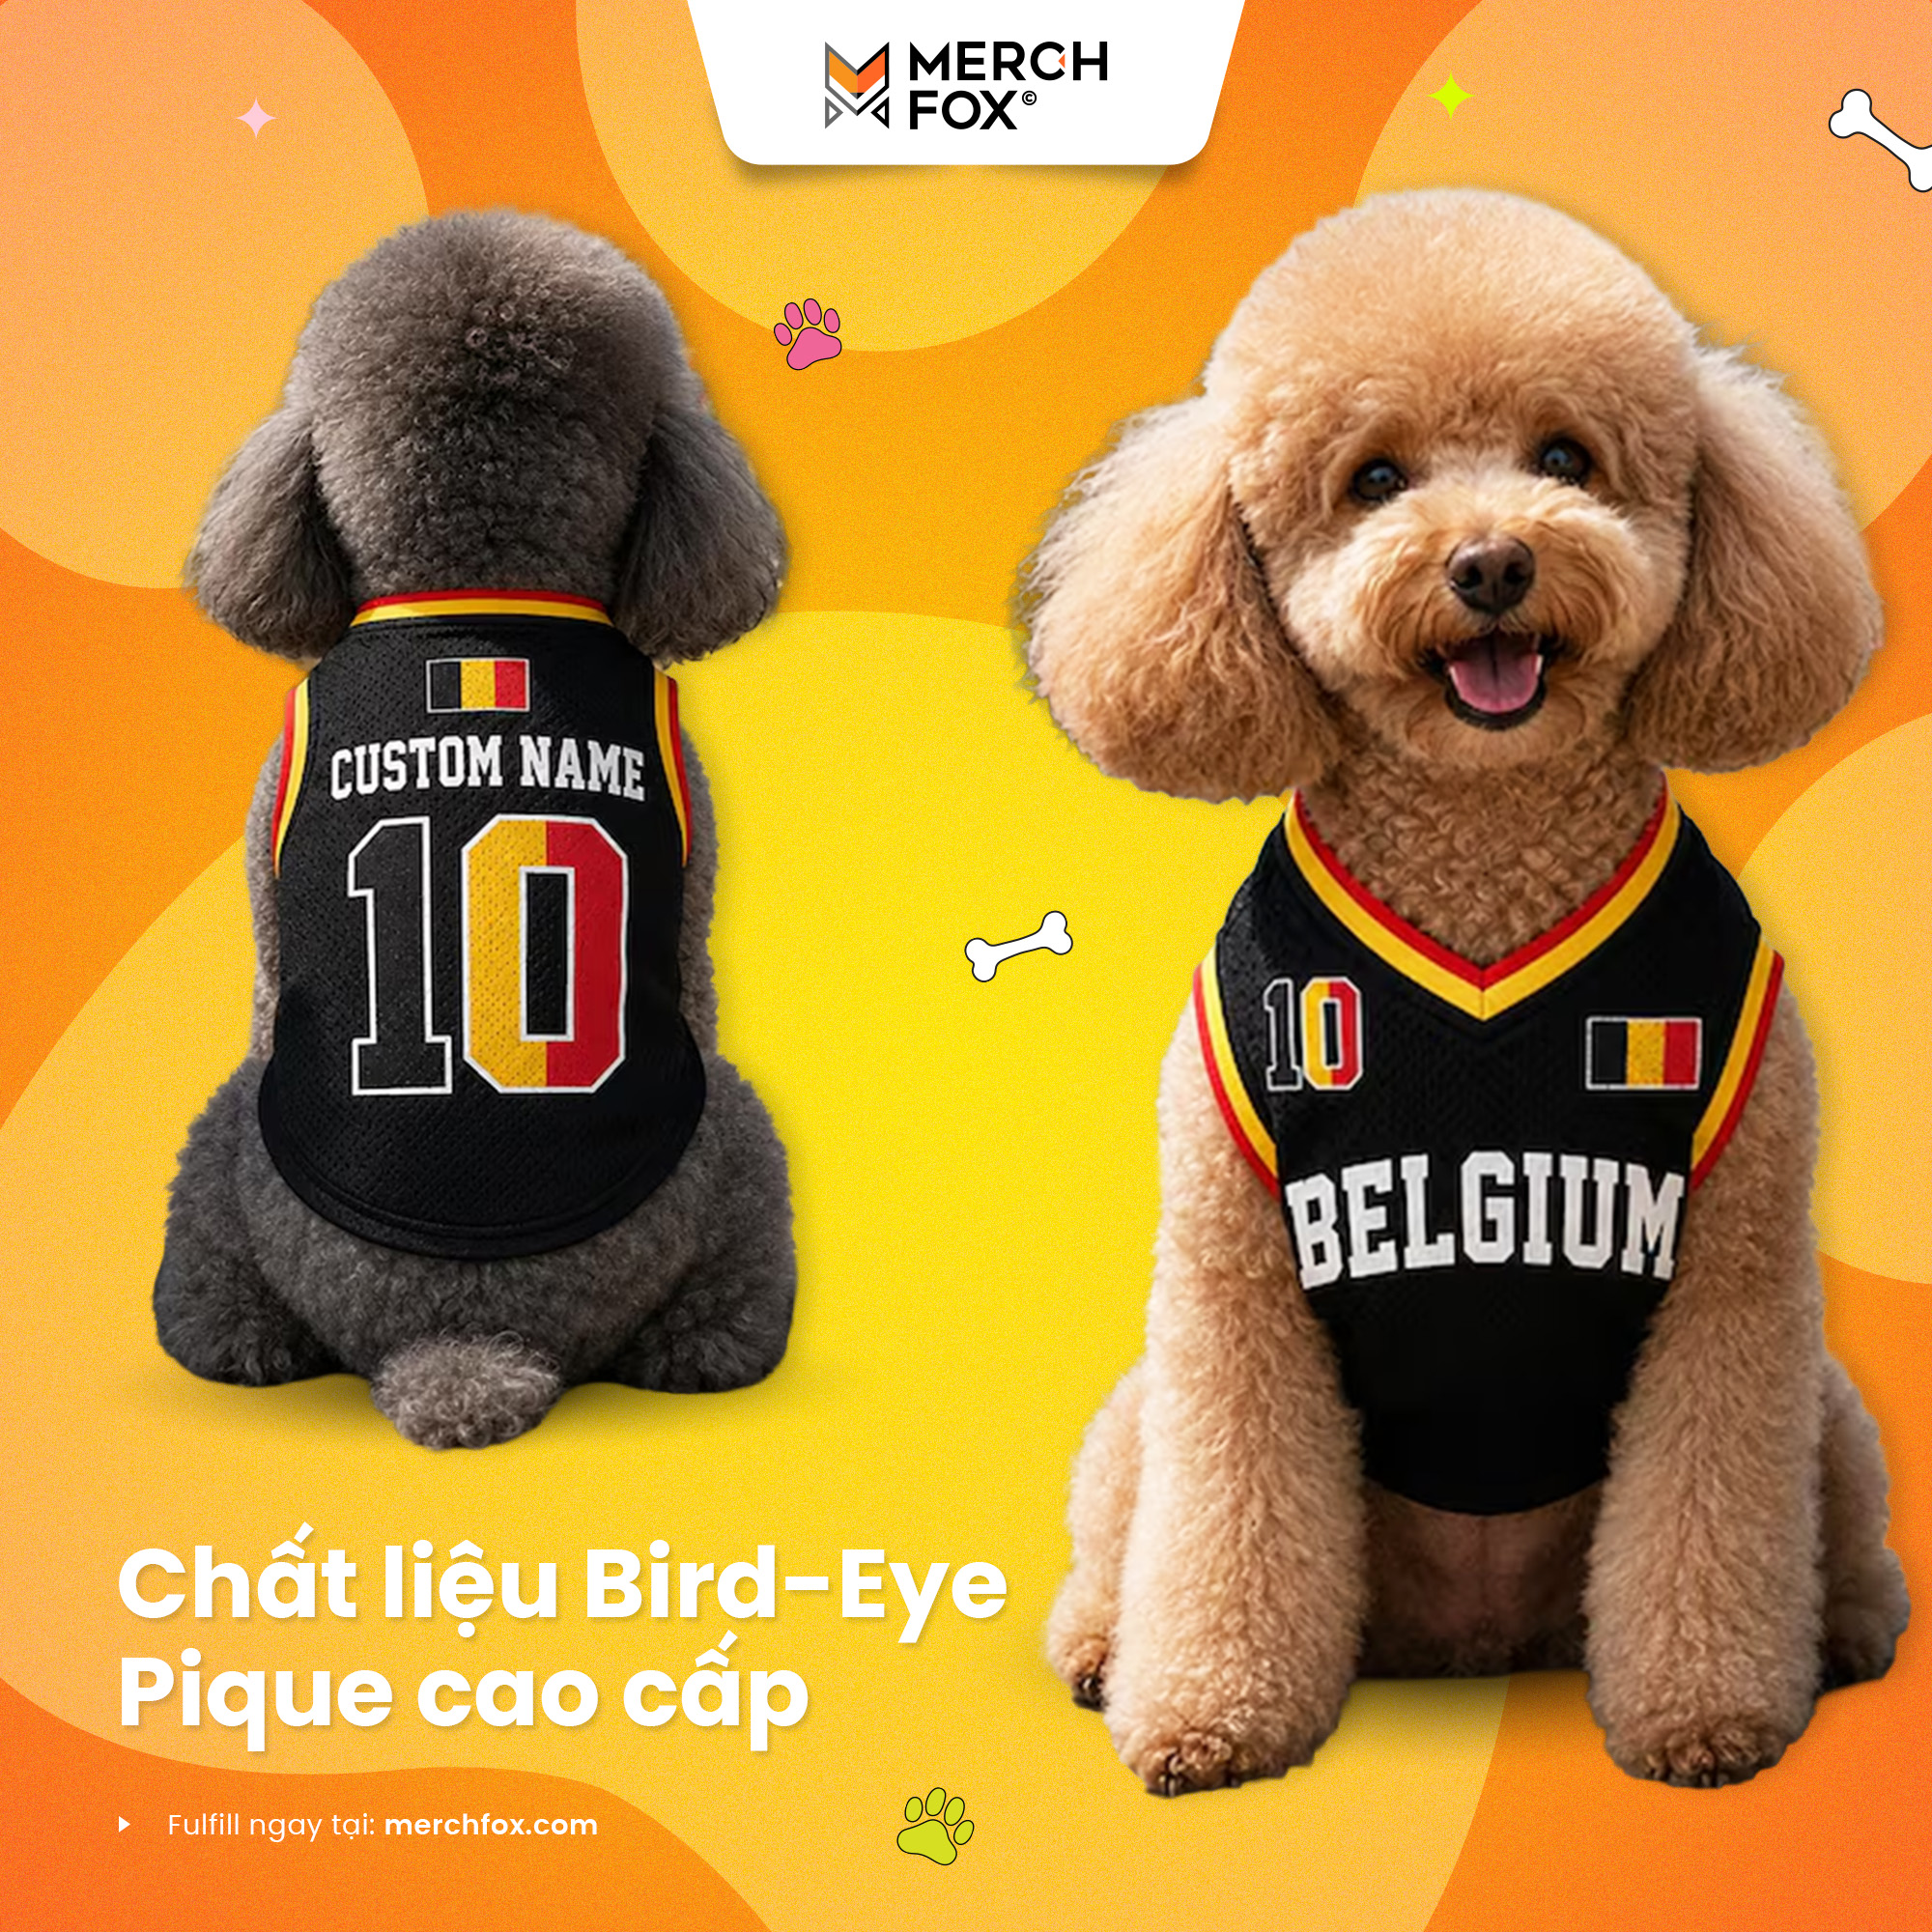
Comfortable Bird-Eye Pique Fabric
The jersey is made from high-quality Bird-Eye Pique fabric, known for being:
Lightweight
Breathable
Soft against a pet's skin
Comfortable for extended wear
Whether pets are relaxing at home or joining family outings, the fabric is designed to provide lasting comfort.
Vibrant All-Over Sublimation Printing
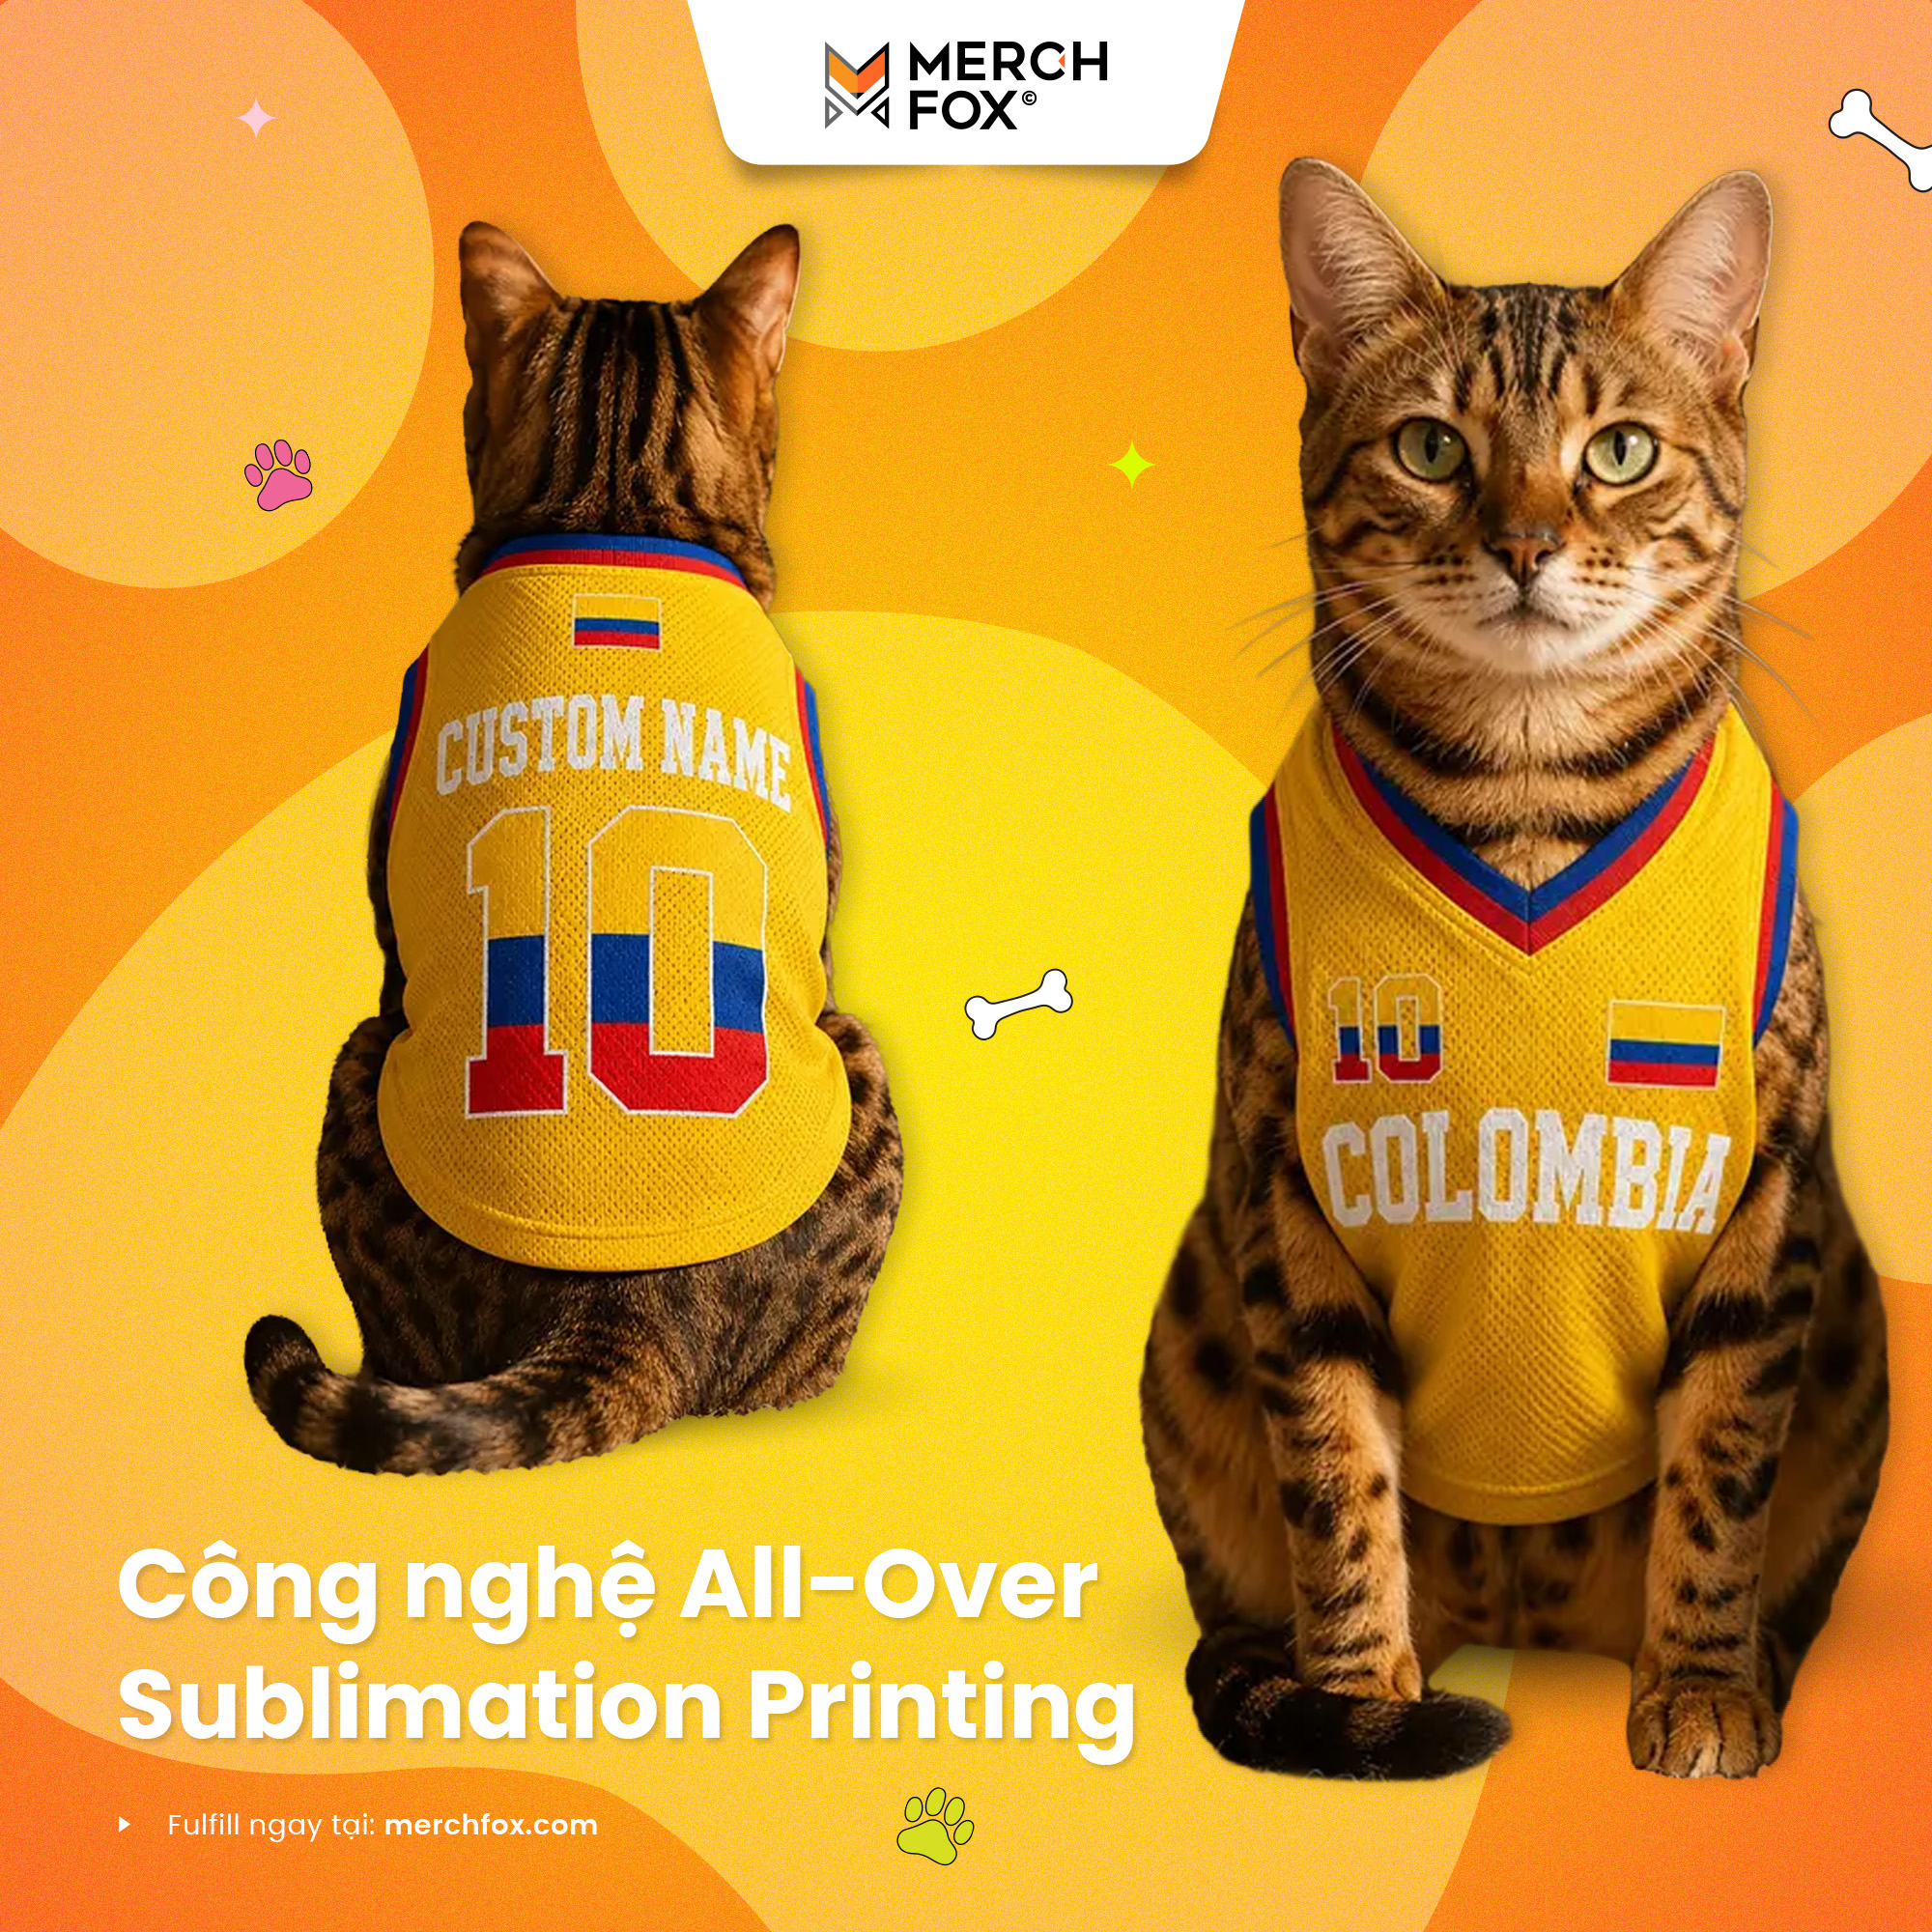
Vibrant All-Over Sublimation Printing
Using advanced All-Over Sublimation Printing, designs cover the entire garment with exceptional color clarity.
Benefits include:
Bright, vibrant colors
Edge-to-edge graphics
Excellent print durability
Resistance to peeling and fading
This gives designers complete creative freedom without worrying about limited print areas.
Wide Size Selection
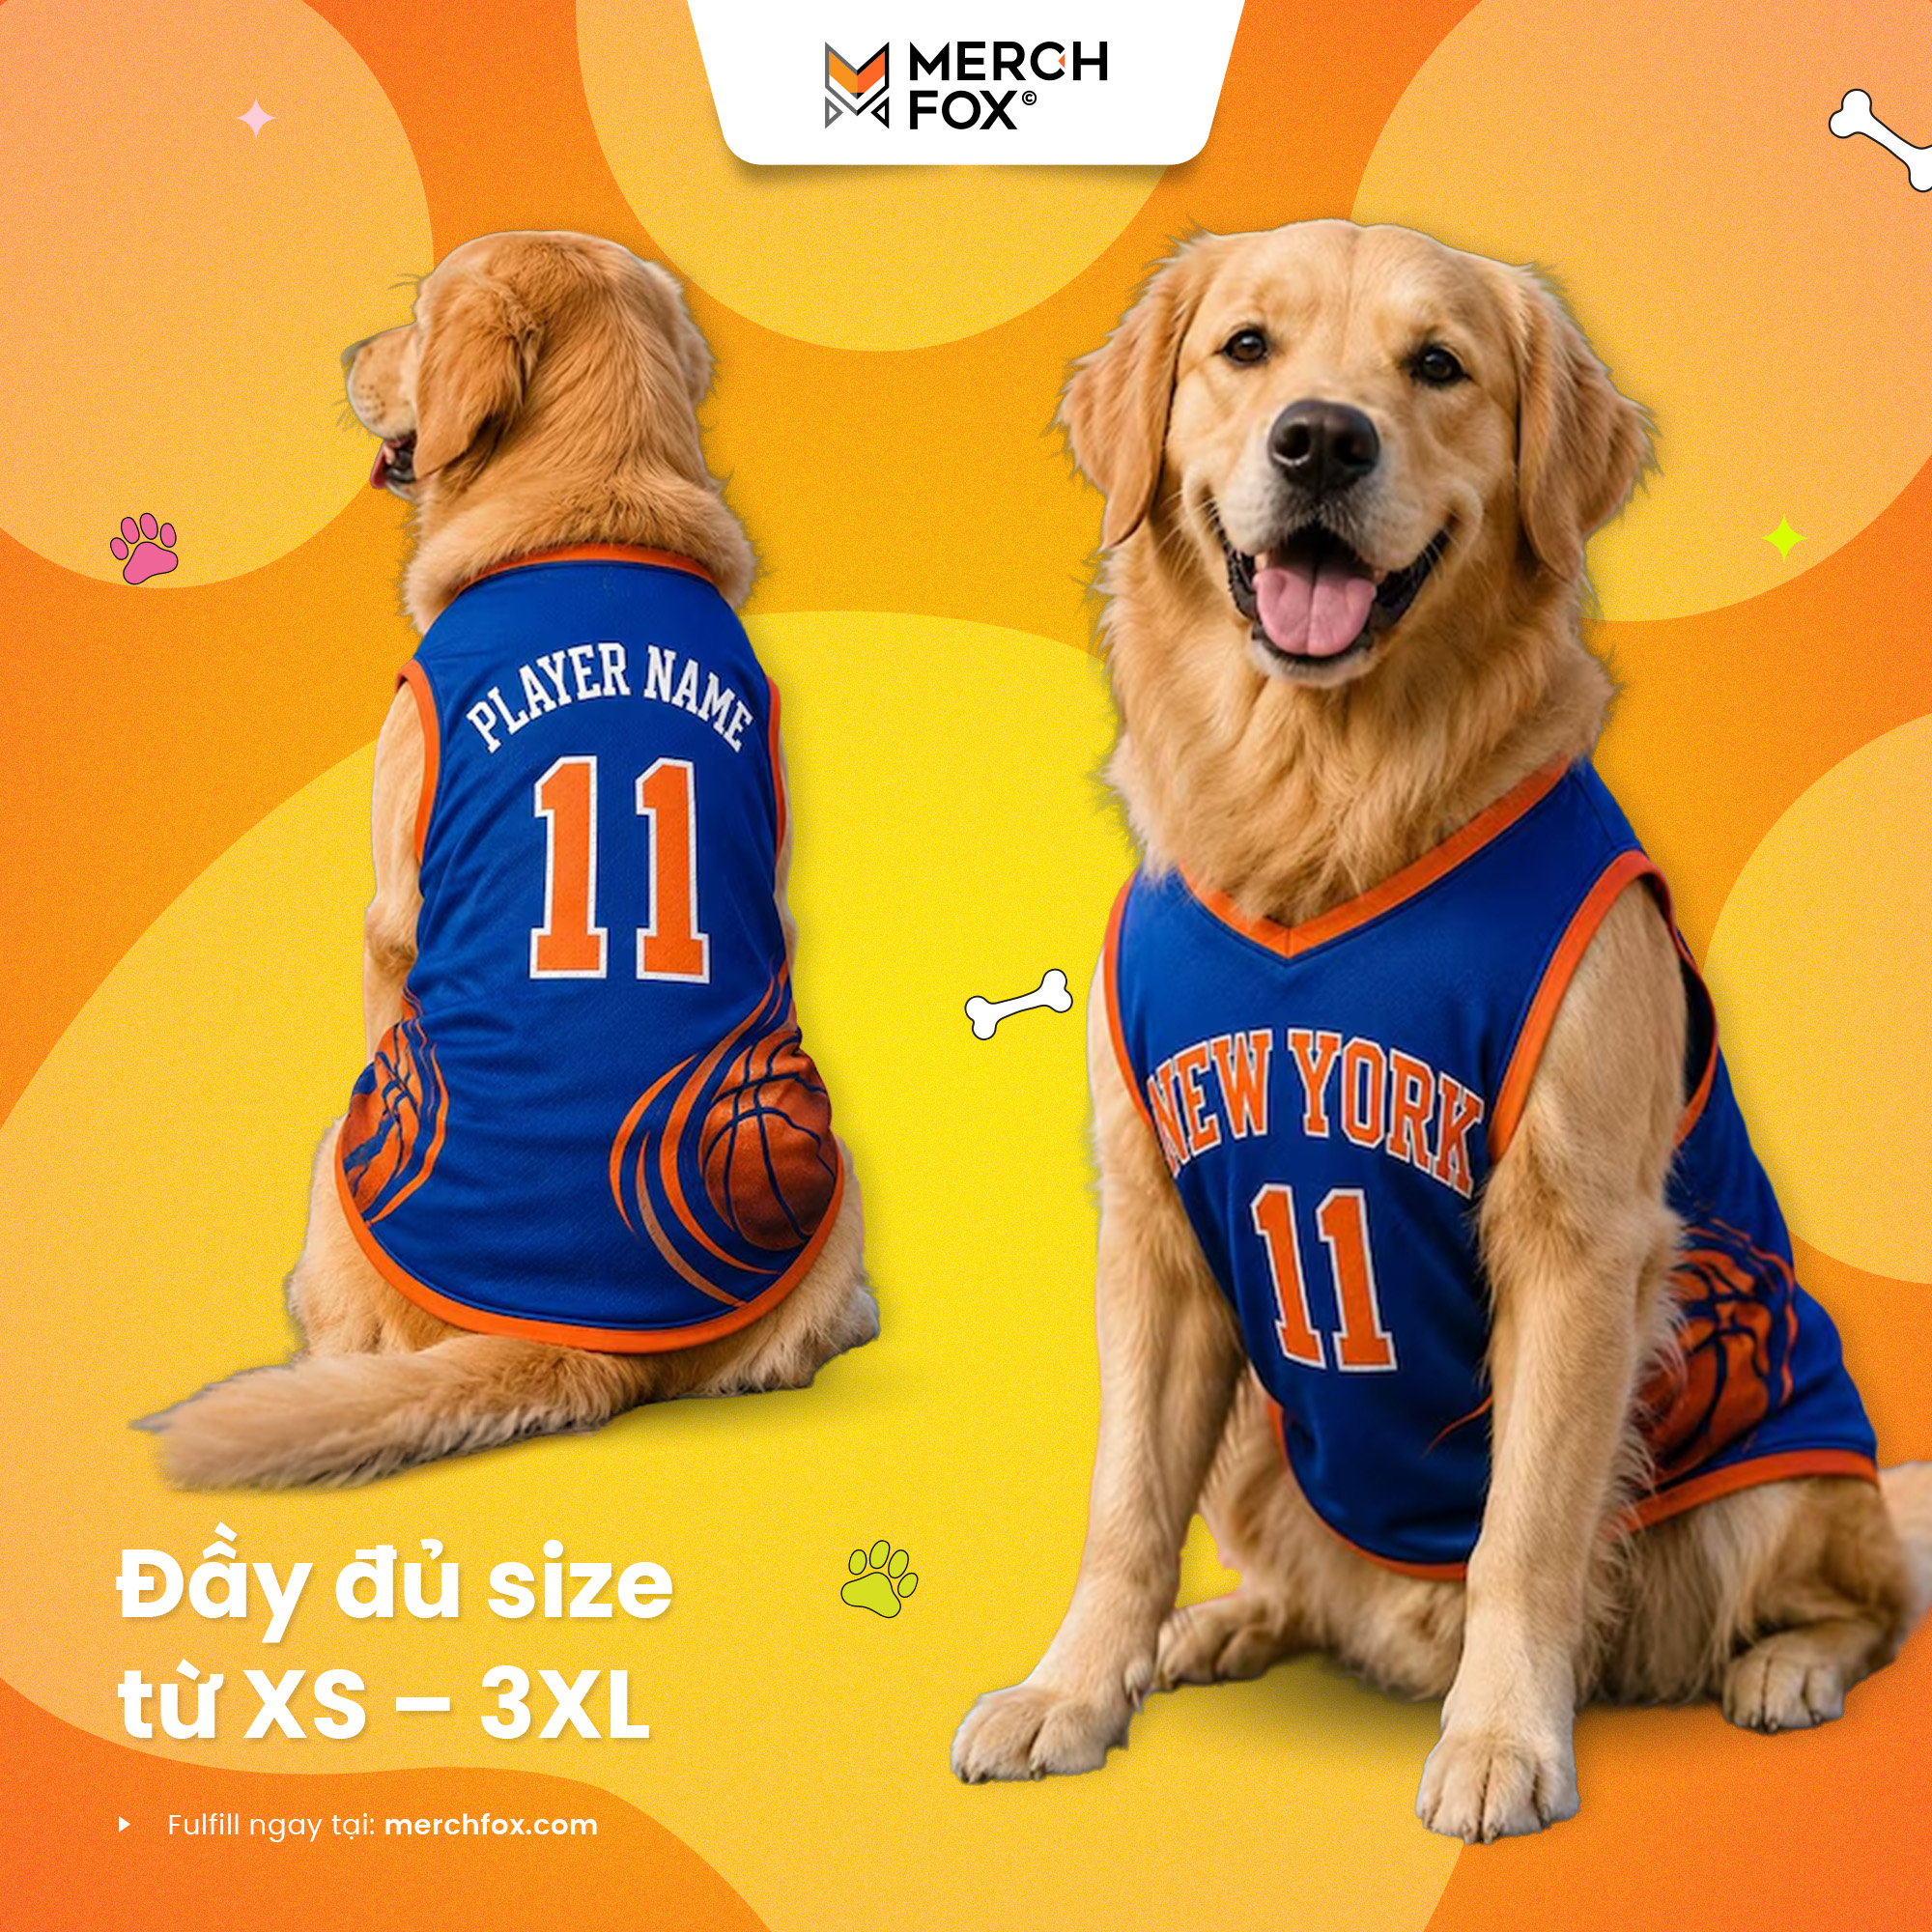
Wide Size Selection
The Pet Jersey is available in sizes XS through 3XL, making it suitable for a wide variety of breeds and body types.
A broader size range helps sellers reach more customers while reducing limitations within the pet niche.
Easy Slip-On Design
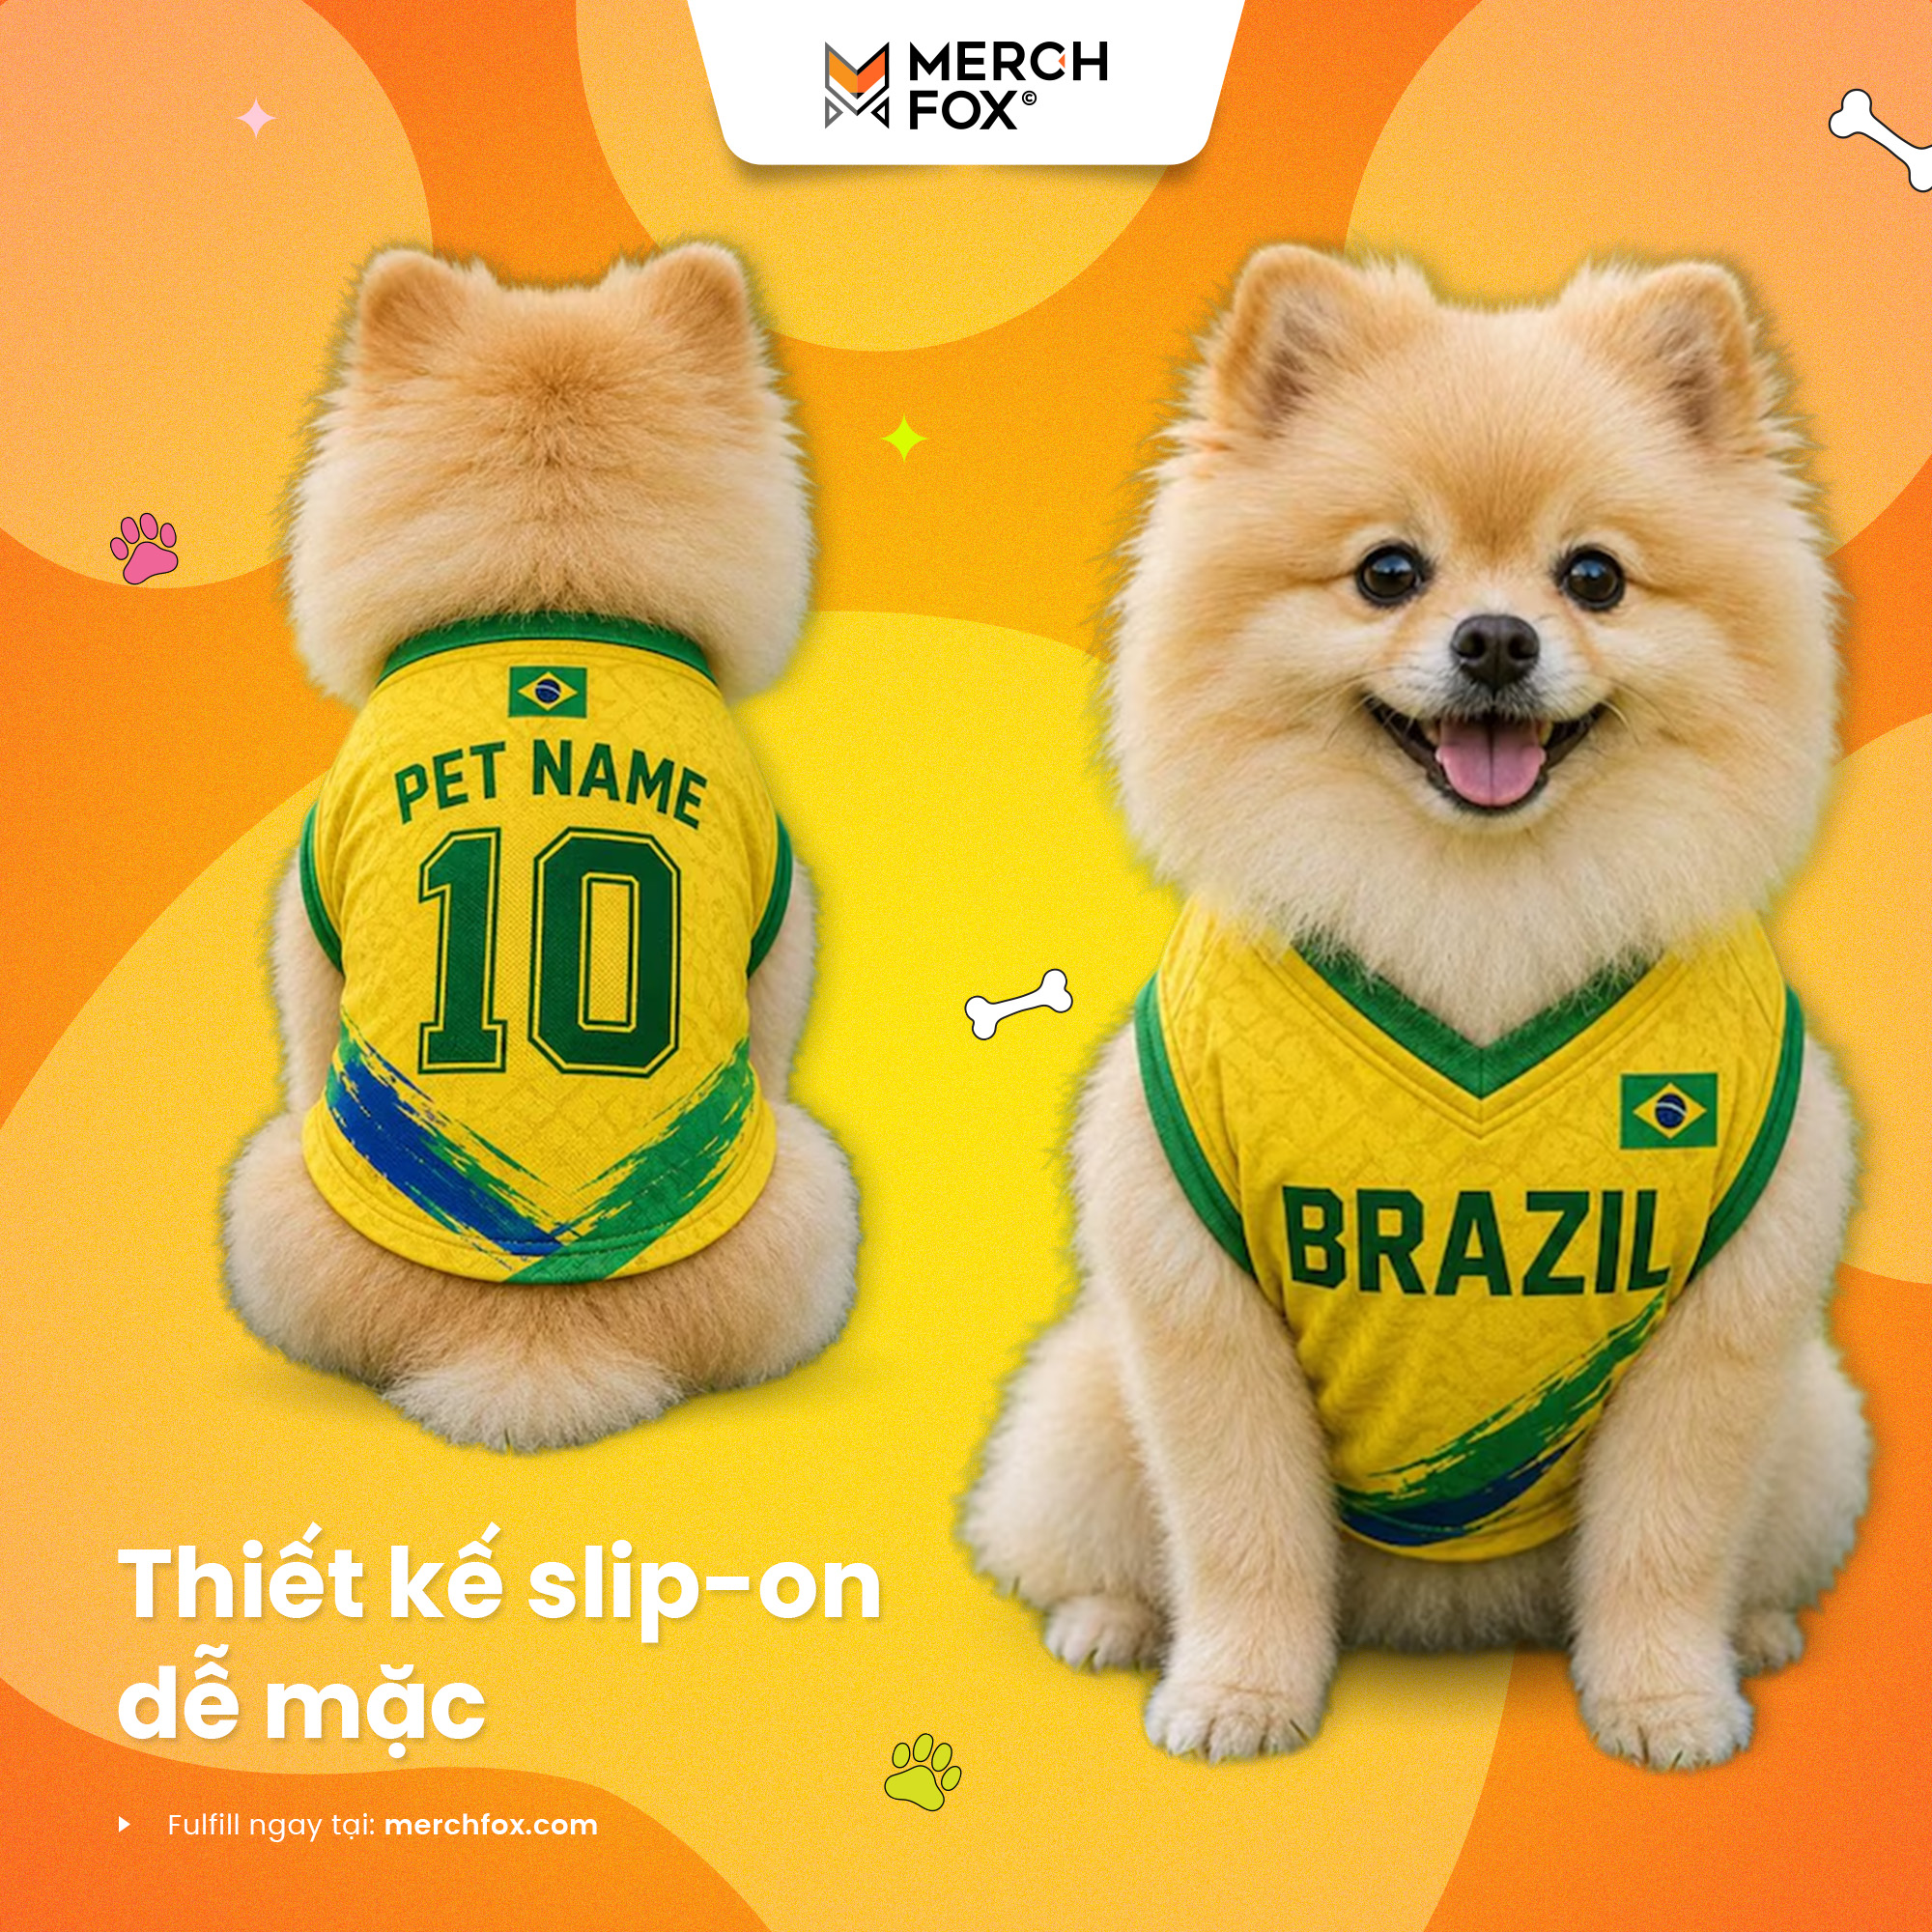
Easy Slip-On Design
The slip-on construction makes dressing pets quick and convenient.
Ideal for:
Daily walks
Outdoor adventures
Family gatherings
Pet-friendly events
Social media photoshoots
Holiday celebrations
Convenience is an important factor for pet owners, making this design practical as well as stylish.
Endless Personalization Opportunities
Endless Personalization Opportunities
One of the strongest selling points of this product is its flexibility for custom designs.
Sellers can easily create collections featuring:
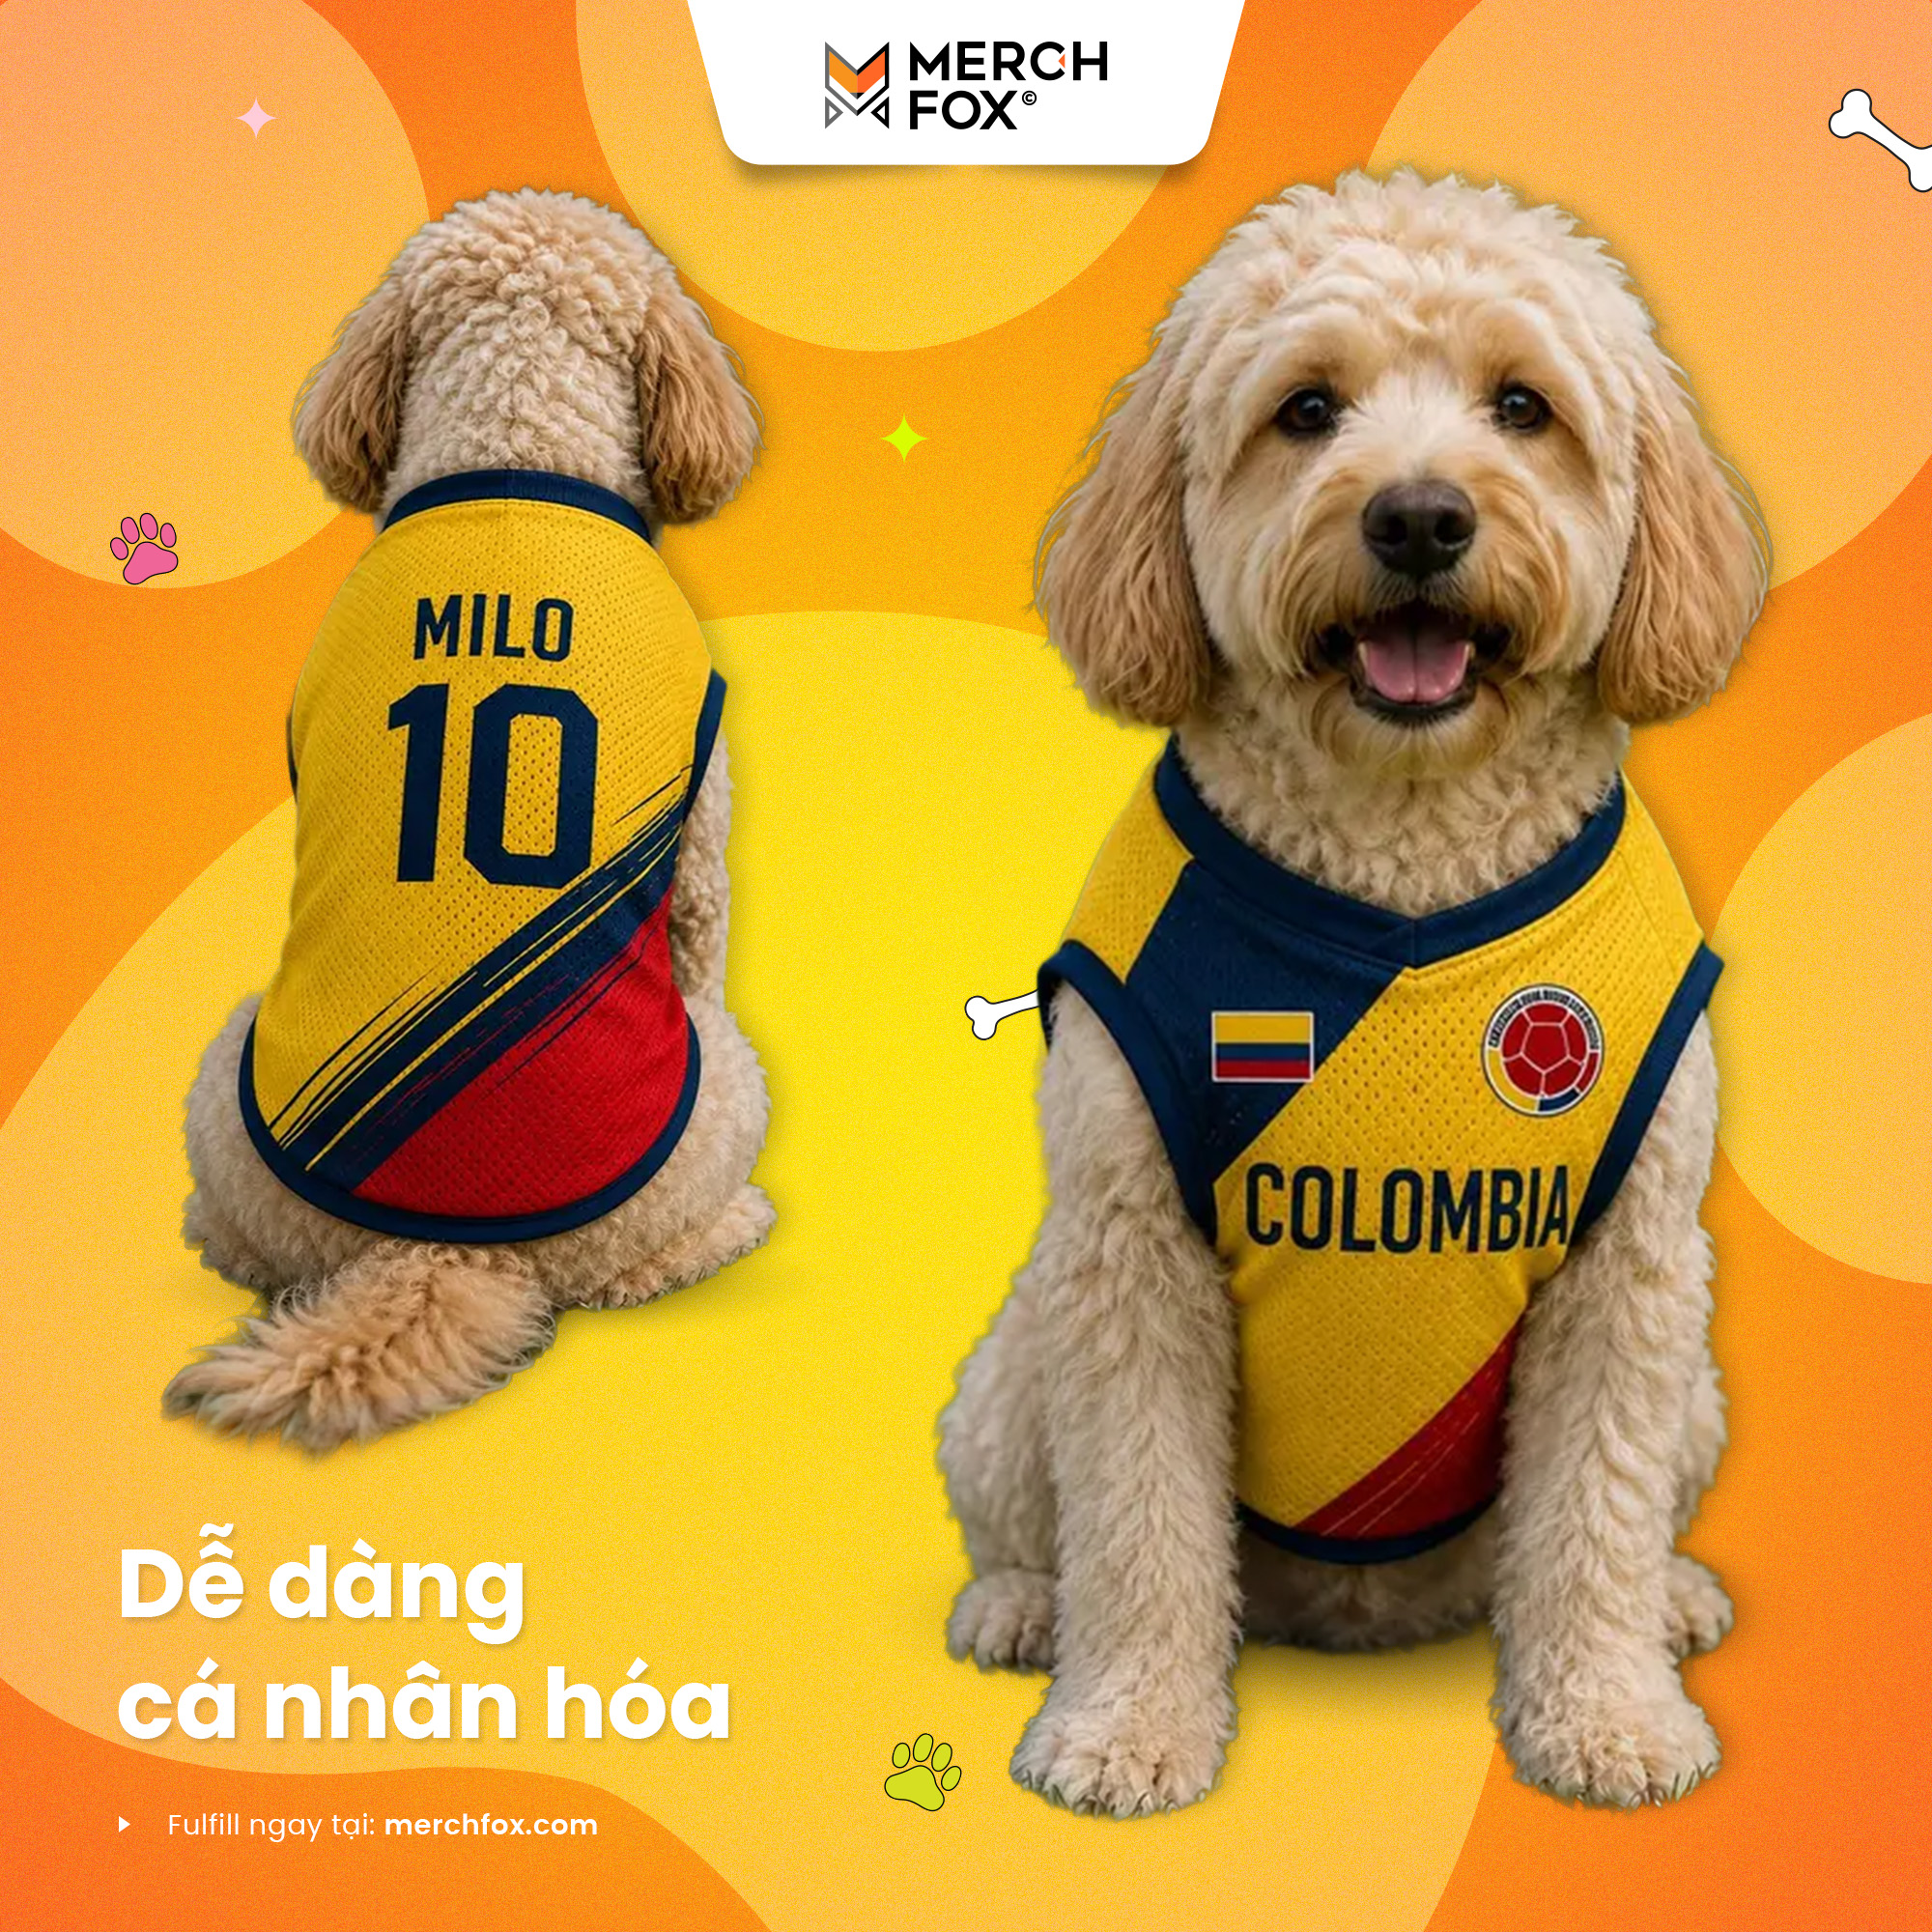
Personalized Names
Add a pet's name for a unique, one-of-a-kind product.
Sports-Inspired Jerseys
Design team-themed jerseys complete with custom player numbers and national colors.
Matching Family Collections
Coordinate pet jerseys with matching apparel for owners to create memorable family outfits.
Holiday Designs
Perfect for occasions such as:
Christmas
Halloween
Valentine's Day
Easter
Independence Day
Birthday celebrations
Breed-Specific Collections
Target passionate communities with designs tailored to Golden Retrievers, French Bulldogs, Corgis, Huskies, and many other beloved breeds.
A Great Product for Multiple POD Niches
The All-Over Print Pet Jersey fits naturally into several profitable markets.
Popular niches include:
Pet Lovers
Dog Moms & Dog Dads
Cat Lovers
Matching Family Apparel
Sports Fans
Personalized Gifts
Seasonal Collections
Birthday Gifts
Holiday Merchandise
Because the product works across so many audiences, sellers can continuously launch fresh designs without relying on a single trend.
Why Expand Your Store with Pet Apparel?
Adding complementary products can significantly strengthen a POD business.
Instead of selling only apparel for people, offering pet products allows sellers to:
Reach passionate pet owners
Increase average order value
Create matching product bundles
Diversify seasonal campaigns
Build stronger lifestyle-focused brands
Many customers enjoy purchasing coordinating products for themselves and their pets, creating additional cross-selling opportunities.
Grow Your Pet Collection with MerchFox
MerchFox continues expanding its catalog with products that help sellers stay ahead of market trends.
The new 3D-VN All-Over Print Pet Jersey is now available through the MerchFox platform, supported by:
Premium all-over sublimation printing
High-quality Bird-Eye Pique fabric
Multiple size options
Personalized design capabilities
Reliable fulfillment
Dedicated 24/7 seller support
Whether you're entering the pet niche for the first time or expanding an existing store, MerchFox provides the tools and fulfillment services needed to launch new collections with confidence.
Final Thoughts
The pet industry continues to grow, fueled by customers who see their pets as cherished members of the family. Products that combine personalization, comfort, and emotional value consistently perform well throughout the year.
The 3D All-Over Print Pet Jersey gives POD sellers an opportunity to tap into this thriving market with a product that's practical, customizable, and perfect for countless design concepts.
If you're looking to diversify your product catalog and reach one of the most loyal consumer communities, now is the perfect time to add personalized pet apparel to your store.
Contact MerchFox today to receive product mockups, detailed specifications, and expert support for launching your next best-selling pet collection.


