

Back-to-School 2026 Starts Earlier Than You Think: Is Your POD Store Ready?
Every year, thousands of Print-on-Demand sellers wait until August to launch their Back-to-School campaigns. By then, many of the best opportunities have already passed.
Read article
The POD Sellers Who Win in 2026 Aren’t the Best Designers — They’re the Fastest Decision Makers
In the early days of Print-on-Demand, sellers believed success came from having better artwork. Today, that’s no longer true. With AI tools everywhere, thousands of new designs are uploaded every hour. Anyone can generate graphics, mockups, and product descriptions in minutes. The barrier to entry has collapsed.
Read article
POD Scaling Blueprint 2026: How to Turn One Winning Product into a $10K/Month Store
In this guide, we’ll break down a proven scaling blueprint — and how to execute it efficiently with MerchFox.
Read article
Micro-Niche Strategy for POD: How to Find Low-Competition Markets That Actually Convert
In this guide, you’ll learn how to find, validate, and scale micro-niches — and how to execute efficiently with a fulfillment partner like MerchFox.
Read article
From 0 to First Sale: A Realistic Roadmap for POD Beginners in 2026
One of the most common questions in Print-on-Demand (POD) is: 👉 “How long does it take to get my first sale?” If you’ve already launched your store and still see 0 orders after a few days, it’s easy to feel stuck. But here’s the truth: 👉 Getting your first sale isn’t about luck—it’s about building the right system.
Read article
Unlock Record Sales: 10 Irresistible Valentine's Day Marketing Ideas for Your Business
Discover proven Valentine's Day marketing ideas to boost your e-commerce sales. Learn about key trends, practical strategies, and execution tips for a record-breaking holiday season.
Read article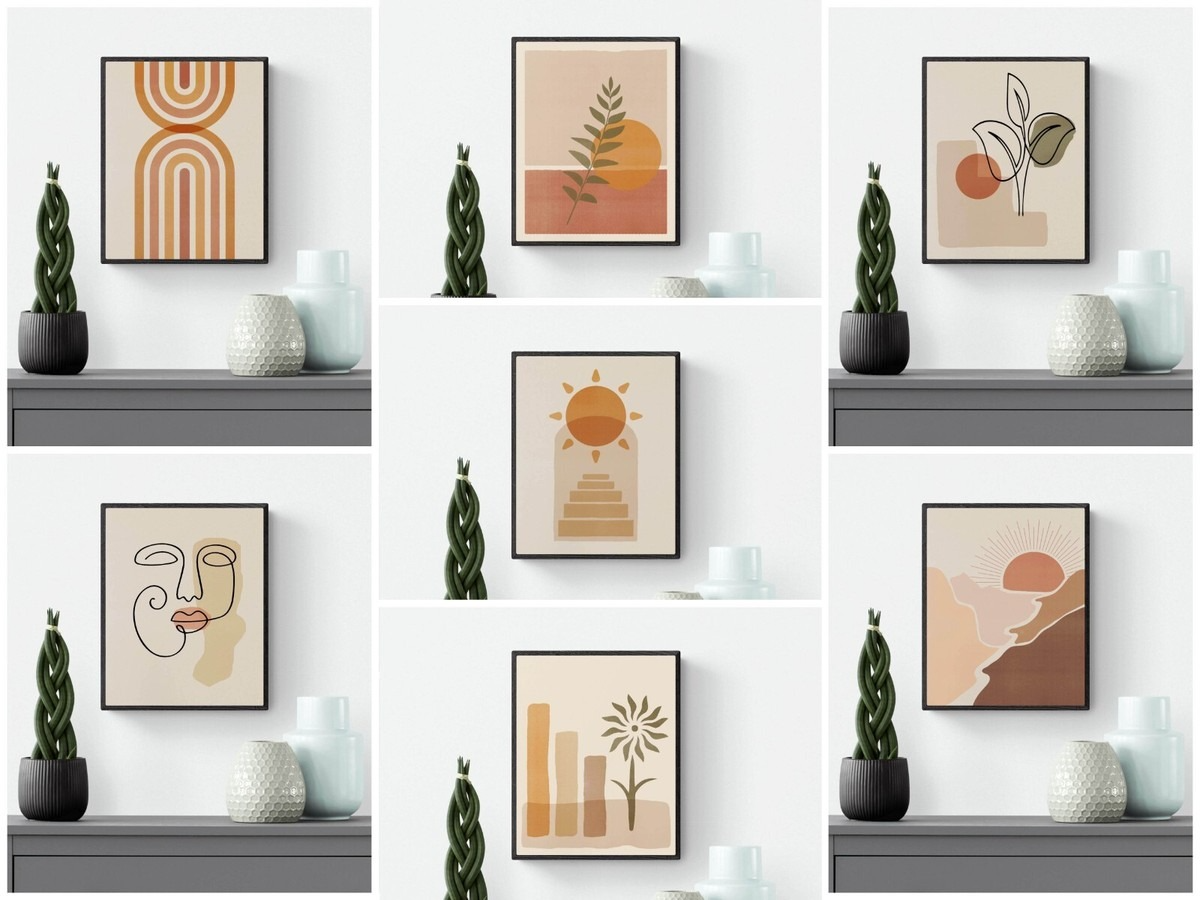
A Creator’s Guide to Turning Your Art Into Prints: From Canvas to Commerce
Unleash your art's potential! This definitive creator's guide covers everything from digitizing your artwork and choosing print methods to pricing, marketing, and selling your unique prints to the world.
Read article
10 Irresistible Things to Sell for Valentine's Day That Everyone Will Absolutely Love
Discover the top 10 most popular and profitable things to sell for Valentine's Day! From personalized gifts to unique experiences, find proven product ideas that everyone will love and boost your holiday sales.
Read article
How to Make Money with Print on Demand: The Ultimate Guide to Launching Your Profitable Business
Discover how to make money with print on demand! This ultimate guide covers everything from finding a profitable niche and creating stunning designs to setting up your store and marketing your products effectively. Start your POD journey today!
Read article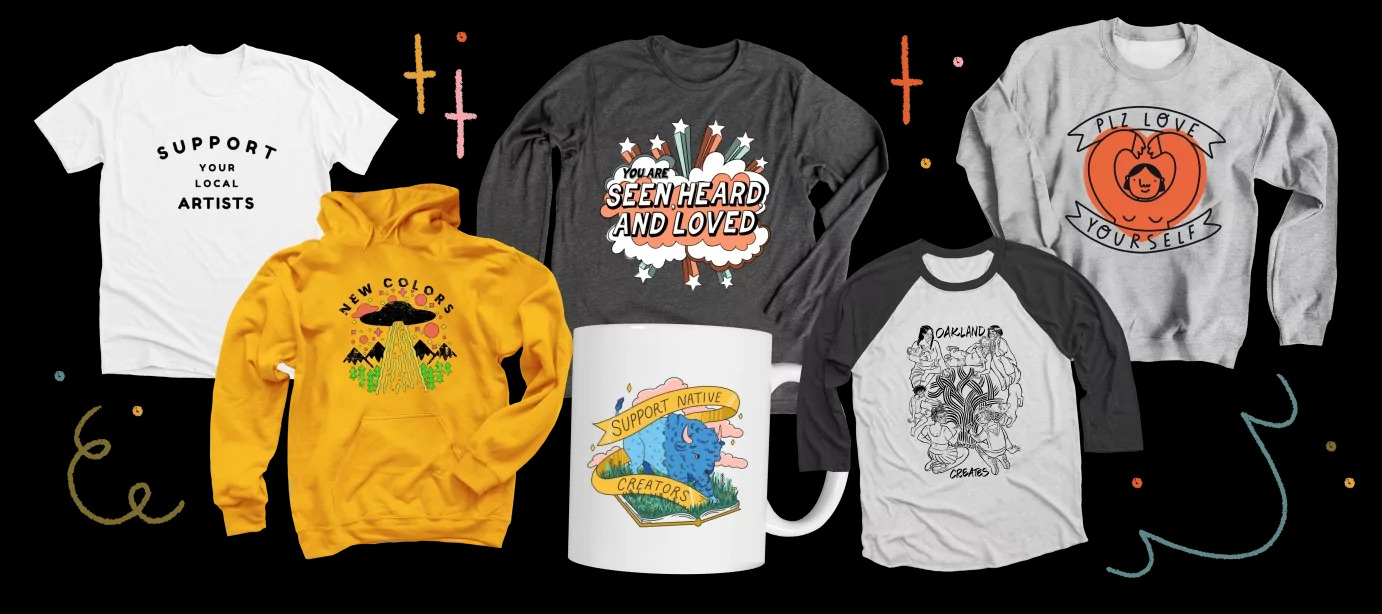
Product and Design Tips for Creators: Crafting Merch Your Audience Will Love
In today's dynamic and fiercely competitive creator landscape, merchandise has evolved far beyond a simple revenue stream. It's an indispensable extension of your brand, a tangible piece of your world, and ultimately, a heartfelt love letter to your community. Many creators, however, often grapple with the complexities of design and production, leading to generic or uninspired merch that simply doesn't resonate with their dedicated fans. The result? Missed opportunities for deeper engagement and significant brand growth.
Read article
How to Start Your Own Home Decor Business Online: A Complete Guide for Aspiring Entrepreneurs
Are you dreaming of transforming your passion for beautiful living spaces into a thriving venture? The online home decor market is booming, offering an incredible opportunity to turn your creative vision into profit. The beauty of starting an online business lies in its inherent flexibility, lower overhead costs compared to brick-and-mortar stores, and the potential to reach a global audience. This comprehensive guide, informed by the insights and experience of MerchFox, a recognized expert in this field, will walk you through every essential step. From crafting your initial concept to launching your digital storefront and scaling your success, we'll provide a roadmap to help you navigate the exciting journey of how to start your own home decor business online. You'll discover practical advice and actionable insights to build a "people-first" business that resonates with your target customers.
Read article
Protect Your Shop: How to Cancel an Order on Etsy Without Affecting Your Metrics
Every Etsy seller eventually faces that moment: an order needs to be canceled. Perhaps an item is unexpectedly out of stock, a buyer changed their mind, or an unforeseen issue arises. The immediate thought for many is, "How can I cancel order on Etsy without affecting my shop? Will this hurt my Star Seller status? Will it trigger negative reviews or penalties?" These are completely valid concerns, as maintaining your shop's health and reputation is paramount to your success on the platform.
Read article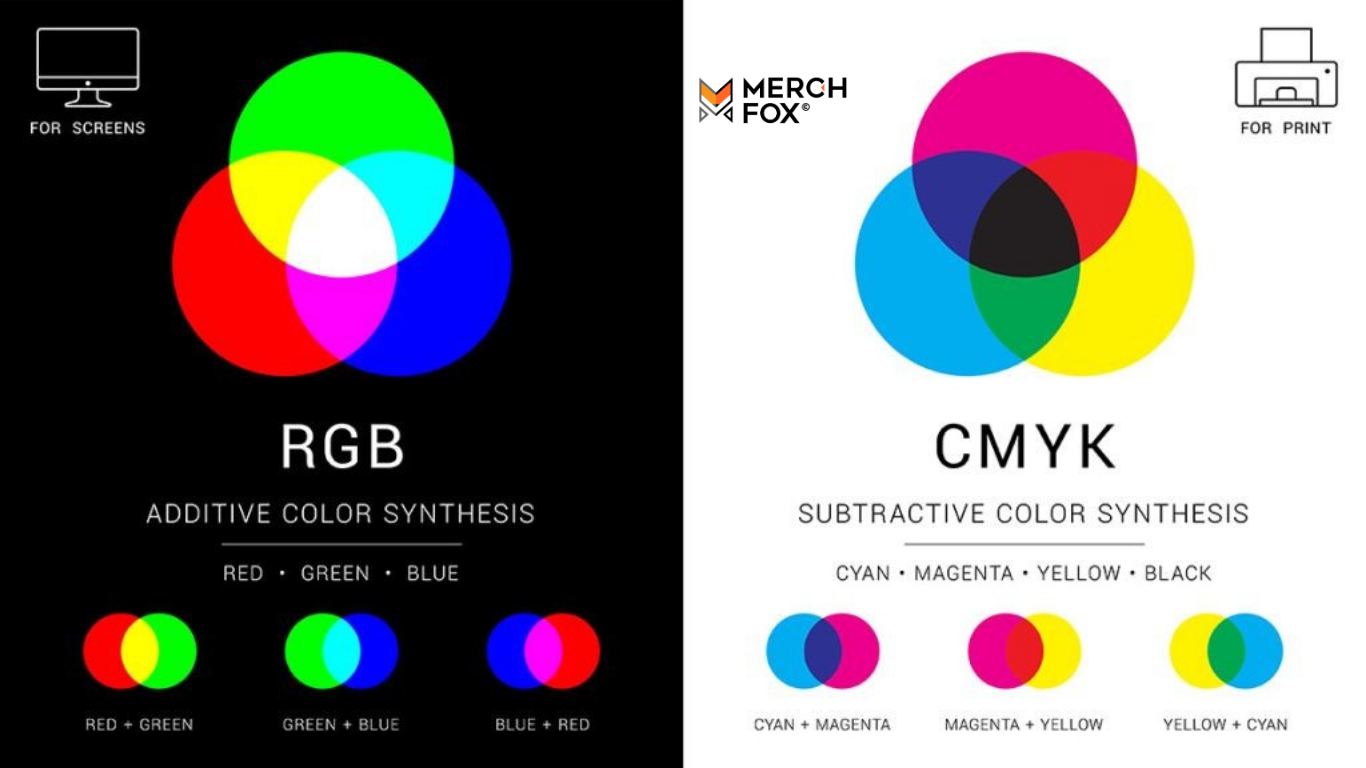
The open road is a canvas, and what better way to express yourself, share a laugh, or promote a cause than with a custom bumper sticker? Far from just a decorative piece, a well-placed sticker on your vehicle transforms it into a mobile billboard for your personality or brand. The thought of creating your own might seem daunting, but it’s an incredibly rewarding and surprisingly straightforward DIY project. From personalizing your ride to crafting unique gifts, diving into the world of how to make your own bumper stickers opens up a realm of creative possibilities. The beauty of DIY bumper stickers lies in their personalization and cost-effectiveness. You’re not limited by mass-produced designs, allowing you to create truly unique, eye-catching visuals. Plus, it's a fun hobby that can even blossom into a profitable side hustle. This comprehensive guide will cover everything you need to know, from multiple reliable methods and essential tools to clever design tips and advanced considerations for durability. Here at MerchFox, we’ve explored the ins and outs of custom creations, and we’re excited to share our insights to help you get started on your bumper sticker journey. Before You Begin: Defining Your Bumper Sticker Project Before you gather your materials and fire up your design software, take a moment to clarify your project's scope. This initial planning stage is crucial for choosing the right method and materials for your homemade bumper stickers. 2.1. Purpose: Personal Expression, Gifts, Branding, or Resale? Are you looking to simply adorn your own car with a funny quote, create a thoughtful gift for a friend, or perhaps promote your small business? Maybe you're even exploring how to make your own bumper stickers with the intent to sell them. Your ultimate purpose will significantly influence your material choices and desired durability. For a personal touch, simple methods might suffice, but for branding or resale, professional-grade materials and longevity become paramount. 2.2. Durability Needs: Indoor vs. Outdoor, Temporary vs. Long-Lasting, Weather-Resistance. A sticker for an indoor laptop won't need the same robust protection as one exposed to sun, rain, and road grime. For truly outdoor-ready, waterproof bumper stickers, weather-resistance and UV protection are non-negotiable. Consider how long you want your sticker to last and under what conditions it will be displayed. This will guide your selection of laminates and printing materials. 2.3. Design Ideas: Brainstorming Themes, Messages, Visual Style. This is where your creativity truly comes alive! Think about what you want your custom bumper stickers to communicate. Will it be humorous, political, artistic, or informative? Sketch out some ideas, consider fonts, colors, and imagery. A strong initial design concept will streamline the entire process, ensuring your final product effectively conveys your message. Essential Materials & Tools for Homemade Bumper Stickers Having the right arsenal of materials and tools is key to successful DIY bumper stickers. Fortunately, most items are readily available, often found at your local craft store or online. 3.1. Design Software/Tools Your design journey starts here. Computer-based: For professional results, programs like Adobe Illustrator or Photoshop offer extensive control. However, user-friendly alternatives like Canva (which, as Royal Elements notes, is excellent for beginners) provide templates and easy-to-use interfaces. GIMP is a powerful free option for image manipulation. Hand-drawing: If you prefer a more artistic touch, good old-fashioned markers, pens, and paper can be used to create your design, which can then be scanned into your computer for printing. 3.2. Printing & Base Materials This is where your design comes to life on a physical surface. Printable Vinyl: This is the gold standard for durable, printable vinyl bumper stickers. You can find white, clear, matte, or glossy options specifically designed for inkjet or laser printers. Brands like Royal Elements are popular choices among DIY enthusiasts. Regular Paper: For a super budget-friendly alternative, as seen in Instructables' "Nebsi Method," standard printer paper can be used, though it will require significant protection later. 3.3. Protection & Lamination Crucial for transforming printed designs into resilient homemade bumper stickers. Self-adhesive Laminating Sheets: These are often the key to waterproofing and UV protection, particularly highlighted in both Instructables' and Royal Elements' methods. They come in various finishes (glossy, matte) and sizes. Clear spray sealant (alternative): While not as robust as laminating sheets, a clear acrylic spray can offer some protection against moisture and UV rays. 3.4. Cutting Tools To give your stickers their final shape. Scissors or craft knife: For simple shapes or when you're just starting out, a good pair of sharp scissors or a craft knife with a cutting mat will do the trick. Cutting machine (Cricut, Silhouette): For precision, intricate designs, or if you plan to make many stickers, a cutting machine like a Cricut or Silhouette is an invaluable investment. 3.5. Application Aids For a smooth, professional finish. Squeegee: Helps press out air bubbles during application. Rubbing alcohol: Essential for thoroughly cleaning the surface of your vehicle before applying the sticker, ensuring maximum adhesion. 4. Method 1: The Popular Printable Vinyl Bumper Sticker Guide This method, often employed by experienced DIYers and detailed in resources like Royal Elements and wikiHow, is considered the benchmark for creating high-quality, durable custom bumper stickers at home. Method 1: The Popular Printable Vinyl Bumper Sticker Guide Method 1: The Popular Printable Vinyl Bumper Sticker Guide 4.1. Step 1: Design Your Masterpiece. Start by creating your artwork in your chosen design software. Focus on high-resolution graphics to ensure crisp lines and vibrant colors. Pay attention to the correct dimensions for your desired sticker size. If you’re incorporating text, ensure it’s legible even from a distance, choosing bold fonts and contrasting colors. MerchFox often advises using a CMYK color profile if your printer supports it, as it’s better for print accuracy than RGB. 4.2. Step 2: Print Your Design on Vinyl. Load your printable vinyl into your home printer (inkjet or laser, depending on your vinyl type). It's crucial to select the correct printer settings – typically "photo quality" or "glossy paper" – to ensure the ink adheres properly and colors are vibrant. Print a test sheet on regular paper first to check colors and layout. Once printed on vinyl, allow ample time for the ink to dry completely, usually several hours, to prevent smudging. 4.3. Step 3: Laminate for Ultimate Protection (Crucial for Durability). This is perhaps the most critical step for outdoor waterproof bumper stickers. Laminating protects your sticker from UV fading, water damage, and scratches. Carefully peel back a small corner of your self-adhesive laminating sheet and align it with your printed vinyl. Slowly and steadily press the laminate down, using a squeegee or even a credit card to smooth it out and push any air bubbles towards the edges. Take your time here – a smooth lamination is key to longevity. 4.4. Step 4: Cut Out Your Bumper Sticker. With your design now printed and protected, it’s time to cut it out. For simple shapes, sharp scissors or a craft knife can achieve a clean edge. If you’re using a cutting machine like a Cricut or Silhouette, follow your machine’s instructions for calibrating and cutting, which allows for incredibly precise and complex shapes. 4.5. Step 5: Prepare and Apply Your Sticker. Proper application ensures your sticker stays put. First, thoroughly clean the application surface on your vehicle with rubbing alcohol and let it dry completely. This removes any wax, dirt, or grease that could prevent adhesion. Slowly peel the backing off your bumper sticker. Position it carefully, then apply it from one side to the other, using a squeegee to press it down firmly and work out any remaining air bubbles. For best results, MerchFox recommends applying in moderate temperatures, avoiding extreme heat or cold. 5. Method 2: The Budget-Friendly "Nebsi Production Method" (Laminate & Paper) For those looking for a cost-effective alternative or a more temporary solution, the "Nebsi Production Method," popularized on Instructables, is an ingenious way to create homemade bumper stickers using regular paper and laminating sheets. Method 2: The Budget-Friendly "Nebsi Production Method" (Laminate & Paper) Method 2: The Budget-Friendly "Nebsi Production Method" (Laminate & Paper) 5.1. Understanding the "Nebsi Method": This method cleverly uses the laminating sheet not just for protection but also to create a repositionable, adhesive layer. By laminating both the front and back of a regular paper print, you encapsulate the design and create a surface that can be adhered to a car and even repositioned with care. It's a fantastic entry point for how to make your own bumper stickers without investing in specialized vinyl. 5.2. Step 1: Design & Print on Regular Paper. Create your design as usual, but this time, print it onto high-quality regular printer paper. While regular paper won't offer the inherent durability of vinyl, focusing on the best possible print resolution will ensure your colors are vibrant and details are crisp. 5.3. Step 2: Apply Laminate to the Front. Carefully apply a self-adhesive laminating sheet to the front (design side) of your printed paper. This layer protects your design from moisture and wear, giving it a glossy or matte finish depending on your laminate choice. Ensure a smooth, bubble-free application, as this is the primary protective layer. 5.4. Step 3: Apply Laminate to the Back. This is the unique step for the "Nebsi Method." Apply a second laminating sheet to the back of your paper. This second layer, once trimmed with a slight border, creates a temporary, repositionable adhesive surface. When you’re ready to apply, you simply peel off a portion of the backing paper from this laminate. 5.5. Step 4: Trim and Finish. Once both sides are laminated, trim your sticker to the desired shape, leaving a small border of laminate around the design. This border helps seal the paper edges, further protecting it from moisture. 5.6. Benefits & Best Use Cases: The Nebsi Method is incredibly cost-effective, yields a nice glossy finish (if using glossy laminate), and offers easy repositioning, making it ideal for temporary messages or if you frequently change your mind. While not as durable as pure vinyl in extreme conditions, it’s a brilliant way to experiment with custom bumper stickers on a budget. 6. Method 3: Quick & Artistic Hand-Drawn Bumper Stickers For those who love a truly unique, artisanal touch, hand-drawn bumper stickers offer unparalleled originality. This method emphasizes creativity and individual flair over mass production. Method 3: Quick & Artistic Hand-Drawn Bumper Stickers Method 3: Quick & Artistic Hand-Drawn Bumper Stickers 6.1. Materials: You'll need sturdy cardstock or heavy paper, waterproof markers or paints (like acrylics), and clear contact paper or a spray sealant for protection. 6.2. Process: First, draw or paint your design directly onto the cardstock. Once completely dry, apply clear contact paper smoothly over the entire design for basic waterproofing, or use several coats of a clear spray sealant. After the sealant dries, cut out your design. To apply, you can use double-sided outdoor adhesive tape or magnets for a removable option. 6.3. Best for: This method is perfect for truly unique, artistic, one-off designs or protest signs where the raw, handmade aesthetic adds to the message. While less durable than printed vinyl methods, the authenticity is undeniable. 7. Maximizing Durability and Longevity: Pro Tips for Your Bumper Stickers Creating homemade bumper stickers that last requires attention to detail, especially when aiming for outdoor durability. Maximizing Durability and Longevity: Pro Tips for Your Bumper Stickers Maximizing Durability and Longevity: Pro Tips for Your Bumper Stickers 7.1. The Importance of Quality Lamination: As MerchFox often stresses, lamination is your first line of defense. A high-quality laminating sheet provides critical UV resistance (preventing fading), waterproofing (protecting against rain and washes), and scratch protection (guarding against minor abrasions). Don't skimp on this step for outdoor stickers. 7.2. Material Selection: Choosing weather-resistant printable vinyl, designed specifically for outdoor use, provides a superior base. These materials are formulated to withstand environmental stressors better than standard paper or indoor vinyls. 7.3. Proper Surface Preparation: The longevity of your sticker is directly tied to its adhesion. Always clean the application surface thoroughly with rubbing alcohol to remove any contaminants. A clean, dry surface ensures maximum stick and prevents premature peeling. 7.4. Handling & Storage: Before application, store your stickers flat in a cool, dry place away from direct sunlight. Improper handling, like bending or creasing, can compromise the adhesive or lamination, leading to issues later on. 8. From Hobby to Business: How to Make Bumper Stickers to Sell Turning your passion for custom bumper stickers into a profitable venture is entirely achievable. Many successful businesses started in a home workshop, as resources like wikiHow and Swagify highlight. From Hobby to Business: How to Make Bumper Stickers to Sell From Hobby to Business: How to Make Bumper Stickers to Sell 8.1. Market Research: Identify trends, popular niches, and target audiences. What messages resonate? What visual styles are currently popular? Research what's selling well on platforms like Etsy or local craft markets. 8.2. Designing for Profit: To create marketable designs, focus on uniqueness, high-quality aesthetics, and broad appeal within your chosen niche. Think about witty phrases, compelling graphics, or designs that speak to specific interests. 8.3. Material & Production Costs: Accurately calculate all your expenses, including printable vinyl, laminating sheets, ink, cutting blades, and even packaging. Understanding these costs is crucial for setting profitable prices. For bulk production, a cutting machine becomes highly cost-effective. 8.4. Pricing Your Bumper Stickers: Consider your production costs, the perceived value of your design, and competitor pricing. Aim for a price that covers your expenses, provides a reasonable profit, and remains attractive to buyers. 8.5. Marketing & Sales Channels: Etsy, Shopify, and other e-commerce platforms are excellent for online sales. Don't overlook local markets, craft fairs, or even collaborating with local businesses. Social media, particularly Instagram and TikTok, are powerful tools for showcasing your designs and reaching potential customers. 8.6. Packaging & Shipping: Presenting a professional product enhances perceived value. Use sturdy envelopes or mailers, and consider adding a small branded insert. Research cost-effective and reliable shipping methods for your DIY bumper stickers. 9. Troubleshooting Common Bumper Sticker Issues Even with the best planning, sometimes things don't go perfectly. Knowing how to troubleshoot common problems can save your project. Troubleshooting Common Bumper Sticker Issues Fading colors or cracking: This usually indicates insufficient UV protection. Ensure you're using quality laminating sheets with UV inhibitors, or a clear spray sealant specifically designed for outdoor use. Bubbles or peeling during application: Often caused by improper surface cleaning or rushed application. Clean thoroughly, apply slowly with a squeegee from the center outwards, and work in moderate temperatures. Difficulty removing old stickers cleanly: For stubborn stickers, heat (from a hairdryer on a low setting) can soften the adhesive. Plastic scrapers and adhesive removers (like Goo Gone) can help with residue, but always test on an inconspicuous area first. Ink smudging or bleeding during printing: This is typically due to incorrect printer settings (e.g., wrong paper type selected) or not allowing enough drying time before handling or laminating. Ensure your printer settings match your vinyl type and be patient with drying. 10. Frequently Asked Questions (FAQs) About DIY Bumper Stickers Frequently Asked Questions (FAQs) About DIY Bumper Stickers Q: How long do homemade bumper stickers typically last? A: The lifespan of homemade bumper stickers varies greatly depending on the method and materials used. High-quality printable vinyl with robust lamination can last 3-5 years outdoors. Budget-friendly paper methods might last a few months to a year, especially if exposed to harsh weather. Q: Can I use a regular home printer (inkjet/laser)? A: Yes, absolutely! Both inkjet and laser printers can be used to print bumper stickers at home, provided you choose printable vinyl or paper specifically designed for your printer type. Always check the product description of your chosen material. Q: Are all homemade bumper stickers waterproof? A: No, not inherently. To make waterproof bumper stickers, you must laminate them with self-adhesive sheets or use a waterproof clear spray sealant. The printable vinyl itself might be water-resistant, but the ink and paper (if used) need protection. Q: What's the best way to remove an old bumper sticker without damaging my car? A: The safest method involves using heat (a hairdryer on low) to soften the adhesive, then gently peeling the sticker off. For stubborn residue, automotive adhesive removers or rubbing alcohol can be used, but always test on a hidden area first. Q: Can I make transparent bumper stickers at home? A: Yes, you can! You'll need to purchase transparent or clear printable vinyl. The process is similar to white vinyl, but your design will need to account for the transparency of the background. Remember that light colors and whites won't show up well on a transparent sticker without a white underlayer. 11. Conclusion: Your Road to Custom Bumper Sticker Success Starts Now! Conclusion: Your Road to Custom Bumper Sticker Success Starts Now! There you have it – a comprehensive guide to mastering how to make your own bumper stickers. From selecting your purpose and gathering materials to printing, laminating, and even selling your creations, the journey is both creative and rewarding. Whether you're aiming for personal expression, thoughtful gifts, or a new entrepreneurial venture, the tools and knowledge are now at your fingertips. Don't be afraid to experiment with different designs, colors, and methods. Each attempt refines your skills and brings you closer to crafting that perfect sticker. As we at MerchFox have seen, the satisfaction of seeing your own custom bumper stickers on a car, a laptop, or even a water bottle is unmatched. So go ahead, unleash your creativity, and let your message hit the road!
Have you ever designed something beautiful on your computer, only to have it come back from the printer looking completely different? It's a common, frustrating experience for many designers and businesses. The vibrant blues become dull purples, and bright greens turn muddy. This isn't a printer conspiracy; it's a fundamental misunderstanding of how colors translate between the digital and physical worlds. As MerchFox often shares from their extensive experience, this color discrepancy is almost always due to the difference between RGB and CMYK color systems.
Read article
The Ultimate Step-by-Step Guide on How to Make Custom Bumper Stickers at Home
Learn how to make your own unique bumper stickers with our comprehensive guide! Discover multiple DIY methods, from printable vinyl to budget-friendly alternatives, plus design tips, durability secrets, and how to sell your creations.
Read article