


In MerchFox, product creation offers two distinct operational workflows depending on your catalog management strategy.
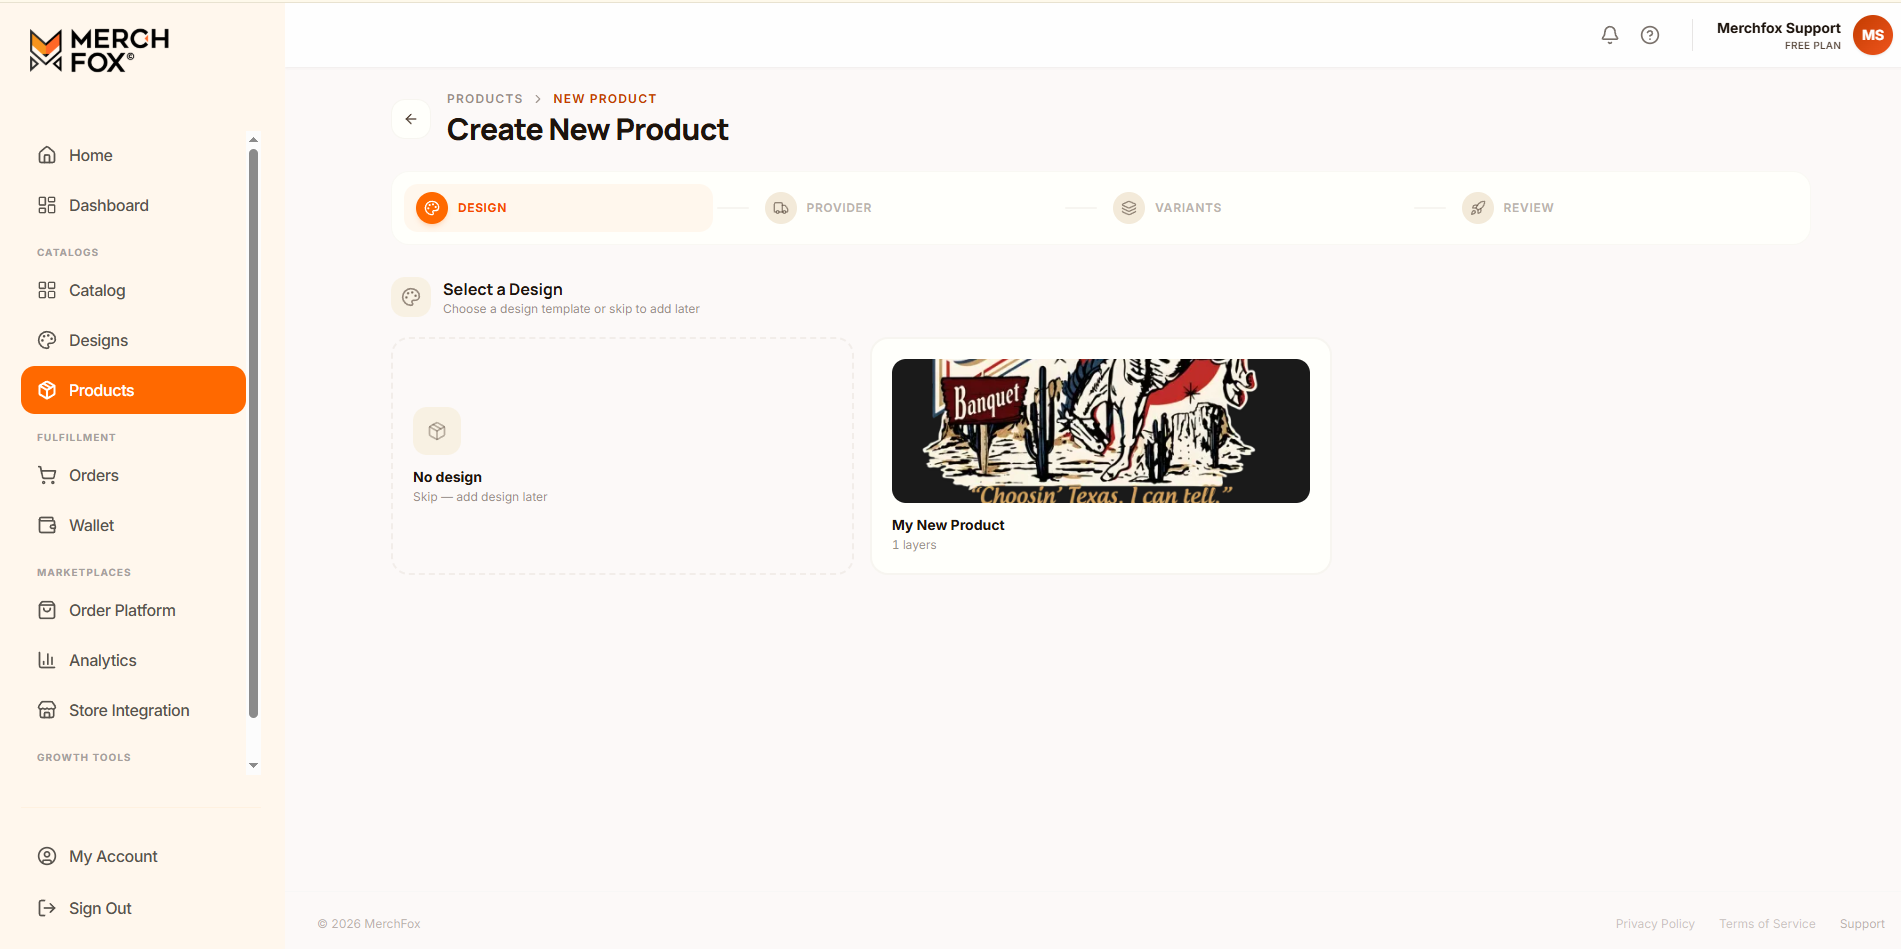
When initiating the workflow via Products > Create New Product, you select your preferred method at the Design step:
Creating with a Design Template (Pre-configured Artwork): Optimized for rapidly launching products using standardized artwork layouts created in the Design Editor.
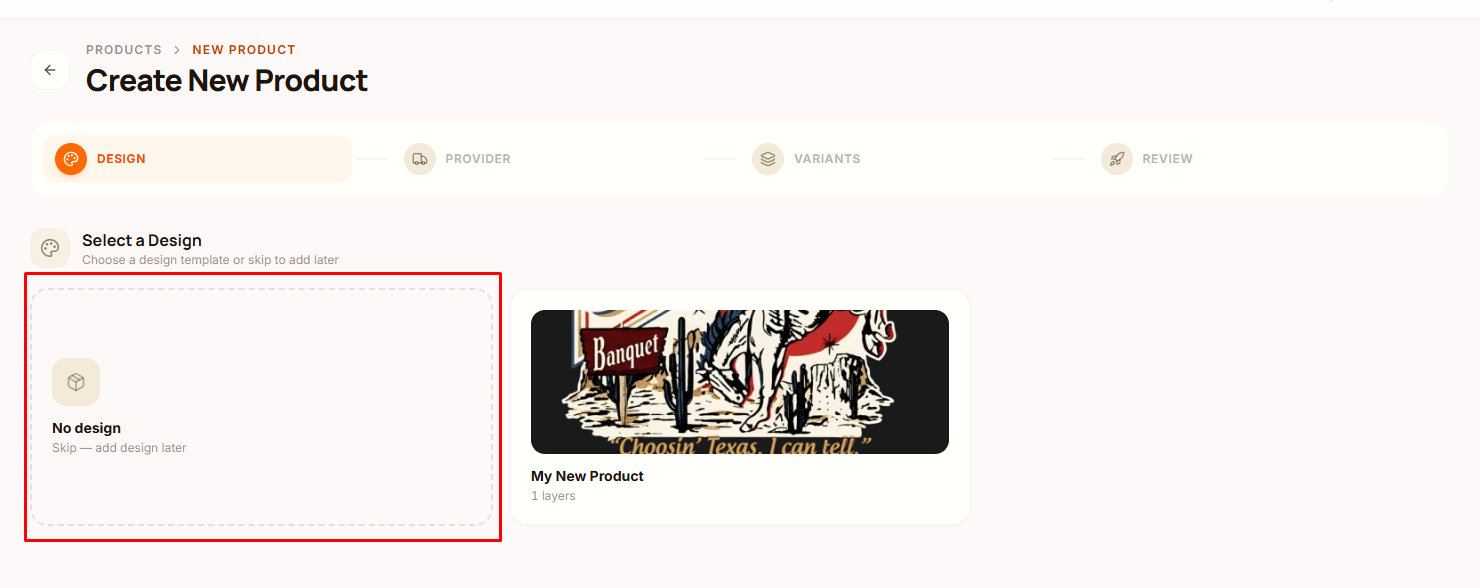
Creating a "No Design" Blank Product: Optimized for setting up generic product listings, catalog blueprints, or custom fulfillment flows where print files and listing visuals are uploaded at the final review step.
Creation Path Comparison
Each creation path serves specific operational needs. Below is a structured comparison of both workflows:
Method 1: Using a Design Template
Use Case: Best for scaling pre-saved artwork across multiple product listings without manual asset re-uploading.
Step 1: Design Selection: Choose a pre-configured template from your workspace (Select a Design).
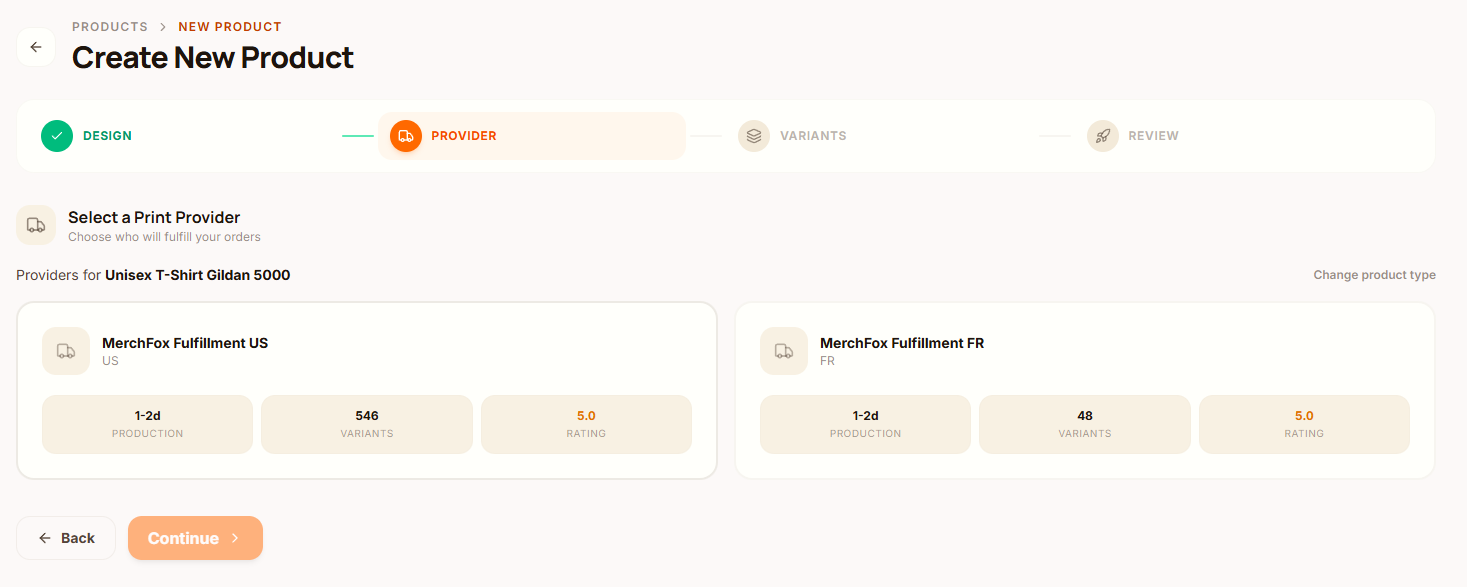
Step 2: Provider Selection: Select your preferred Print Provider and Printing Method (e.g., DTF or DTG). Target print areas automatically map based on the template.
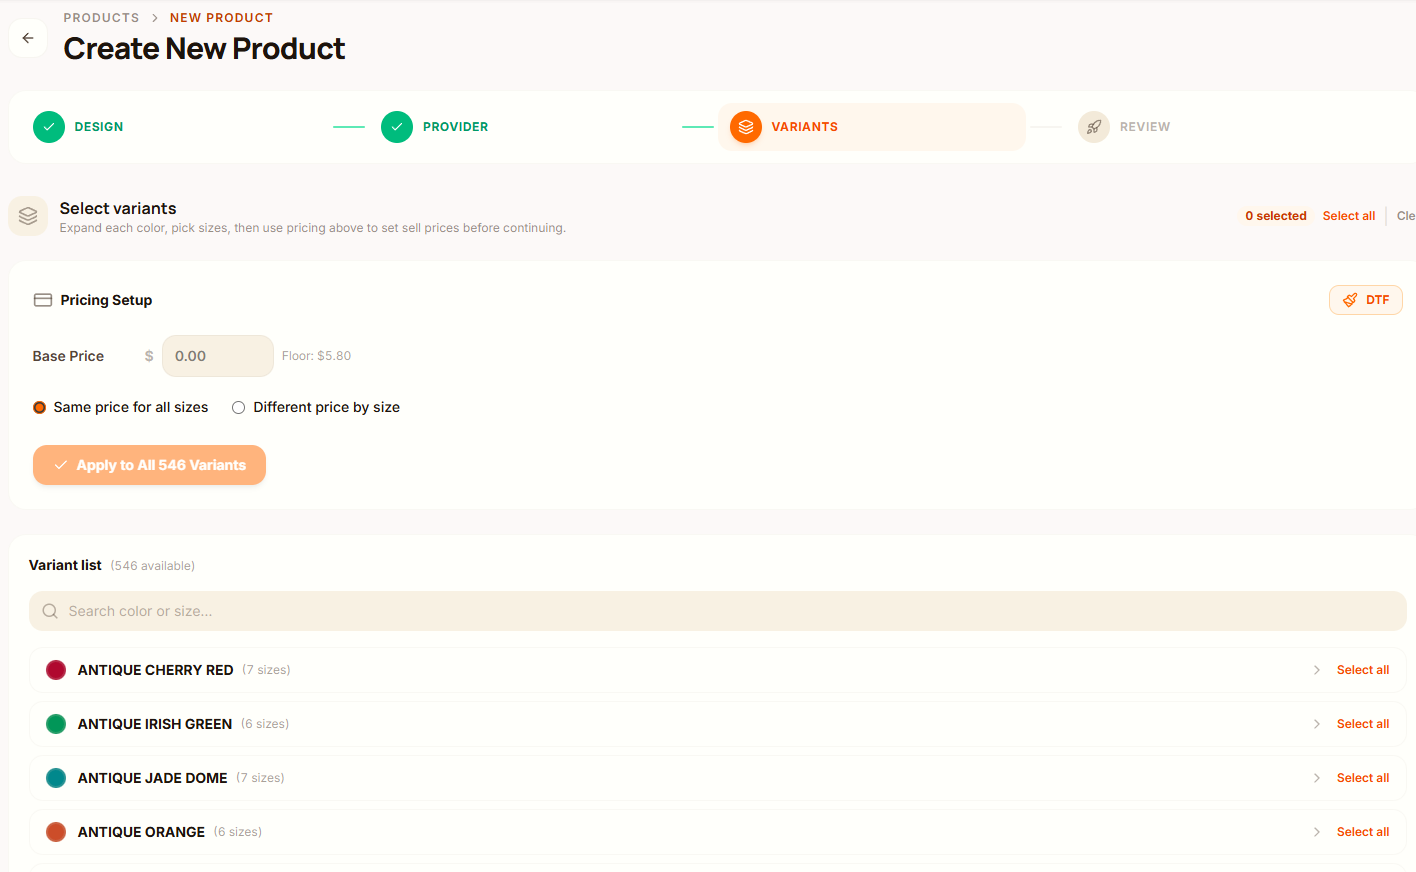
Step 3: Variants & Pricing: Select colorways, size matrices, and configure MSRP / profit margins.
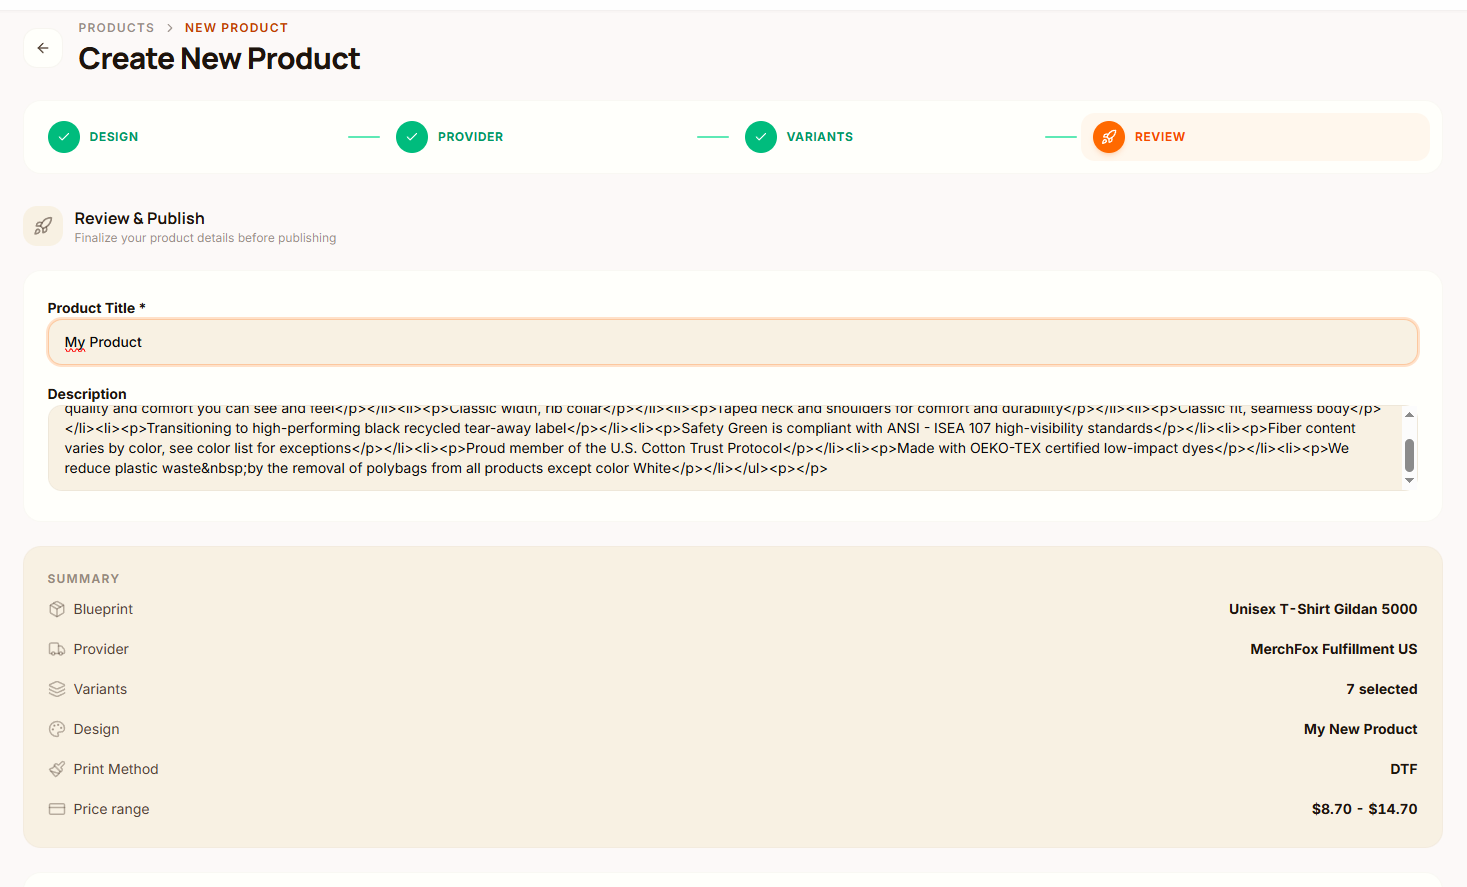
Step 4: Review & Publish: Print files (Linked Design) and mockups are automatically synced from the Design Editor. Sellers only need to review the Product Title, Description, and click Publish.
Method 2: "No Design" Workflow
Use Case: Best for setting up blank product listings first, or using custom external mockups and artwork files.
Step 1: Design Selection: Select the No design card (Skip — add design later).
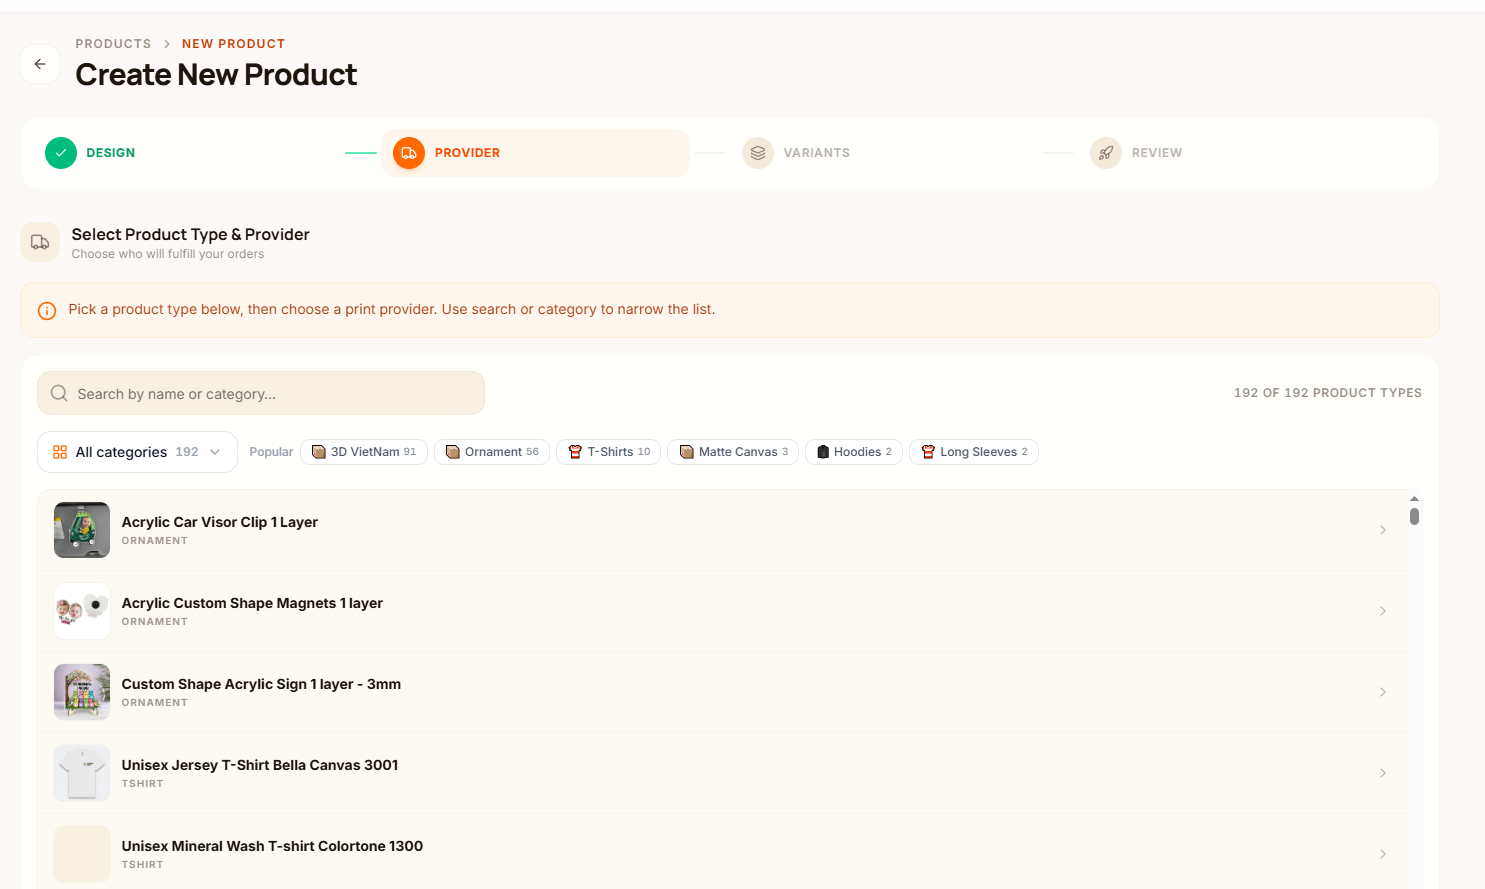
Step 2: Provider Selection: Choose the base garment via Select Product Type & Provider (e.g., Bella Canvas 3001) and assign your Print Provider.
Step 3: Variants & Pricing: Select active color swatches, size ranges, and establish retail pricing rules identical to Method 1.
Step 4: Review & Publish: Requires manual asset attachment prior to publishing:
Upload print files for each print position under Designs.
Upload custom storefront visuals under Order mockups.
Workflow 1: Creating a Product with a Design Template
Using a pre-saved Design Template accelerates listing creation because artwork layers, scaling ratios, and default mockups are pre-rendered by the system.

Step 1: Select Your Design Template
Navigate to Products > New Product.
Under Select a Design, click your target template card (e.g., My New Product).
Step 2: Choose Print Provider & Printing Method
Select your designated Print Provider (e.g., MerchFox Fulfillment US or MerchFox Fulfillment FR).
Select the Printing Method (e.g., DTF or DTG).
Verify supported print positions (e.g., Front, Back, Collar, Sleeve).
Step 3: Configure Variants & Set Retail Prices
In the Select variants step, choose your garment colorways and size matrix.
Define your Base Price or apply automated margin rules across all variants.
Review the Price Preview matrix to check unit floor costs against final retail pricing.
Step 4: Finalize Details & Linked Design
On the Review & Publish screen, populate the Product Title, Description, and Tags.
In the right-hand panel under Designs (1), verify the Linked Design card. Your high-resolution print files and mockups are automatically linked.
Click Publish to push the draft to your connected sales channels.
Workflow 2: Creating a "No Design" Product
The "No Design" workflow allows sellers to configure variant options, base costs, and fulfillment routes before attaching print assets and storefront mockups.
Step 1: Select "No Design"
Navigate to Products > New Product.
Under Select a Design, select the No design card (Skip — add design later).
Step 2: Select Product Type & Print Provider
Search or filter the catalog under Select Product Type & Provider to pick a blank item (e.g., Unisex Jersey T-Shirt Bella Canvas 3001 or Acrylic Custom Shape Magnets).
Select your designated Print Provider and Printing Method.
Step 3: Configure Variants & Pricing
Select active color swatches and size ranges.
Establish your retail price matrix across all selected SKUs.
Step 4: Upload Design Assets & Custom Mockups
On the final Review & Publish screen, manually attach your print assets and storefront images:
Designs Section (Right Panel): Select the print position (e.g., Front) and click Upload to attach your print-ready file (
PNG,JPEG, orWebPat 300 DPI).Order Mockups Section: Select the print side (e.g., Front (order mockup)) and click Upload Mockup to add your custom storefront listing visual.
Fill in the Product Title, Description, and Tags, then click Publish.

Frequently Asked Questions
Can I edit a Linked Design on a published product?
Yes. Navigate to the product management page, locate the Linked Design card, and click Edit to open and adjust artwork layers directly within the Design Editor.
What happens if I publish a "No Design" product without attaching print files?
The product will exist as an unlinked storefront blueprint. However, incoming fulfillment orders will remain on hold until a valid print file is uploaded to the product details page.
Was this article helpful?
Let us know so we can continue improving our help center.