

To ensure your printed products turn out sharp, vibrant, and accurately aligned during production, your source artwork must meet MerchFox’s production standards. This guide covers file format specifications, resolution rules, color profiles, and how to work with print safe zones in the MerchFox Design Editor.
Technical File Requirements
When preparing artwork files in software like Adobe Photoshop, Illustrator, or Canva, ensure your export settings match the following parameters before uploading them to the MerchFox Design Editor:
File Formats:
.PNG(recommended for transparent backgrounds),.JPG, or.WEBP.Color Mode: RGB / sRGB profile. (Note: Printing machines automatically translate RGB inputs into CMYK ink formulations).
Resolution / DPI: 300 DPI (Dots Per Inch) at 100% physical print size.
Maximum File Size: Up to 100 MB per uploaded image file.
Maximum Dimensions: Up to 30,000 × 30,000 px.
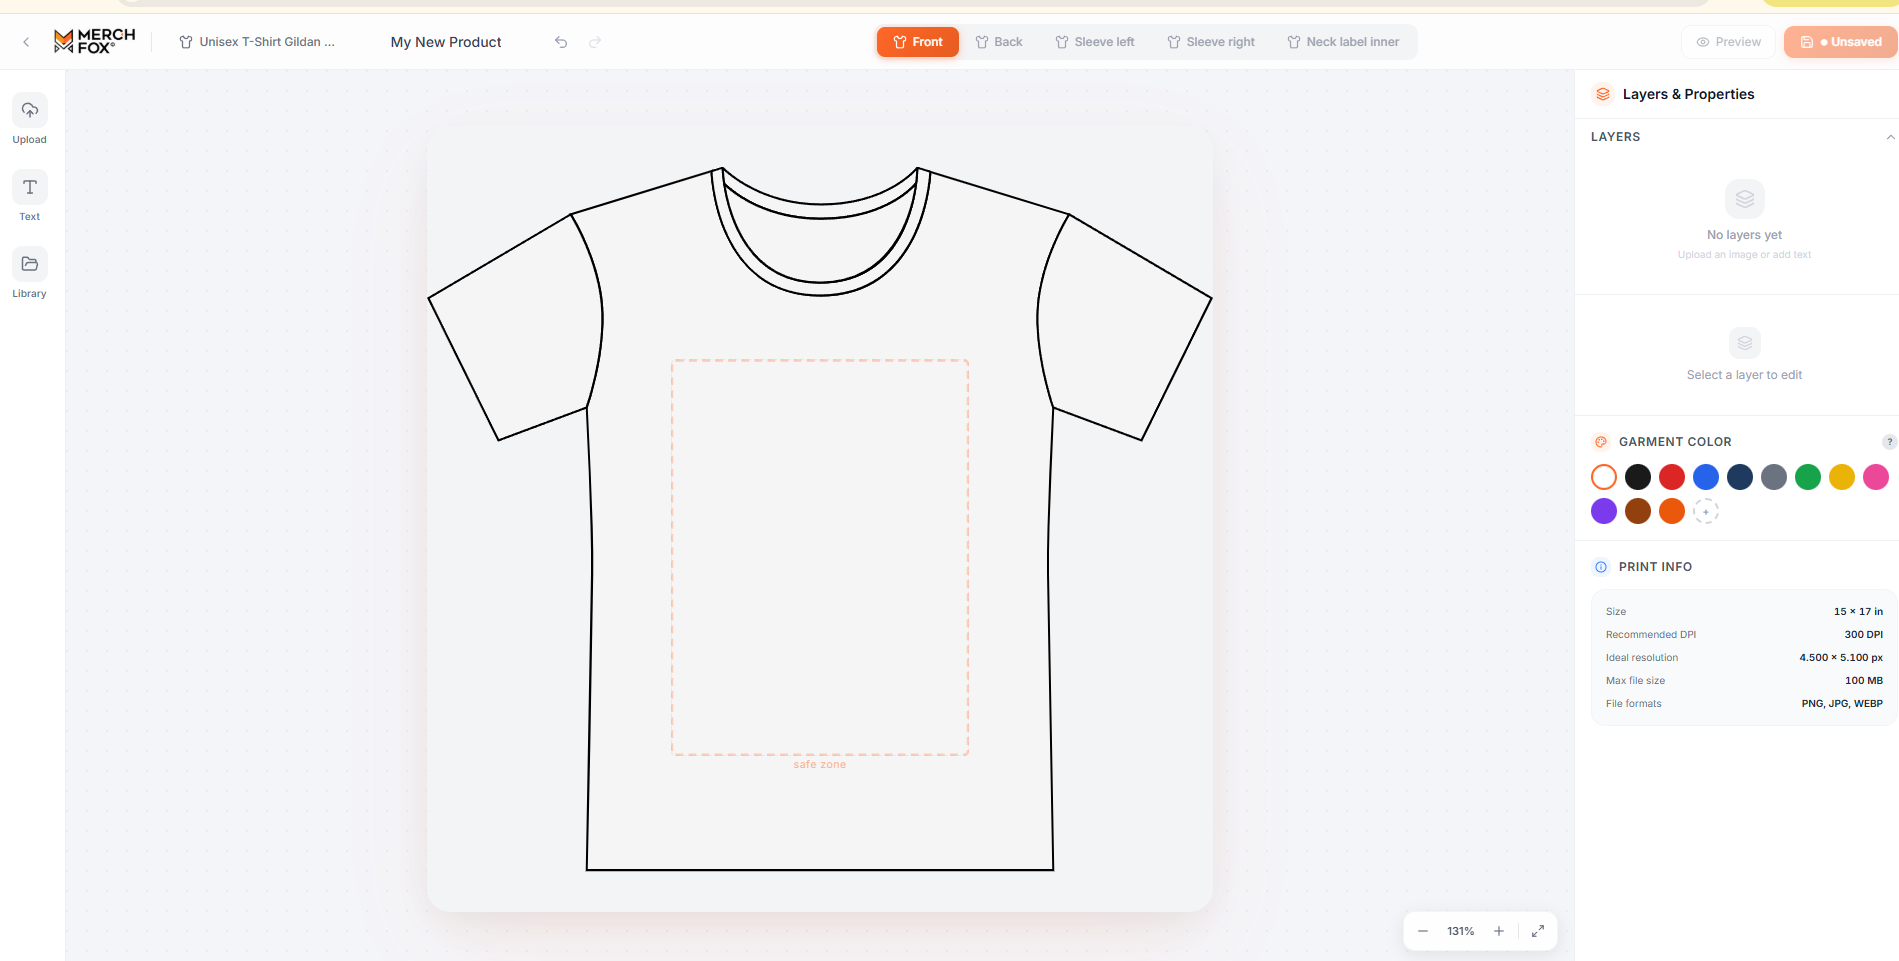
Standard Canvas Resolution: 4,500 × 5,100 px (for standard full-front t-shirt print areas at 300 DPI).
Important: Always design on a transparent canvas if you want only the graphics to print. Saving artwork with a solid background (e.g., solid white) on a PNG will cause that background box to print onto dark-colored garments.
Understanding the Safe Zone
When you load a product in the MerchFox Design Editor, you will see a red dotted box on the garment layout labeled safe zone.
What is the Safe Zone?
The safe zone represents the maximum printable boundary for the selected print position (e.g., Front, Back, Sleeve, or Collar) for that specific blank product and provider.
Within the Bounds: All graphics, text, and visual elements placed inside the red dotted line are guaranteed to print on the physical garment.
Outside the Bounds / Clipping: Any portion of an artwork layer that extends beyond the red dotted safe zone line will be automatically cropped and will not print.
Bleed & Tolerance: Keep critical elements (like small text or logos) slightly inward from the safe zone edge to account for minor movement tolerances during physical printing and heat pressing.
Understanding DPI Warnings
The MerchFox Design Editor automatically calculates your artwork’s effective DPI based on how large you scale it on the editor canvas:
300 DPI (Optimal): Your graphic is rendered at native print resolution. Colors will be sharp and details well-defined.
Below 150 DPI (Low Resolution Warning): Stretches low-pixel artwork across a large surface area. The editor will display a warning because the final printed physical product may appear pixelated, blurry, or grainy.
Frequently Asked Questions
Why should I design in RGB if print machines use CMYK ink?
MerchFox’s direct-to-garment (DTG) and direct-to-film (DTF) RIP software is calibrated to receive high-gamut sRGB files and convert them accurately for multi-ink printing. Uploading files natively in CMYK may cause unexpected color shifts.
Can I upscale a low-resolution image directly inside the editor?
While you can enlarge an image frame on the canvas, scaling a low-res image up will not add physical pixels or fix blurriness. Always start with a high-resolution canvas (
4500 x 5100 pxat300 DPI) in your design software.
Was this article helpful?
Let us know so we can continue improving our help center.