


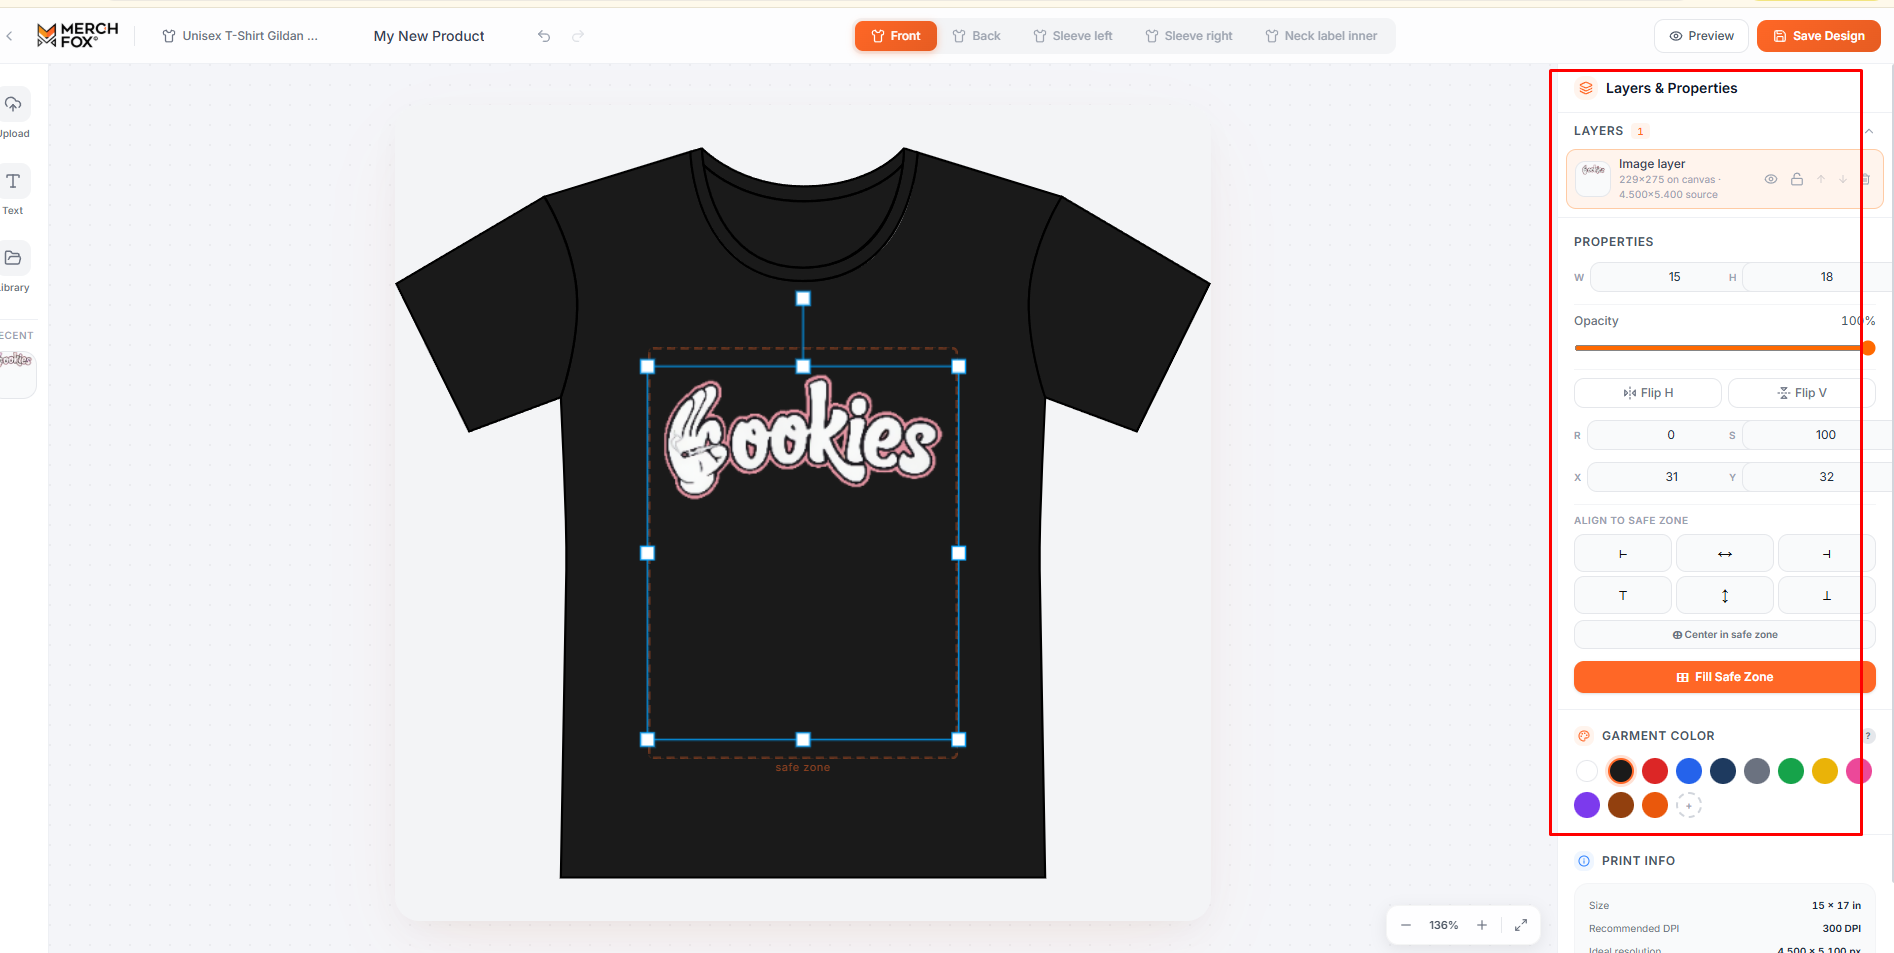
The MerchFox Design Editor provides dynamic layer controls and alignment tools to position, transform, and arrange graphics with pixel-perfect precision. This guide details how to work with the Layers & Properties inspector panel on the right sidebar.
Working with the Layers Panel
Every image, graphic, or text element added to the canvas creates a dedicated layer inside the LAYERS section of the right sidebar.
1. Layer Stacking & Visibility
Reorder Layers: Use the up (
↑) and down (↓) arrow icons next to a layer to adjust its visual hierarchy. Layers at the top of the list sit in front of layers underneath.Toggle Visibility: Click the eye icon (
👁) to temporarily hide or show a layer on the canvas without deleting it.Delete Layer: Click the trash icon (
🗑) to permanently remove an element from the canvas.
2. Canvas vs. Source Resolution Info
Each image layer badge displays two key resolution parameters:
Canvas Size (e.g.,
229 × 274on canvas): The current relative pixel dimensions of the graphic on the active print area.Source Size (e.g.,
813 × 975source): The original pixel dimensions of the uploaded artwork file.
Tip: Keep your canvas size smaller than or equal to your source size to maintain optimal print sharpness and avoid low-DPI warnings.
Precision Transform Controls
When a layer is selected, the PROPERTIES section unlocks numerical input controls for granular adjustments:
Dimensions (W / H): Enter explicit width (
W) and height (H) values to scale the graphic accurately.Opacity: Use the slider or enter a percentage (from
0%to100%) to control layer transparency.Flip Tools:
Flip H: Mirror the selected element horizontally.
Flip V: Mirror the selected element vertically.
Rotation (
R): Enter a degree value to rotate the asset around its central axis.Scale (
S): Adjust the overall percentage scale factor (default100).Coordinates (X / Y): Fine-tune the exact horizontal (
X) and vertical (Y) position relative to the print canvas bounds.
Aligning to Safe Zone
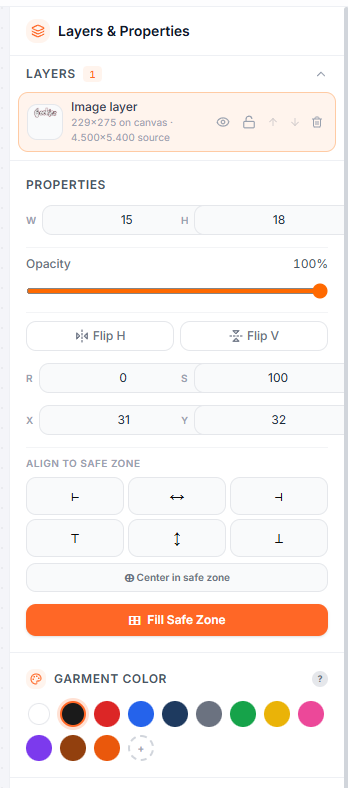
To eliminate manual guessing and ensure perfect balance, use the ALIGN TO SAFE ZONE shortcut grid:
Quick Alignment Grid
Top Left / Top / Top Right: Snap layer to upper safe zone boundaries (
⊩,⊤,⊨).Center Horizontal (
↔): Center the layer horizontally within the printable area.Center Vertical (
↕): Center the layer vertically within the printable area.Bottom Left / Bottom / Bottom Right: Snap layer to lower safe zone boundaries (
⊥).
Canvas Fill & Snap Shortcuts
Center in safe zone: Instantly snaps the center point of the selected graphic directly into the exact middle of the safe zone.
Fill Safe Zone: Automatically stretches and scales the asset to fill the entire red dotted printable region while maintaining optimal coverage.
Frequently Asked Questions
How do I select multiple layers at once?
Click on individual layers directly in the right sidebar list or click elements on the canvas workspace to switch active layer selection.
Does flipping an image horizontally affect text inside the graphic?
Yes. Using
Flip Hmirrors the entire layer pixel array, including embedded typography. If your graphic contains readable text, avoid flipping unless a mirrored aesthetic is intended.
Was this article helpful?
Let us know so we can continue improving our help center.