


If you are using a custom-built storefront, proprietary platform, or automated scripts, MerchFox provides a powerful REST API and Webhook system. This allows you to directly pass orders, update product catalogs, and receive real-time fulfillment status notifications.
Accessing Store API Settings
Log in to your MerchFox Dashboard.
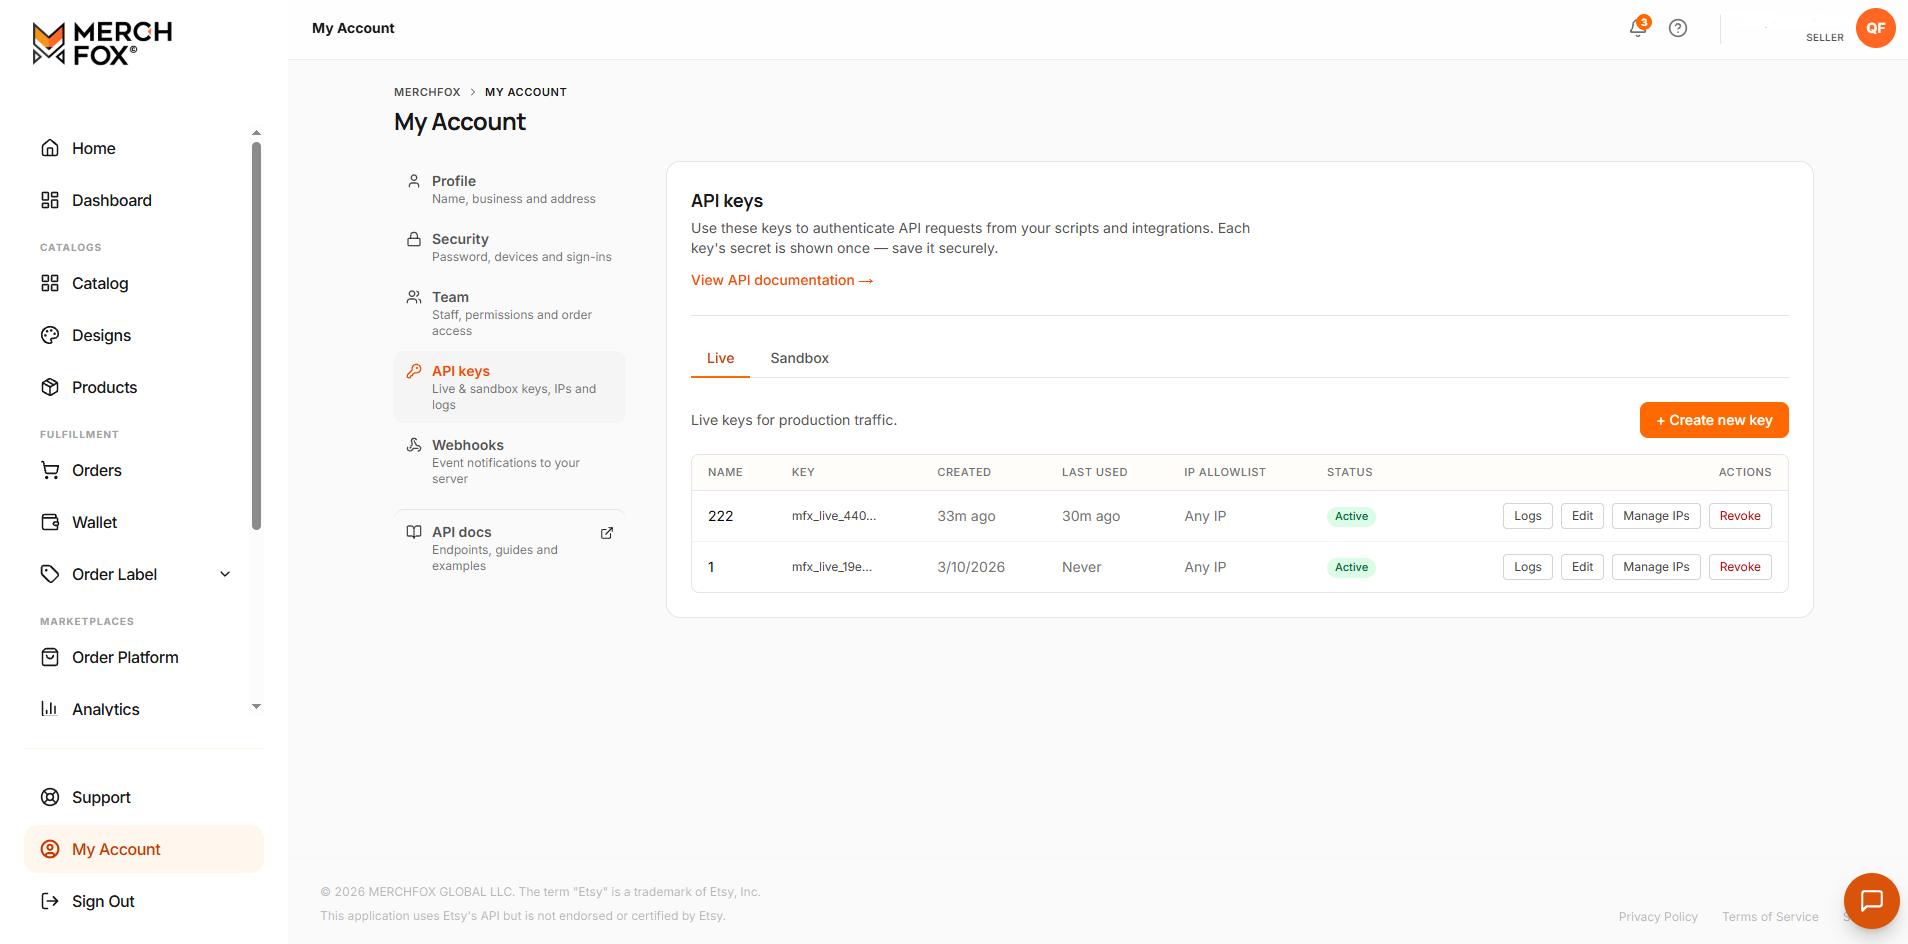
Navigate to My Account section in the left navigation menu.
You will see two primary components:
API Keys: Generate and manage access credentials for authenticating REST API requests.
Webhooks: Subscribe to real-time event notifications sent from MerchFox to your custom endpoint.
Step 1: Managing API Keys
To connect your custom platform or automation scripts, you need an API key to authenticate requests.
Generating a New API Key
Click API Keys
Choose your target environment tab:
Live: Used for production traffic and real order processing.
Sandbox: Used for testing and development without placing live orders.
Click the + Create new key button.
Give your key a descriptive name (e.g., Custom Web Store) and save it.
Important: Copy and securely save your API key secret immediately. The secret is only displayed once and cannot be retrieved later.
API Key Security & Controls
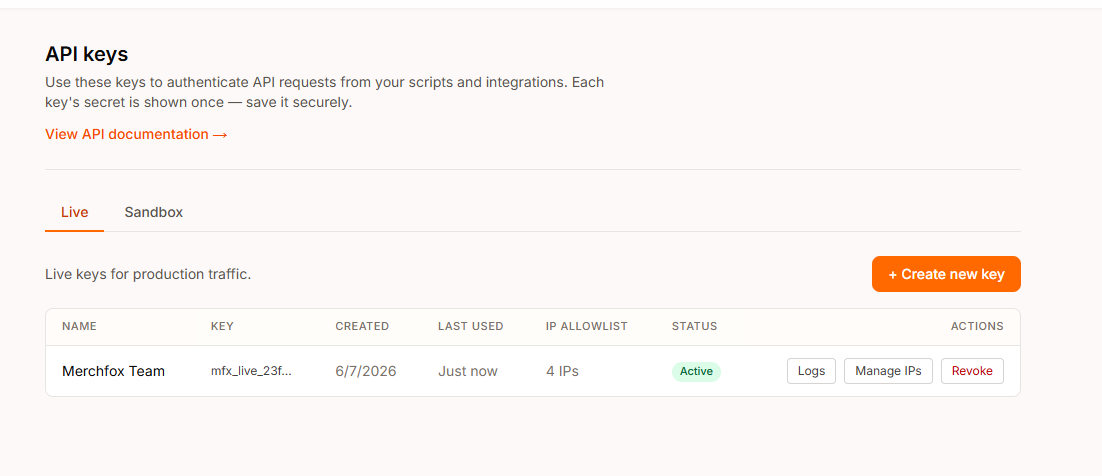
In the API Keys management table, you can monitor and control each active key:
NAME & KEY: Identifies the key name and its masked key prefix (e.g.,
mfx_live_23f...).IP ALLOWLIST: Click Manage IPs to restrict API requests exclusively to your server's specific IP addresses for enhanced security.
Logs: Click Logs to view recent API calls, request statuses, and payload details.
Revoke: Click Revoke to immediately disable an API key if it is compromised or no longer needed.
Step 2: Setting Up Webhooks
Webhooks allow MerchFox to push real-time event notifications (such as order status updates, tracking numbers, or fulfillment changes) directly to your server.
Creating a Webhook Endpoint
Click Manage Webhooks.
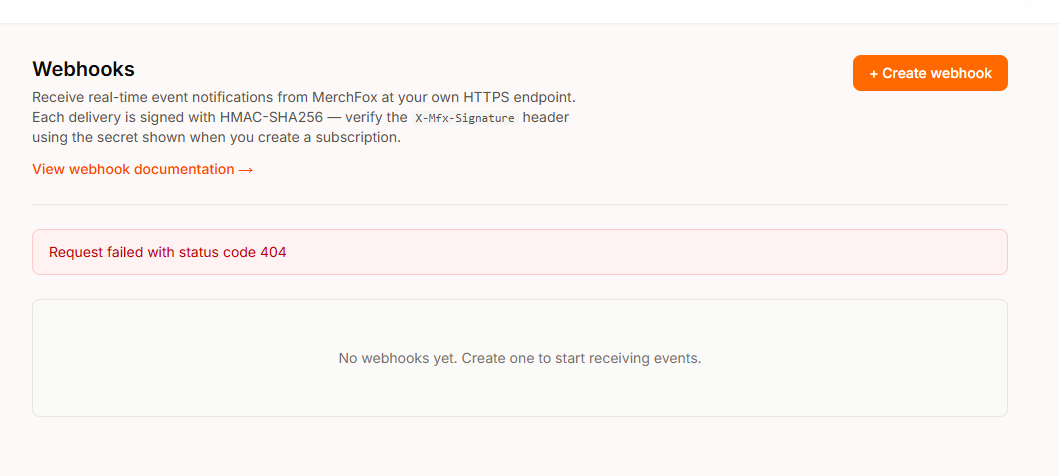
Click the + Create webhook button.
Enter your server's secure endpoint URL (must start with
https://).Select the event topics you wish to subscribe to (e.g., order creation, order fulfillment, product updates).
Save the webhook. A unique signing secret will be generated for HMAC-SHA256 signature verification.
Setting Up Webhooks
Webhook Security & Signature Verification
Every webhook delivery sent by MerchFox includes a cryptographic signature in the HTTP header:
Header:
X-Mfx-SignatureAlgorithm:
HMAC-SHA256
To ensure incoming requests genuinely originate from MerchFox, compute the HMAC-SHA256 hash of the request body using your secret key and verify it against the X-Mfx-Signature header value before processing payload data.
Developer Resources
For complete REST API endpoint definitions, request/response formats, code samples, and payload schemas, visit the official MerchFox API documentation:
Frequently Asked Questions
What is the difference between Live and Sandbox API keys?
Sandbox keys allow you to test your integration end-to-end without charging your wallet or sending orders to physical production line facilities. Live keys route actual orders to production facilities.
Why is an HTTPS URL required for Webhooks?
HTTPS ensures that sensitive order data and fulfillment payloads are encrypted during transit between MerchFox and your server.
Was this article helpful?
Let us know so we can continue improving our help center.